Curious why wild sourdough starter fermentation can suddenly go from sluggish to unstoppable? Let’s break down the science of temperature and how it shapes your starter’s destiny.
Temperature is the secret ingredient many home bakers overlook. A few degrees can swing starter fermentation from lazy to lively, and getting it right transforms flavor, rise, and reliability in every loaf.
Ready to stop guessing and start influencing your wild starter’s vigor? Dive in for practical steps, decision-making tips, and clear troubleshooting, whether you’re a beginner or going for that perfect sour note.
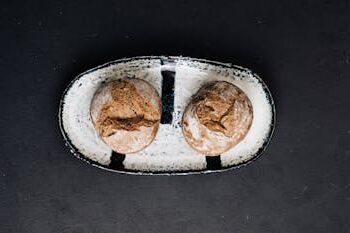
Setting Up Your Wild Starter: Temperature’s First Role
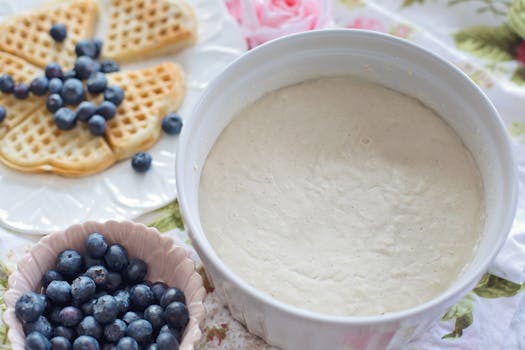
To lay a solid foundation for starter fermentation, set up your wild sourdough starter in an environment that encourages strong yeast and bacteria growth. An ideal range fuels quicker, safer fermentation day after day.
Storing in a draft-free spot between 72 and 78°F gives wild yeast a reliable environment to multiply. It’s like giving your culture a stable job—less unpredictability and steady performance from feeding to feeding.
Choosing the Right Place in Your Home
Keeping your jar away from cold windows or sunlit countertops avoids wild swings in temperature. Place it on top of a refrigerator or near a warm appliance for gentle, consistent warmth, fostering even starter fermentation across days.
A cupboard above the stove is a classic for a reason. The gentle ambient heat rises while avoiding direct blasts, so your wild sourdough starter develops steadily and predictable—perfect for daily bakers aiming for consistency.
Layering a towel over your jar isn’t only about dust—it slows sudden chill or heat spikes, much like wrapping a seedling on a cold night ensures even, gentle warming crucial for balanced fermentation and resilient starter health.
Common Temperature Missteps to Avoid
Placing your starter above a dishwasher or by a window where temperature flips disrupt microbes can stall or confuse wild yeast, leading to separation, inconsistent bubbling, or sour off-odors. Skip these spots and choose steadiness instead.
Setting your jar too close to hot appliances can ‘cook’ the culture, causing separation or even killing beneficial bacteria. If it’s too warm for your hand to rest comfortably, it’s too hot for living microbes—move the starter elsewhere.
Colder locations slow starter fermentation to a crawl. If you find your starter is unresponsive or smells stale, check first if the storage spot is below 70°F for most of the day, then relocate or use gentle warming methods to revive activity.
| Location | Average Temp (°F) | Fermentation Speed | Recommended Action |
|---|---|---|---|
| Above Fridge | 75 | Medium-Fast | Place jar here for steady growth |
| Baking Drawer | 80 | Fast | Check frequently for over-fermentation |
| Countertop, away from sun | 72 | Medium | Ideal for slow, flavorful fermentation |
| Beside Window | 66 | Slow | Relocate to warmer spot for more bubbling |
| Near Dishwasher | 88+ | Unpredictable | Avoid—temperatures too variable |
Dialing In Daily Temperature Adjustments
Implementing daily temperature adjustments brings more control over starter fermentation strength. Little tweaks make your wild sourdough more resilient and responsive at every feeding.
Start with a thermometer beside your jar. This habit helps you correlate aroma, rise, and appearance with temperature and quickly adapt when seasons or home routines shift.
Bulking Up Activity with Small Changes
If your wild sourdough starter looks sluggish or slow, increase warmth by a few degrees. Try placing the jar atop a switched-off oven light or setting it beside a warm water bottle.
- Place on warm appliance: Harness gentle heat overnight to nudge fermentation when a room cools off, especially during fall and winter evenings.
- Wrap with kitchen towel: Insulation helps maintain a narrow temperature window, reducing daily swings that could stress microbes and hinder growth.
- Use proofing box: Choose a proofing box set to 76°F for reliable sourdough starter activity—every home baker can benefit from this simple addition.
- Rotate jar locations: Move your starter to track the warmest spots in your home, adjusting with the time of day or changing seasons.
- Tape thermometer to jar: Get instant feedback—reading temps at eye level catches cold drafts that can slow starter fermentation unexpectedly.
Consistency, not maximum heat, encourages starter longevity and reliable bread performance. Adjust temperatures gradually and keep notes daily to spot growth trends.
Cooling Down to Prevent Over-Fermentation
If your air is hot and your starter bubbles up then collapses fast, slow things down with cooling strategies. Relocate your jar or use refrigeration to extend rising time and tame acidity.
- Partial refrigeration: Rest part of your starter in the fridge between feedings, especially during heatwaves, keeping the bulk at room temperature for flavor balance.
- Float test later: When cooled, starters may rise more slowly. Wait 6–8 hours before floating a teaspoon in water to check readiness before baking.
- Feed with colder water: Lower flour hydration temperature by mixing with cold tap water, which calms wild fermentation and minimizes overgrowth during prolonged warm spells.
- Move jar after sunset: Position the culture in the coolest corner overnight—cellar shelves or low cabinets work best to dial back microbial speed and avoid off-flavors.
- Reduce feeding frequency: In constant warmth, reduce feeding to twice a day with smaller amounts—excess food can tip balance toward acid-producing bacteria and flatten wild yeast activity.
Write down your cooling experiment results. Compare times and flavors across batches to fine-tune your house’s best summer routine for wild sourdough starter fermentation.
Tracking and Troubleshooting Flavor Shifts
Connected bakers spot flavor shifts as temperature changes. The aroma and tang of wild sourdough starter are clear signals—pay close attention to patterns that match cooler or warmer routines and adjust accordingly.
If bread suddenly tastes more sour or develops sharper notes, notice if it followed an especially warm or cool week. Tiny tweaks make noticeable differences in tang, crumb, and crust with each bake.
Recognizing Overly Tangy Notes
A sudden acid spike means lactic acid bacteria rose too fast. This usually follows a hot day or a missed feeding. Next time, cool your starter down or feed more frequently for balance.
When the starter fermentation leans tangy, adjusting temperatures for just 12 hours can mellow flavors. Use a countertop thermometer to spot if the rise went above 78°F overnight or if your starter’s location caused the change.
Write “move to pantry after noon if above 75°F” on your kitchen whiteboard. This sort of visual prompt helps curb tanginess, and you’ll see steady, mild-smelling starter day after day.
Detecting a Blunted Rise
If the wild sourdough starter barely doubles and bread flattens, check if it chilled below 70°F. A cold spell or unheated kitchen slows yeast multiplication and leaves you waiting for activity that never takes off.
Place your palm on the jar’s storage surface for a sense-check; if it feels cool, your microbes feel cold too. Move the jar and re-test rise over one day for confirmation.
Begin noting flavor and growth patterns: “Starter slow—room 68°F” vs. “Starter lively—room 75°F.” With this log, you’ll quickly diagnose and remedy issues tied to temperature swings in your home.
Fine-Tuning House Temperatures by Season
Adjusting wild sourdough starter fermentation across the seasons requires more than just moving your jar. Thoughtful tweaks keep your routine smooth, flavor consistent, and fermentation reliable year-round, no matter the weather outside.
Notice which rooms warm or cool faster as weather shifts. Spring drafts can sneak in, while summer heats up your favorite baking nook—move the jar as needed as part of your feeding habit.
Applying Seasonal Micro-Adjustments
In the depths of winter, a slow starter calls for gentle artificial warmth, like placing it near a boiler or wrapping with a microwaved rice sock—just warm, not hot, to avoid microbial shock and unreliable fermentation patterns.
As summer sets in, switch to partial refrigeration or feed mornings and evenings. Wild bacteria and yeast both thrive in warmth, risking over-acidity if action isn’t taken, so jot down new targets and experiment with adjusted feeding windows.
Record your “seasonal map” for the house. Label which shelves or rooms stay within the 72-78°F range and which overheat or cool too much, so you’re ready to pivot throughout the year for stronger starter fermentation results.
Evaluating Heating and Cooling Methods
Compare electrical proofers, seedling mats, and hot water bottles. Electrical proofers give precise control but cost more; seedling mats cover larger areas; hot water bottles give flexible, portable warmth. Weigh the effort and return for your typical starter cycle.
Mix methods for unique environments—use a seedling mat under the jar at night, then rely on a cupboard location during warm afternoons. Efficiency isn’t just about convenience, but about avoiding wild fermentation swings that confuse microbes.
Each setup has tradeoffs. Proofing boxes automate things; manual methods give more hands-on learning. Pick the mix that fits your kitchen rhythm and starter preferences, and note outcomes with each season for future reference.
Syncing Feeding Times with Temperature Shifts
Feedings need to match both starter fermentation activity and ambient temperatures for a reliable, strong wild sourdough. Strategic timing ensures yeast keeps pace, flavor develops, and discard stays low.
Feed in high-activity periods—like mid-morning or early evening—when your home’s temperature stabilizes. Reliable routines help wild yeast establish a predictable cycle, supporting smooth fermentation week after week.
Timing for Optimal Activity
Use two-a-day feedings in summer warmth to avoid over-acidic, tired starters. Structure feedings around the day’s coolest and warmest periods— “feed before work, check after dinner”—for steady growth and excellent baking performance.
When the house cools in winter, stretch feeding intervals to allow more time for yeast to catch up. Log intervals and adjust to match your starter’s specific rise patterns by season for easy tracking, especially during holidays or busy weeks.
If you plan an early morning bake, set the final feeding before sleep. The next day, your starter fermentation matches desired peak rising, and you can proceed straight to dough mixing. This syncs perfectly with shorter, cooler days.
Matching Hydration with Ambient Temperature
Adjust your starter’s hydration between 90–100 percent in cooler conditions. This higher hydration encourages rapid fermentation, ensuring yeast stays active even when temperatures dip below the ideal range for several hours.
In hotter months, drop hydration slightly to slow fermentation, cutting down on the risk of over-acidity and lost volume. This fine-tuning keeps flavor balanced and crumb light, even when home conditions are unpredictable.
Consistency arrives through notes—write “Summer: 95g water / Winter: 105g” beside your starter recipe so you adapt automatically to environmental changes instead of getting surprised by sudden shifts in activity or flavor.
Conclusion: Realizing Consistent Results with Temperature Awareness
Mastery in wild sourdough starter fermentation means matching temperature to your culture’s needs. Embrace both day-to-day tweaks and seasonal shifts to coax stronger flavor, better rise, and more reliable performance.
Every home, season, and routine introduces new variables for wild starter fermentation. Tracking results, logging location shifts, and making small changes smooth out the process and support a vibrant, unique sourdough for every loaf.
With observation and gentle intervention, bakers develop intuition for their starter’s favorite temperature—leading to tastier bread and confident baking, batch after batch. Let your starter, and your bread, thrive in harmony with your home’s rhythms.
Frequently Asked Questions
What’s the best temperature range for wild sourdough starter fermentation?
Most wild sourdough starters thrive between 72 and 78°F. This range promotes balanced yeast and bacteria growth, ensuring good rise, mild tang, and consistent feeding results. Going higher or lower can disrupt this harmony and require more attention to timing.
My starter smells sour and collapses. Is temperature to blame?
Consistently warm conditions can produce sharp, vinegary smells and collapse after peaking quickly. Lower the temperature or feed more frequently to regain balance, noting environmental changes and adjusting your starter’s storage location as needed.
Can I speed up starter fermentation if my baking schedule is tight?
Yes—boost activity by moving your starter to a warmer spot or increasing hydration, but watch for over-acidity. Return to the usual temperature for the next feeding to maintain microbial balance and avoid unexpected flavors in your bread.
What tools help monitor starter temperature reliably?
Low-cost digital thermometers, proofing boxes with thermostats, and adhesive temperature strips all work well. Log temperature readings daily beside your feeding notes for a complete picture of your culture’s activity patterns and long-term health.
Should I adjust starter routine each season?
Adjust the feeding schedule, storage spots, and hydration for seasonal swings in home temperature. This helps keep wild sourdough starter fermentation steady throughout the year, supporting great bread every time, no matter the weather outside.