Imagine a loaf that tastes as good as it smells, with a hearty crust and complex tang. That’s what draws bakers to the world of whole grain sourdough, where wild fermentation meets nourishing grains.
The renewed interest in wild fermentation sourdough isn’t just a return to tradition—it’s a deliberate choice for nutrition, flavor, and connection to the baking process. Each loaf tells its own story through careful ingredient selection and mindful steps.
In this article, you’ll find practical steps, actionable guidance, and real-world parallels to help you bake whole grain sourdough that’s delicious, good for you, and full of character.
Choosing the Right Whole Grains: Flavor and Nutrients in Every Slice
Each grain you select will shape your whole grain sourdough—flavor, texture, and nutrition all depend on your choices. Knowing what to pick sets your bread apart from airy white loaves.
If you want extra depth, combine multiple flours. Rye adds earthiness, spelt imparts nuttiness, and whole wheat gives a bold, grainy profile. Try small percentage swaps first to find your preferred mix.
Identifying High-Quality Flour Sources
Look for reputable mills that stone-grind their grains, keeping the bran, germ, and endosperm intact for robust flavor. Check packaging dates to ensure freshness—stale flour loses vitality and taste.
Farmers’ markets and co-ops often carry freshly milled options. Ask vendors about their sourcing and grinding techniques. A good test: the flour should smell sweet, earthy, and slightly grassy when fresh.
If you can’t find small-mill flour locally, choose whole grain flours in sealed, airtight packaging at grocery stores. Store leftovers in the fridge or freezer for maximum flavor retention and longer shelf life.
Balancing Whole Grain Percentages
Whole grain sourdough rewards experimentation—start with 20 to 30 percent whole wheat, then gradually increase. Higher percentages boost fiber and flavor but may tighten the crumb or make the dough denser.
Try recording each batch’s percentages and comparing crumb texture and sourness. Many bakers say, “That loaf with 40 percent whole rye had the boldest crust,” as they learn from side-by-side tastings.
Keep a simple baking notebook: Write the flour mix, hydration, proofing time, and outcome for each bake. These notes make progress tangible and cuts down on guessing with future bakes.
| Grain Type | Flavor Profile | Nutrition Benefit | Suggested % in Dough |
|---|---|---|---|
| Whole Wheat | Robust, hearty | Rich in fiber, B vitamins | 20–50% |
| Rye | Earthy, tangy | Good for digestion, mineral-rich | 10–40% |
| Spelt | Nutty, subtly sweet | High in protein, easier to digest | 20–50% |
| Kamut | Buttery, mellow | Rich in selenium, zinc | 10–30% |
| Emmer | Earthy, deep | Antioxidants, complex carbs | 10–30% |
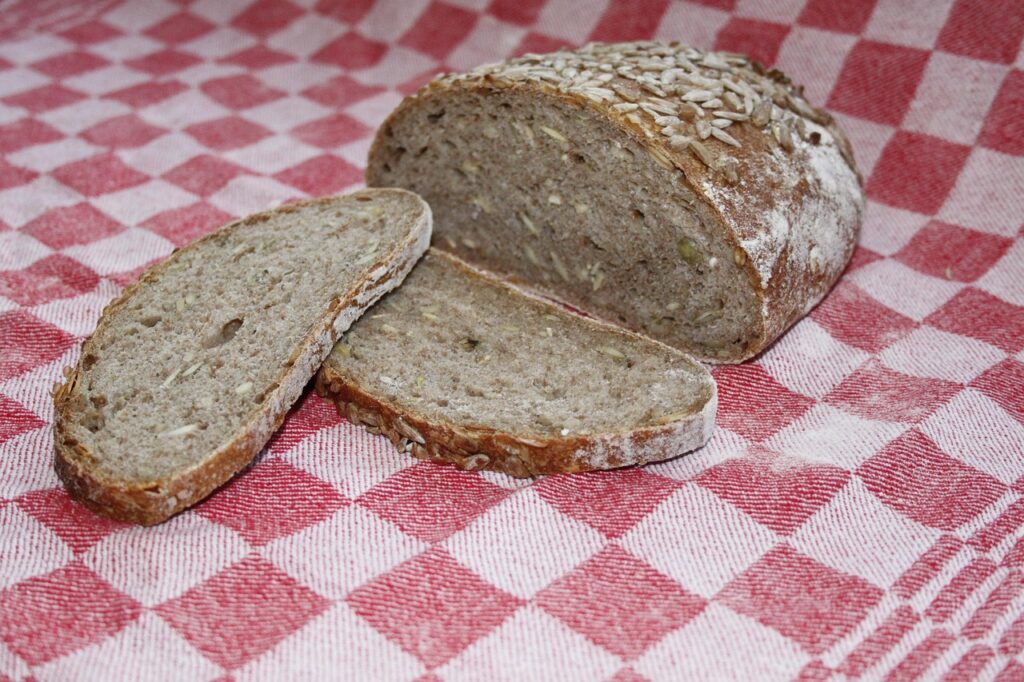
Managing Hydration and Texture: Get the Right Crumb Every Time
Control over dough hydration delivers repeatable results—a moist, open crumb or a hearty, tight slice. For whole grain sourdough, bump the water up slightly to account for bran’s absorption.
Wild fermentation encourages structure even in wetter doughs, so don’t be afraid to push hydration past the levels used for plain white flour bread mixes.
Why More Water Creates Better Crumb
Whole grain flour absorbs more water because the bran and germ need time to soak up moisture. This leads to a tender, creamy crumb and helps fermentation.
- Add water slowly as you mix the dough—see how the flour absorbs, then add more if the mix feels dry. Hydration levels between 75–85% work well.
- Let dough rest after initial mix for a simple autolyse: combine water and flour, rest 30 minutes, and only then add sourdough starter and salt. This step boosts extensibility.
- Use a bench scraper to shape sticky dough instead of adding extra flour—this keeps texture light and moist as you work.
- If dough feels stiff after mixing, cover and rest for 10 minutes, then return and gently knead by hand with wet fingers to continue developing gluten
- When shaping, dust only lightly with flour. Excess flour at this stage can lead to tough crusts or flour pockets inside the loaf after baking.
When a baker says, “I tried 78% hydration, and my slice had big, glossy holes,” it’s a clear sign hydration affects bread’s final look and feel.
Common Pitfalls With Wet Dough
“My dough ran like batter the first time!” is a common reaction, so it’s helpful to use a round-sided bowl and wet your hands when handling high-hydration doughs.
- Work with dough quickly and confidently, never letting it stick to the bench for long—it’ll gain strength with each fold or coil, not with hard kneading.
- Always cover dough with a damp towel or plastic between steps. Even 5 minutes exposed can dry the top and disrupt gluten development.
- For first-time bakers, shape dough with the assistance of a proofing basket lined with a well-floured towel. It gives crucial support.
- Don’t panic if dough spreads in the banneton—after an overnight chill, it holds shape during baking much better.
- If a loaf bakes up flat, check your starter’s strength, bulk fermentation time, and was the dough underproofed or overhydrated? Note tweaks for next time.
By consciously adjusting hydration or folding technique next bake, you’ll see progress loaf by loaf. Learning comes hands-on.
Harnessing the Power of Long, Natural Fermentation
Letting your whole grain sourdough ferment slowly with wild yeast transforms both nutrition and complexity. Time and patience translate into deeper flavors, better digestibility, and open crumb structure.
This method lets natural organisms unlock locked-up nutrients in whole grains, while lactic acid bacteria soften bran and bring out pleasant sourness with every rise.
Timed Bulk Fermentation for Superior Results
After mixing and first knead, let dough bulk ferment until nearly doubled and airy—between 4 and 8 hours at room temperature, sometimes longer for high percentages of whole grains.
During the bulk, perform gentle stretch-and-folds every 30–60 minutes. Each fold incorporates air and encourages long gluten strands instead of breaking them.
Watch for visual cues: dough that rises, jiggles, and keeps its shape when gently shaken. You know it’s ready when it leaves a well-defined but not sticky finger indentation.
Cold Retarding for Digestibility and Flavor
Pop shaped dough in a cold fridge-proof for 8–36 hours. This extends fermentation, making the finished sourdough easier on the stomach and bursting with flavor.
A baker might say, “My cold-proofed wild fermented sourdough tasted brighter, and the tang lingered long after.” The slow chill slows yeast and gives bacteria time to break down tough bran.
If life gets busy, a refrigerator pause keeps your schedule flexible. Bake straight from the fridge for bold scores and crisp crust on whole grain sourdough.
Blending Wild Fermentation Techniques with Everyday Schedules
Fitting wild fermentation into daily routine just takes a little advance planning. Reliable habits mean fresher, tastier bread ready whenever you want it.
Look for natural breaks during your day—morning feed, lunchtime mix, evening shaping. These anchor points keep whole grain sourdough simple and sustainable even on your busiest weeks.
Real Life Bread Scheduling Example: The “9 to 5 Baker”
Feed your sourdough starter before work—just mix flour and water, leave it while you’re out. Get home, combine ingredients, and bulk-ferment as you cook dinner or relax.
By bedtime, shape dough and refrigerate. Your morning loaf is ready to bake, with hands-on time less than 40 minutes total spread over a whole day.
Even tight schedules allow wild fermentation to shine—one baker’s evening routine means fresh, nutritious slices every breakfast.
Troubleshooting Timing Issues and Solutions
If your workday is unpredictable, keep dough in the fridge for up to 36 hours, then bake when possible. Chilly fermentation holds rise, slows yeast, and builds deeper flavors.
Set phone reminders for folds or proofing. A simple “Fold dough!” alert during your lunch break helps maintain structure even from afar
Share baking tasks if you’re in a busy household—someone else can fold or shape if needed. Share the ritual and the results.
Using Add-Ins and Toppings to Elevate Every Loaf
Add-ins bring personal flair—seeds, grains, or fruit boost whole grain sourdough. Each mix-in calls for a few tweaks so the loaf bakes up light, even with bonus ingredients.
Fold extras gently during final stretch-and-folds when dough isn’t sticky but still relaxed. Handle only until dispersed, never knead hard.
Seeds and Grains: Rules for Even Distribution
Pre-soak seeds like flax or chia before adding to dough. This prevents dryness and lets the flavors meld with sourdough’s tang.
Keep add-ins at 10–20% of dough weight for best results. More can disrupt the crumb. Mix evenly, focusing on gentle folding instead of stirring.
Dust loaves with rolled grains or seeds before baking. Roll dough over the seeds and gently press so they stay put during oven spring for extra crunch and aroma.
Cheese, Fruit, and Vegetables: Careful Choices
Use semi-hard cheeses cut in small cubes. Pat extra moisture from dried fruit, and never add watery vegetables. Each choice ripples through dough hydration and bake time.
Mix cheese and fruit during the last fold. For extra-rich flavor, layer them between dough sheets as you shape the loaf rather than rushing them in early.
If you want roasted vegetables, dice and cool them fully before folding in. Warm veggies soften the dough too much, while well-chilled pieces keep structure intact and crumb open.
Measuring Success and Learning Loaf by Loaf
Tracking small wins with each wild fermented whole grain sourdough bake helps you tune recipes and avoid future pitfalls. Not every attempt is perfect—and that’s essential for long-term growth.
Use a basic checklist: did the loaf rise as expected? Was the crumb even? Did the crust color and flavor match your aim? Even failed loaves offer clues to evolve your technique.
Essential Elements to Note After Baking
Score the loaf’s aroma, crust, crumb, and flavor. Write “Bolder tang after an extra fridge proof,” or “Tender crumb when using more spelt.” Be specific. These notes chart your progress for next time.
Share notes or finished slices with others. “My kids loved today’s nutty crust.” Tasting with friends or family encourages honest feedback and celebrates big leaps forward.
Set a small baking goal for the next loaf. “Try 5% more hydration,” or “Switch to local rye this weekend.” Choose one tweak per bake—simple steps minimize guesswork in the journey to your ideal loaf.
Frequently Asked Questions
Can I convert my all-white sourdough recipe to whole grain sourdough?
Yes. Swap 20–50% of white flour with whole grain flour and increase hydration. You may need to extend bulk fermentation by 30–60 minutes to achieve a similar rise and structure.
Why does my whole grain sourdough sometimes taste bitter?
Bitterness can come from stale or rancid flour or under-fermented dough. Use fresh flour, and ensure fermented dough doubles in size and shows bubbles before shaping and baking.
How do I keep my whole grain sourdough from turning dense?
Use strong, active sourdough starter. Give the dough longer bulk and final proofs, and ensure you’re using enough water (75–85% hydration) for the bran to absorb plus frequent stretch-and-folds.
What’s the best way to store whole grain sourdough bread?
Store cooled whole grain sourdough in a paper bag for a crisp crust or wrap in linen for softer texture. Avoid plastic unless freezing, as moisture softens the crust quickly.
Can I make whole grain sourdough with gluten-free whole grains?
Yes, but results differ. Try buckwheat or sorghum, add psyllium husk for binding, and expect a denser, moist crumb. Specialty recipes help you adapt timing and hydration for gluten-free grains.