Every wild fermentation sourdough baker can recall a loaf that bloomed with stunning ears or developed a delightfully complex flavor. The difference sometimes comes down to technique—like when and how to use cold proofing or room-temperature proofing. These small refinements are where flavor and texture are born.
Proofing methods shape every part of your sourdough’s journey, from its airy crumb to its tangy aroma. Wild, naturally leavened dough responds dramatically to the environment, and the decisions bakers make about temperature and timing influence everything from rise to oven spring.
Exploring the strengths of cold proofing and room-temperature proofing uncovers practical techniques any home baker can master. Let’s walk through the real-life adjustments and results each approach offers—empowering you to craft sourdough that fits your schedule and taste preferences.
Timing Your Proof for Predictable Results
Dialing in when you cold-proof or use room-temperature proofing will unlock repeatable, delicious outcomes. Temperature and timing drive observable differences in wild fermentation sourdough, impacting everything from flavor depth to interior crumb.
Before deciding, consider your schedule and desired flavors. Room-temperature proofing typically works fast—great for same-day bakes, while cold proofing rewards patience with easy-to-score, tangy loaves and flexible timing.
Assessing Wild Fermentation Dough Development
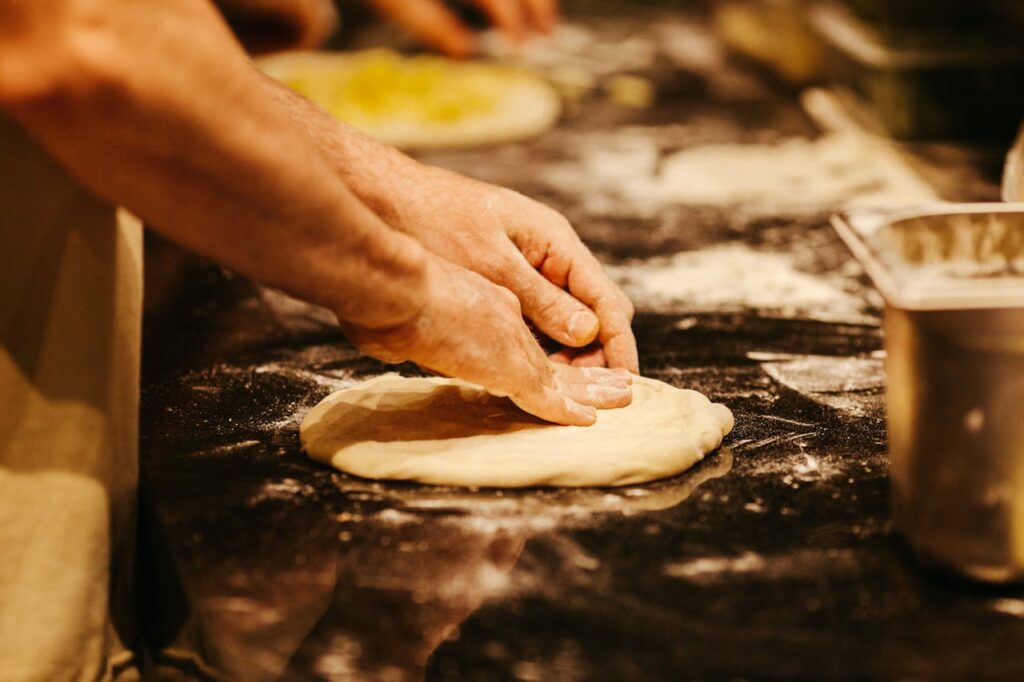
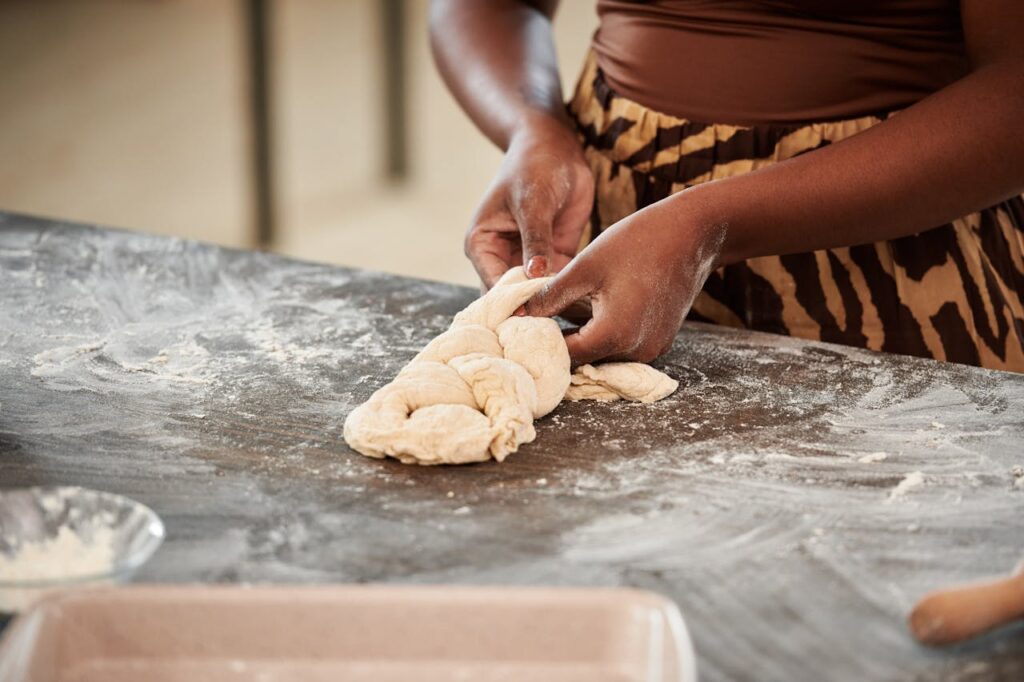
Knead the dough until smooth, and track how wild fermentation influences gluten formation. Under a watchful eye, you’ll see the dough relax and bubbles multiply during either cold proofing or room-temperature proofing.
Notice when the dough passes the “poke test”: press gently, and if it springs back slowly while holding a slight indentation, it’s ready for baking. This benchmark remains dependable across all proofing techniques.
Document your observations. Bakers who note dough rise, texture, and fermentation smell build a more intuitive connection to their wild fermentation process—critical for mastering either proofing strategy.
Matching Schedule With Desired Sourdough Qualities
Wild fermentation sourdough adapts to your lifestyle with the right proofing choice. If you bake after work, cold proofing the dough overnight fits seamlessly into busy routines without sacrificing quality.
On weekends, room-temperature proofing delivers a rustic loaf in a single afternoon. Decide which approach matches your timeline, then set out your ingredients when your energy is high. Adapt your method to fit the day.
Imagine slicing freshly baked wild fermentation sourdough for breakfast on a Sunday, thanks to a cold-proofed dough in your fridge. Little strategy changes prepare you for delicious flexibility all week.
| Proofing Method | Recommended Time | Flavor Profile | Action for Bakers |
|---|---|---|---|
| Cold Proofing | 8-36 hours, fridge | Deep, tangy, aromatic | Chill after shaping; bake straight from cold for crisper crust |
| Room-Temperature Proofing | 2-6 hours, 68-75°F | Mild, wheaty, subtle sour | Shape and rise at room temperature; bake promptly |
| Hybrid (Short Cold Proof) | 2-4 hours cold after room rise | Balanced, medium sour | Start at room temp, finish in fridge for scheduling flexibility |
| Extended Cold Proof | 24-48 hours, fridge | Strong tang, chewy crumb | Use very mild starter, monitor for over-proofing |
| Warm Room-Temp Proof | 2-3 hours, 78-80°F | Lighter, less sour | Proof in a warm spot; watch for quick fermentation |
Adapting Cold Proofs for Time and Temperature Flexibility
Cold proofing wild fermentation dough offers remarkable scheduling flexibility and flavor advantages. The longer, chilled rise in the refrigerator slows wild bacteria development, opening new possibilities for flavor complexity, oven spring, and crust crispness.
For bakers who need to stretch their timeline, cold proofing can buy extra hours—or even days—without hurting dough performance. Checking dough firmness visually helps prevent over-proofing during these longer rests.
Fine-Tune Crust and Tang With Temperature Control
To sharpen flavor, drop your refrigerator’s temperature slightly and extend proofing by several hours. This gentle slowdown intensifies acidity and produces a deeply caramelized crust when baked straight from cold.
- Chill dough at 38–40°F for sharper tang, extending fermentation and aroma complexity.
- Bake directly from the fridge for maximum oven spring—a firm, chilled dough expands rapidly in the hot oven.
- Add an extra 1–4 hours of cold proof if a firmer crust and sourness are desired.
- Adjust fridge placement: dough on a lower shelf ferments more slowly, preventing accidental over-proofing during long rests.
- Watch dough: look for dome shape and visible blisters—signs that gluten structure has developed well and is ready for the oven.
Once you find your sweet spot, record specific proofing times and temperatures. Small shifts transform sourness, crust texture, and even scoring patterns for your next bake.
Planning for Spontaneity With a Hybrid Approach
If plans change, move dough between cold and room temperatures. For example, start with room-temperature proofing, then finish with cold proofing for up to 12 hours without compromising wild fermentation flavor or structure.
- Switch from warm rise to fridge as needed—this pauses development for busy schedules.
- Stick shaped loaves in the fridge when you’re short on time.
- Resume proofing at room temperature later if more rise is still needed.
- Check dough status visually and by touch so you never miss the ideal bake window.
- Bake on your timeline: morning, midday, or evening—cold proofing keeps your options open without undermining quality.
This flexibility is one of the best-kept secrets behind wonderfully tangy flavor and beautiful crust in wild fermentation sourdough.
Observing Dough Behavior: What the Dough Tells You
Paying close attention to wild fermentation dough during both cold and room-temperature proofing gives you control over final loaf quality. Every poke, shape, and smell communicates a stage of readiness.
Cold proofing typically leads to a slower rise, tighter skin, and colorful blisters. Room-temperature proofing looks different—looser dough and more uniform bubbles. Notice these visual and tactile cues every bake.
Reading Texture and Aroma for Success
Squeeze the proofed dough gently. Properly cold-proofed dough feels cool, resilient, and taut with small, even bubbles. Room-temperature proofed dough feels softer, warmer, and slightly sticky to the touch—from faster wild fermentation.
Catch the changes in aroma: cold proofing brings a complex sour fragrance, while room-temperature methods maintain subtler, wheatier notes that fill the kitchen quickly as the dough warms.
This careful observation gives bakers an edge, helping prevent under-proofing or collapse. Empower yourself to audit your dough every bake with eyes, nose, and hands.
Judging Visual Markers for Oven-Readiness
Trace the tension on the dough’s surface. With cold proofing, a slight dome and visible bubbles signal that fermentation is active but not exhausted. Over-proofed cold dough loses its bounce and becomes flat.
For room-temperature proofing, expect a higher rise within a shorter time frame—dough will look plump, shiny, and jiggly sooner. A saggy center means you’ve waited too long, so act quickly at the peak.
If in doubt, err on the side of under-proofing when trying a new schedule. Wild fermentation sourdough recovers beautifully in the oven, so you can course-correct with confidence.
Striking Balance: Flavor, Texture, and Scheduling Needs
Finding your favorite wild fermentation sourdough style is easier when you match cold proofing or room-temperature proofing to your flavor and timing needs. Each approach offers distinct trade-offs you can experiment with—without stress.
Wild fermentation intensifies during long cold proofs, producing pronounced tang and chewy texture. Short, warm proofs retain delicate wheat flavors for a lighter, softer crumb—perfect for variety in your weekly baking lineup.
Leveraging Schedules to Your Flavor Advantage
Decide what works for your routine. Prepare dough before bed, cold proof overnight, and bake in the morning for bakery-quality wild fermentation sourdough on a relaxed schedule. Room-temperature proof for a softer crumb when you’ve got a full afternoon free.
Missing your bake window? A quick chill buys extra time. Ready too early? Warm the proofing environment slightly and monitor dough growth. Every loaf you bake refines your personal method list.
Test new schedules on small batches first, logging what you did and tasted. Over time, you’ll develop a mental menu of textures and flavors unique to your fermentation style.
Dialing in Success With a Simple Checklist
- Start with a healthy wild fermentation starter to guarantee fermentation strength and sourness control.
- Pick your proofing strategy: cold proofing for complex, tangy flavor, or room-temperature for mild, quick bakes.
- Check dough status every 1–2 hours until you learn your chosen variation’s pace and signals.
- Always score chilled dough right before baking for sharp, crisp ears and maximum oven spring.
- Adapt temperatures: cooler yields more tang, while warmer accentuates lightness and sweetness.
These clear steps reduce guesswork and boost your confidence for every wild fermentation loaf.
Fine-Tuning Fermentation for the Home Baker
Home bakers have an edge with cold proofing and room-temperature proofing—your kitchen conditions are both a laboratory and an ingredient. Embrace small tweaks to water temperature, proofing container, and even batch size to get the best from your wild fermentation sourdough.
Document and adjust. A simple log helps spot patterns, correct course, and plan for your next session based on observable results, not guesses or hope.
Planning for Consistency in Changing Seasons
Whether winter chills or summer heat takes over, wild fermentation will shift. Cold proofing lets you ride out hot spells without losing control. In cooler months, extend rises for deeper flavor without worry.
Modify water temperature: start with 80°F for faster fermentation in winter, or drop it to 65°F in the high summer to slow things down.
Shorten or lengthen bulk rise as you notice changes in ambient temperature. Adapting these micro-steps ensures delicious, reliable sourdough year-round without surprises.
Batch Adjustments for Confident Results
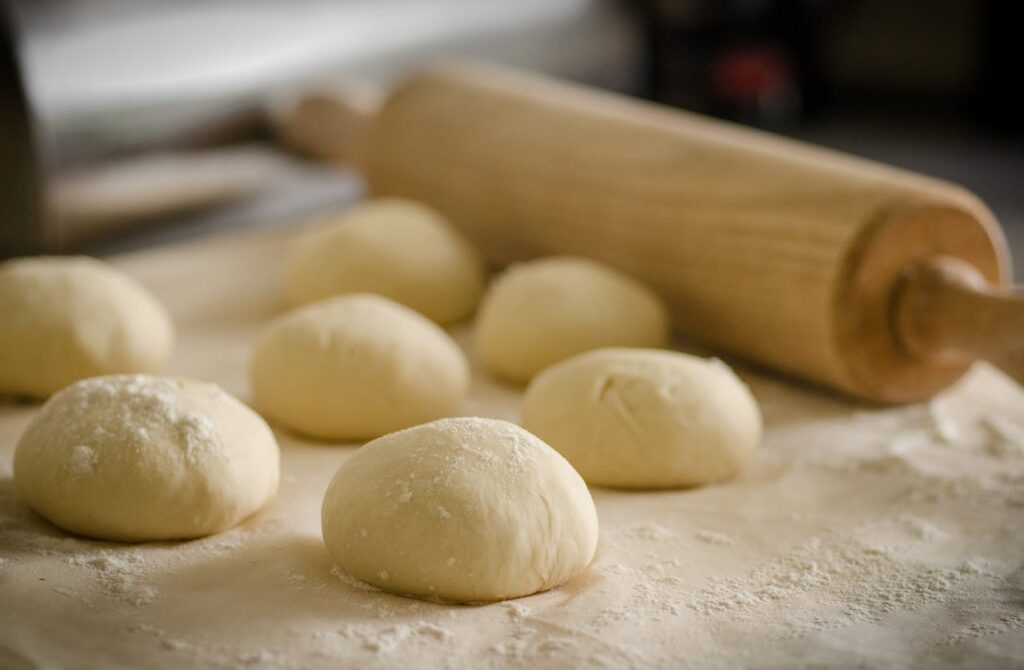
Bake smaller batches to master a new proofing schedule before scaling recipes up. Wild fermentation rewards brave, frequent experiments; cold proofing allows taste tests on different timeframes for direct comparison.
Try splitting one batch: cold proof half, room-temperature proof the other. Compare slices for texture and flavor side by side with family and friends, making your next decision crystal clear.
Adjust proofing containers and hydration to see what produces your favorite crust, crumb, and tang. Small changes accumulate; your wild fermentation sourdough gets better with every trial loaf.
Conclusion: Choosing Proofing Techniques for the Wild Fermentation Baker
Wild fermentation sourdough responds uniquely to cold proofing and room-temperature proofing, letting bakers orchestrate timing, tang, and texture batch by batch. Even small process shifts yield real results in every homemade loaf.
Adaptability is the wild fermentation baker’s strength. Recording and responding to your dough’s behavior leads to better control, bigger flavor payoffs, and a growing sense of mastery with each bake.
Let cold proofing support your schedule and sharpen flavor profiles; let room-temperature proofing reward a spontaneous afternoon bake. Every decision deepens the relationship between baker and dough—raising every loaf’s potential.
Frequently Asked Questions
What is the main benefit of cold proofing wild fermentation sourdough?
Cold proofing extends the rise over 8–36 hours in the fridge, naturally amplifying sourness and creating a stronger gluten structure. This approach makes scoring easier and delivers excellent oven spring, especially appealing for those seeking a deeper tang in each slice.
Will my sourdough over-proof if I cold proof too long?
Dough can slowly over-proof in the fridge if left too long, especially when hydration is high or your fridge is slightly warm. Monitor for flattened loaves or slack gluten, and shorten the proofing window next time for improved loft and crumb.
Can I start cold proofing wild fermentation dough before bulk fermentation is complete?
Transfer dough to the fridge before bulk rise finishes only if you need to pause due to unexpected scheduling conflicts. Complete bulk fermentation whenever possible for predictable crumb and flavor. Bake once the final shape sets and dough is puffy to the touch.
Is room-temperature proofing worse than cold proofing for wild fermentation?
Not at all. Room-temperature proofing offers a mild, slightly sweet flavor and yields a softer crumb—ideal for sandwich loaves or whenever a gentle wheat aroma is preferred. Both methods have a proper place, depending on your desired end result and available time.
How should I store wild fermentation sourdough after baking with cold proofing?
Let the loaf cool completely, then wrap it loosely in a clean towel or parchment to preserve crust texture. Once sliced, store in a bread bag at room temperature for 2–3 days. For longer keeping, freeze individual slices and toast as needed.