Sourdough bread starts with a mystery: the wild yeast and bacteria living in flour, water, and air create infinite flavors, textures, and aromas. These invisible communities are as complex as city neighborhoods, bustling with activity. Exploring the microbiome unveils why bakers treasure sourdough’s unique character.
As bread enthusiasts discover, wild yeast brings depth that packaged yeast simply can’t duplicate. Bacteria add tang, resilience, and rich notes that transform dough. Understanding their roles gives bakers more control over fermentation, turning home kitchens into mini science labs for flavor discovery.
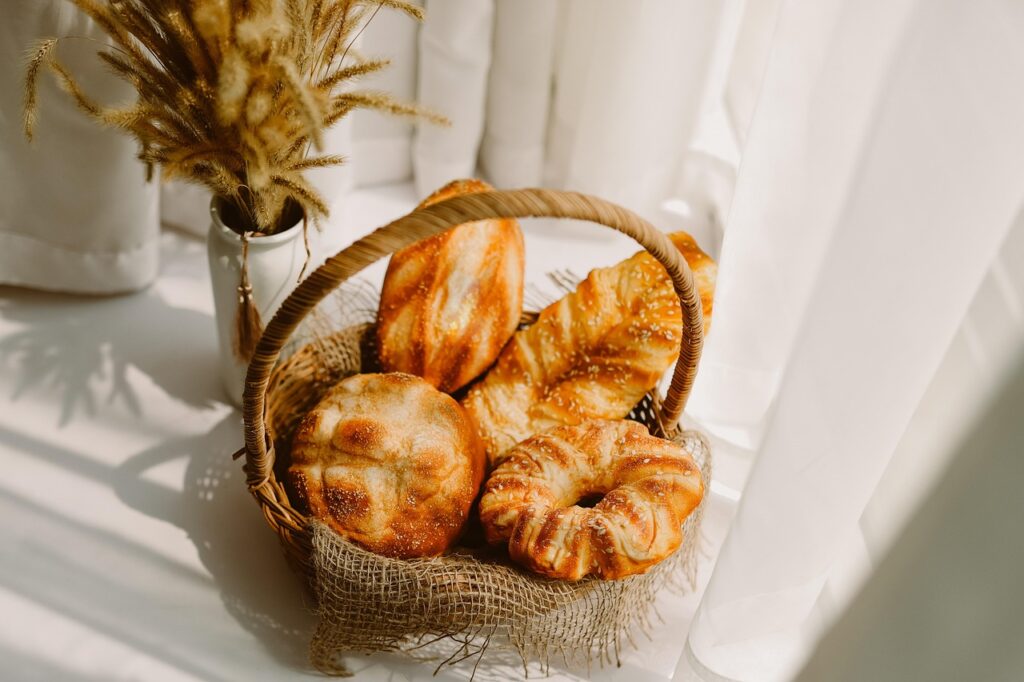
If you’re curious about wild fermentation sourdough and its living ecosystem, you’ll learn how wild yeast and bacteria shape every loaf. This article unpacks practical tips, real scenarios, and the science behind the magic, helping you bake with confidence and insight.
Recognizing Wild Yeast’s Impact on Sourdough Bread Outcomes
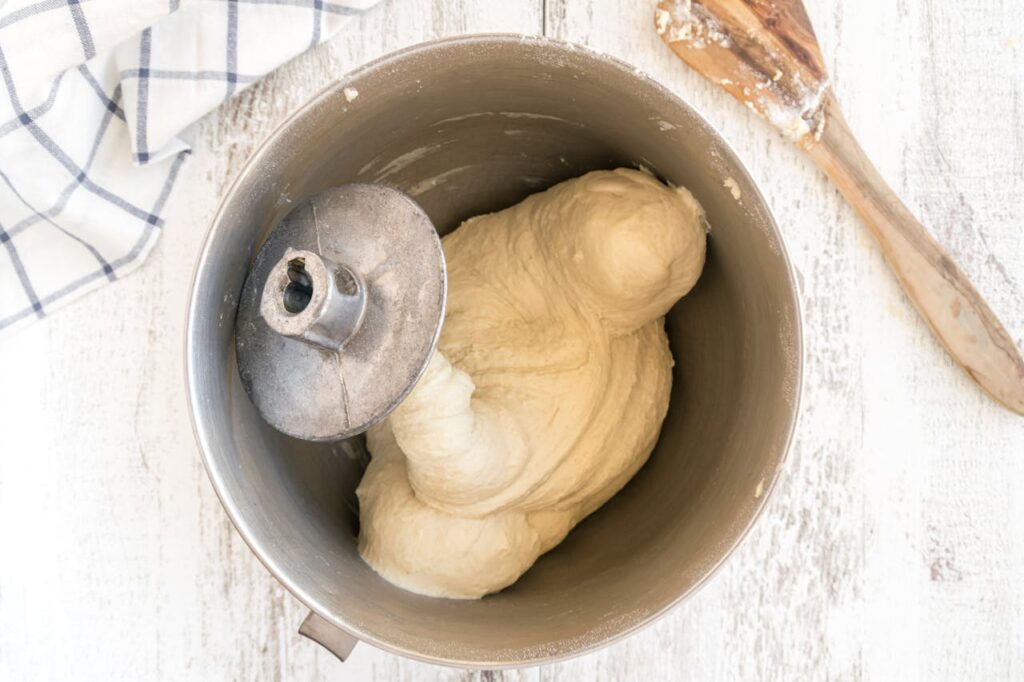
Every sourdough starter is a living collaboration between wild yeast, lactic acid bacteria, and flour. Observing their interaction at each stage helps bakers know what to expect during bread making, ensuring predictable results and rich tastes.
Wild yeast strains vary from one location to another, influencing how quickly dough rises and what flavors emerge. Tracking starter behavior helps identify subtle shifts. A baker might note, “My starter bubbles more actively after a warm evening in the kitchen.”
Tracking Sourdough Starter Progress: Visual and Sensory Markers
Wild yeast fermentation produces observable cues: bubbles, creamy texture, and a yogurt-like aroma. These signs highlight a healthy microbiome and let bakers gauge when to start mixing dough. Trusting your senses is as important as following any recipe.
If starter growth slows or smells off, it’s wise to revisit feeding schedules, check water temperature, or even adjust flour types. Keeping written notes—“Starter doubled in five hours, sharp scent”—reveals patterns, which guides future decisions for sourdough success.
Think of wild yeast as energetic tenants. Fresh flour and water are their reliable paychecks, fueling bubbles and growth. If tenants seem sluggish, try offering warmer conditions or tweaking ingredient ratios to restart their activity and restore lively, balanced fermentation.
Comparing Wild Yeast with Commercial Yeast in Sourdough Starters
Commercial yeast provides fast, consistent results but lacks wild yeast’s character. In wild fermentation sourdough, patience rewards bakers with delicious complexity. Use wild yeast if you want malty, tangy notes that transform ordinary bread into an artisanal treat.
Switching from commercial to wild yeast requires adapting expectations. Dough may rise slower yet yield an open crumb and deeper crust color. Jot down, “Overnight rise gives subtle tang—morning bake shows better oven spring.” Such notes help fine-tune your process.
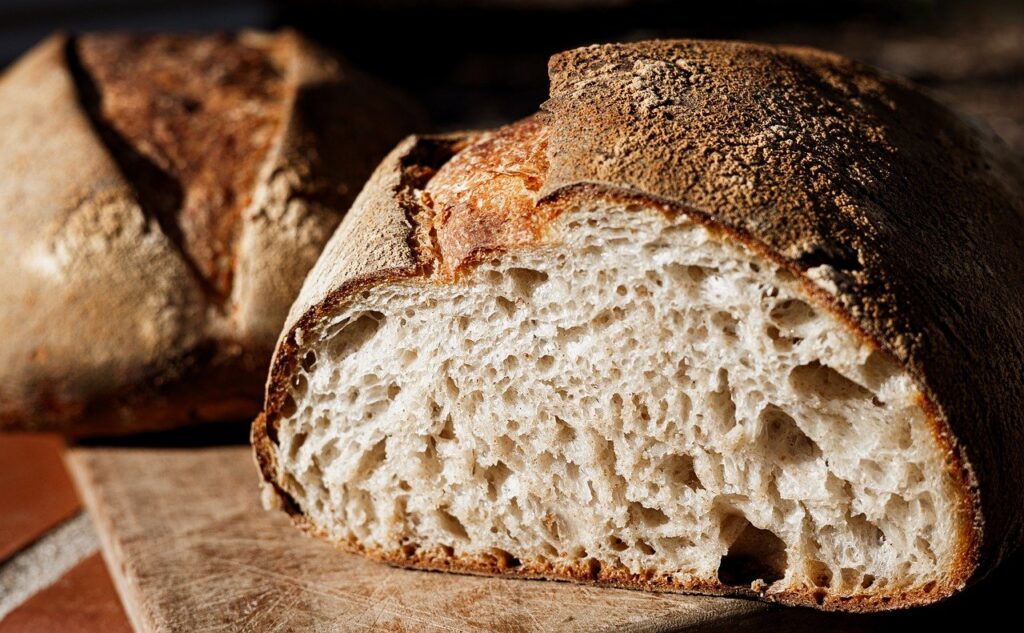
Wild yeast also fosters strong gluten networks. Unlike the single strain in packaged yeast, wild yeast blends reinforce texture and crumb structure. Letting wild yeast ferment longer creates bread that feels hearty and moist, with that distinct sourdough chew.
| Feature | Wild Yeast | Commercial Yeast | Takeaway |
|---|---|---|---|
| Fermentation Speed | Slower rise, extended flavor development | Rapid, predictable rise | Use wild yeast for complexity |
| Flavor Profile | Tangy, layered, subtle notes | Mild, neutral, single-note | Choose wild fermentation for deeper taste |
| Texture | Open crumb, chewy bite | Even, tighter crumb | Wild yeast gives rustic texture |
| Gluten Network | Strengthens over time | Quick structure formation | Long fermentation for springy bread |
| Microbial Diversity | High—yeasts and lactic acid bacteria | Low—usually only Saccharomyces cerevisiae | Diverse microbes mean bold breads |
Mapping Microbial Diversity in a Sourdough Starter Ecosystem
Identifying the mix of wild yeast and bacteria in a starter demystifies its fermentation. This diversity isn’t random—techniques control which microbes dominate, shifting flavors and dough strength. A focused approach helps you steer your sourdough’s evolution every bake.
Some bakers describe the starter as a microorganism “garden.” Cultivating the wild yeast and bacteria you want means favoring certain flours, temperatures, and feeding schedules. It’s like adjusting sunlight and water for houseplants to help them thrive.
Creating a Stable Microbial Habitat in Homemade Starters
Bakers can align feeding, hydration, and temperature to develop a rich wild yeast microbiome. For instance, rye flour tends to foster vigorous fermentation, while white flour yields a milder aroma and slower activity. Documenting changes reveals preferences over time.
- Feed your starter at the same hour daily to anchor microbial habits. Consistent routines support reliable fermentation.
- Warm environments (72–80 F) boost wild yeast bubble output. Use a proofing box or a warm spot to stabilize temperature swings.
- Mix flours to test diversity—try 50 percent rye, 50 percent wheat for distinct flavors and wild microbial growth.
- Observe starter rise every 2–3 hours and mark levels with a rubber band. Immediate feedback shows if microbes need extra food or warmth.
- Smell and taste starter weekly. Sharp, fruity, or vinegary notes track wild yeast and bacteria shifts as the ecosystem matures.
The ecosystem also shifts if you travel. A baker returning from vacation may say, “My starter has mellowed—flavors have softened with new water and flour.” This illustrates how microbial diversity adapts, constantly blending into new symphonies.
Encouraging Healthy Competition Among Wild Sourdough Microbes
Bread makers can promote beneficial wild yeast while suppressing harmful molds or rogue bacteria by keeping feeding schedules and storing starter in a clean, loosely covered container. Clean tools guard against unwanted, flavor-dulling microbes.
- Discard half the starter before each feeding—this keeps population balanced and prevents off flavors.
- Use filtered or non-chlorinated water, as chlorine harms both wild yeast and beneficial bacteria.
- Opt for unbleached, additive-free flour. Chemicals can stifle microbial vigor and slow sourdough development.
- Store starter in non-reactive glass or food-safe plastic. Metals may interfere with wild yeast communities.
- Monitor starter color—pink or green streaks indicate unhealthy contamination, and you should start over with a clean jar.
Healthy microbial competition opens up delicate sourdough aromas, and promotes fluffy, flavorful loaves. This ecosystem—the very heart of wild fermentation sourdough—rewards mindful care and routine adjustment.
Shaping Dough Fermentation with Wild Yeast and Bacteria Selection
The sourdough you bake responds to the choices you make with your starter. When you nurture wild yeast-rich environments or tilt the balance toward certain bacteria, you set the stage for unique flavors and crusts. Narrowing microbes means targeted, repeatable results.
For instance, if a baker says, “I want tangier bread,” increasing temperature during proofing or using whole grains can aid acid-producing bacteria alongside robust wild yeast. This blend is the backbone of bold sourdough flavor.
Temperature Adjustments for Desired Fermentation Results
Using the refrigerator for a longer cold ferment encourages lactic acid bacteria to build a milder tartness, while a warm kitchen accelerates wild yeast. Swapping proofing temperatures forms a habit: soft crumb loaves get cool overnight proofing; chewy crusts rise in warm daytime hours.
Wild yeast thrives between 72–80 F, but the bacteria produce most flavor around 80–90 F. By logging temperature details—“Bulk rise: 76 F, Proof: 44 F”—bakers learn to nudge wild fermentation sourdough toward their favorites.
Each adjustment can be tested weekly for impact. Record, “Room temp proof yielded softer flavor; cold rest brought prominent tang.” Over several bakes, sense patterns that lead to your most rewarding sourdough.
Flour Types as Microbe Selectors for Bread Characteristics
Whole wheat and rye contain nutrients that wild yeast adore. Switching to all-purpose flour may slow fermentation and mellow acidic notes. A baker who wants a heartier bread might say, “Tonight’s rye starter sparked a lively overnight rise—bread had a glossy, aromatic crumb.”
Rye encourages rapid wild yeast and lactic acid bacteria growth; adding just 10–20 percent can jumpstart a sluggish starter. Experiment regularly: alternate flour blends every other bake, log taste and structure changes, and build a personal ledger of wheat and microbial interaction.
High-ash flours, like stone-ground whole wheat, boost wild yeast diversity and resilience. You’ll notice a richer, earthier flavor and more varied crumb. Adjust feeding and hydration—thirsty flours need more water—and observe your starter’s response for continuous improvement.
Troubleshooting Wild Fermentation Sourdough: Readjusting for Consistency
Bakers can troubleshoot wild fermentation sourdough issues systematically for better, more predictable results. Adjusting one variable at a time, such as hydration or feeding interval, identifies which changes restore balance and revive wild yeast vigor in your starter.
If a starter stops rising, focus on recent changes. Review water type, feeding ratios, room temperature, or flour source. A baker might note, “Starter sluggish after switching to new flour—returned to original and activity bounced back.” Such observation pinpoints weak links in the process.
Checklist for Diagnosing Common Fermentation Problems
Use a precise checklist to target issues. First, sniff for unusual odors. Next, inspect for visible contamination or see if the starter doubles in 6–8 hours. Examine changes since the last successful bake—were there shifts in temperature, water, or storage habits?
- If starter smells “off,” discard and refresh with a small portion of healthy starter plus fresh flour and water.
- If rise time slows, increase feedings or try a warmer space. Mark jar levels at intervals to watch for improvement.
- If dough feels overly sticky, reduce hydration by 5–10% and knead gently, supporting gluten network formation from wild yeast action.
- If loaf lacks rise, lengthen bulk fermentation time, giving wild yeast hours to generate enough gas and structure.
- If crumb becomes gummy, extend baking or lower final hydration to help set the loaf’s interior as microbes digest starch.
Each fix, paired with attentive journaling, homes in on the specific microbe or method driving the trouble. Consistency flows from attentive, small-batch tinkering.
Scenario: Rescuing a Starter with Declining Activity
When wild yeast falters, bakers often rescue the starter using temperature or flour tweaks. A typical routine may involve moving the jar to a cozy shelf and feeding with rye for several days, then recording the improvements in lift and aroma.
- Warm starter gently with a heating pad—never above 85 F—to encourage wild yeast without stressing bacteria. Mark increases on the container and continue until reliable bubbles return.
- Switch to whole grain or rye flour for three feedings. Wild yeast in these grains proliferate quickly, restoring competition and vibrancy among microbes—especially after travel or flour changes.
- Refresh daily and discard half, reinforcing dominance of robust fermenters. Watch for fresh, fruity scents and fast peak rise as your quality check.
- If no improvement after a week, start a new culture with the most vigorous scoop and more nutritious flour, and use filtered water as a reset.
- Celebrate when starter resumes rising, showing “doubled in six hours” with strong gluten feel. Bake with this active starter to capture a lively, flavorful wild fermentation sourdough.
Each intervention clarifies what wild yeast and bacteria need. By matching their conditions, a baker reliably recovers even the most sluggish sourdough starter.
Optimizing Starter Maintenance for Long-Term Fermentation Success
Maintaining a robust wild fermentation sourdough starter over months delivers dependable bread, even as seasons change. Practice makes for resilient ecosystems—each feeding rounds out flavors and gluten structure unique to wild yeast blends.
Experienced bakers establish habits from starter-to-bake. “Every Saturday morning is my feed and refresh,” one might say. Over time, wild yeast and bacteria learn the rhythm, resulting in smoother, more consistent rises and loaves.
Routine Maintenance Example for Home Bakers
Set your feeding schedule—daily at room temperature or every 5–7 days in the fridge (with a pre-bake warm-up). Choose whole grain for vigorous activity or all-purpose for a gentle, slow-fermenting base, then monitor with written notes and taste tests for consistent output.
Keep the starter jar loosely covered to allow airflow while preventing debris. If a weekend bake follows fridge storage, remove, discard half, and feed twice in twelve hours to ensure peak wild yeast strength for dough mixing. This builds trust in your process.
Notice texture and aroma shifts—“nutty scent, tight bubbles” signal a strong ecosystem, while “vinegar tang, slack feel” may prompt a week of daily room-temperature feeds to recover wild yeast. These micro-adjustments ensure robust sourdough outcomes, week after week.
Crafting Custom Flavors: Practical Approaches for Sourdough Bakers
Bakers can shape and fine-tune flavor profiles in wild fermentation sourdough by exploring ingredient blends, proofing schedules, and even environmental changes. Testing new methods reveals which combinations emphasize the signature tang, earthiness, or aroma particular to wild yeast partnerships.
For adventurous bakers, leveraging the natural variability of wild yeast means trying focused experiments—“shorter proof for mild bread, long proof for pronounced sourness.” Consistency evolves as patterns surface from each bake, building an intuitive, ever-growing sourdough playbook over time.
Blending Flours and Hydration Ratios for Signature Taste
Introducing spelt, whole wheat, or fresh-milled grains cultivates rich wild yeast diversity, shifting tang and crumb. Hydration adjustments (70% for chewy, 80% for open crumb) help optimize fermentation, letting you say, “This loaf has the nutty aftertaste I love.”
Test variations by changing only one ingredient at a time, logging comparison notes. Try: “Added 20% spelt, dough rose more slowly—amazing depth in flavor.” Over time, small changes stack, allowing pinpoint tuning of the sourdough’s flavor palette.
Preview flavors using “scrap” bakes: mix 100g of starter, flour, and water, and ferment for a day. Taste, assess, and decide which direction—tangy, creamy, subtle—best fits tomorrow’s loaf. This process refines personal wild yeast craft.
Environmental Tweaks for Enhanced Loaf Character
Changing where or when you proof dough influences wild yeast and bacterial behavior. Proofing in a cooler room slows rise, deepens flavor, and boosts lactic acid presence; a sunny window speeds fermentation and leans toward mild, floral notes.
Test proofing methods every season—move the dough to a new kitchen spot, try overnight rests during winter, and track the resulting flavors and textures in a simple logbook. This controlled tinkering gives each batch a distinct “signature.”
If a batch finishes with new aromas or structure, the baker can announce, “Cool pantry proof gave complex crumb, lovely tartness.” Continual gentle experimentation rewards with not just bread, but discoveries you can repeat and celebrate.
Putting It All Together: The Wild Microbiome in Action
Wild fermentation sourdough is a living record of bakers’ choices—every starter feeding, temperature change, or flour blend nudges wild yeast and bacteria, shaping each loaf’s mood. Maintaining observation, routine, and adventure lets a baker turn microbe activity into daily, repeatable excellence.
When you feed your starter on schedule, use local water, or try local flours, you turn your bread into a snapshot of place and season. It’s an ongoing collaboration. Tracking your results and making small tweaks keeps your sourdough vibrant and unique week after week.
Approach each bake with curiosity and care, and let notes from every batch inform the next. The logic of wild yeast makes sourdough creative—and with every crumb, you’ll taste the living science of fermentation.
Frequently Asked Questions
Can I use tap water for my wild fermentation sourdough starter?
Filtered or dechlorinated water is best, as chemicals in tap water can harm wild yeast and slow fermentation. If tap water is all you have, letting it sit uncovered overnight before using will help dissipate chlorine so your starter remains healthy and active.
How do I know if my starter’s wild yeast is thriving?
Look for a doubled volume, active bubbles, and a clean, tangy aroma after eight hours at room temperature. If the starter rises reliably each day and the dough lifts well, wild yeast are working and your starter is healthy for wild fermentation sourdough.
Can I switch between different flours when feeding my starter?
Yes, you can rotate flours, but switch gradually to allow wild yeast to adjust. Changing 10–20 percent of the flour per feed lets the microbial community adapt, preserving balance and helping wild fermentation sourdough maintain consistent rise and flavor.
What do I do if my sourdough starter starts to smell strange?
If a starter smells putrid, like rotten cheese or harsh chemicals, discard most of it and feed a tablespoon of healthy starter with fresh flour and water. Persistent bad odors suggest contamination, so starting over in a clean jar is sometimes the fastest solution.
Is it possible to make sourdough bread without waiting days to build a starter?
Wild fermentation sourdough needs time for wild yeast and bacteria communities to mature. However, some bakers accelerate the process by using “discard” from a friend’s mature starter, resulting in bread with full character and robust, consistent fermentation.