Every sourdough baker experiences the thrill of feeding a lively starter and watching dough rise. Behind that magic is the meticulous, hands-on practice of keeping your baking environment spotless. Wild fermentation, a process based on airborne yeasts, depends heavily on a well-kept workspace to foster good microbes and discourage unwanted ones.
Wild fermentation relies on naturally occurring yeast and bacteria. Any lingering mess or old flour can spoil a batch by introducing off flavors or allowing mold to take hold. With bread as a daily ritual, a reliable, clean environment becomes essential for safety, taste, and consistent results.
This article unpacks the art and science of setting up a clean baking space tailored for wild fermentation sourdough. Get expert-backed checklists, actionable cleaning routines, and troubleshooting steps you can use with your next loaf. Fresh insights await—let’s raise your fermentation game.
Organize the Essentials for Reliable Wild Fermentation
A predictable wild fermentation sourdough routine calls for a space where tools are accessible and surfaces stay uncluttered. Organizing your workspace fosters both efficiency and consistent, clean results.
This method is the difference between wild fermentation success and accidental failure due to cross-contamination or missed steps. Get your space in order before the first mix.
Start With a Dedicated Baking Zone
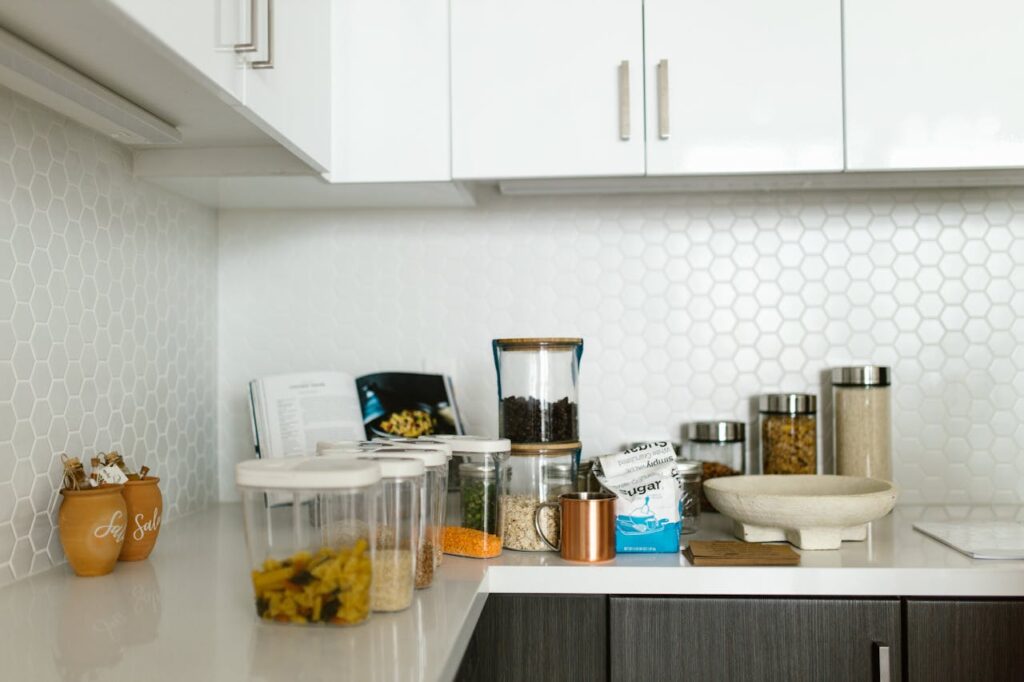
Create a defined sourdough area by clearing a countertop and designating specific shelves or bins for all supplies. This physical separation makes it less likely for unrelated food debris and crumbs to drift into your dough prep zones.
Label bins or containers with “flour,” “starters,” and “tools” so nothing gets misplaced during the wild fermentation process. If possible, keep a small caddy nearby for frequently used items—think dough scraper, thermometer, and a digital scale. Organization always pays off mid-bake.
Adopt the habit of resetting your station after every wild fermentation session. Wipe down, restock flour canisters, and return tools to their spots. Doing this during clean-up avoids last-minute scrambles when starter activity peaks and timing is tight.
Store Ingredients With Freshness and Cleanliness in Mind
To keep sourdough flavors clean, transfer flour and grains from paper sacks into airtight containers. This bars pantry pests and helps you track flour age—key for wild fermentation predictability.
If storing water for futural bakes, always use food-safe jugs and rinse before refilling. Keep these covered to limit dust or airborne yeast from changing your hydration ratios during wild fermentation. No corners cut.
Segregate specialty flours—such as rye, whole wheat, or spelt—so you can grab exactly what you need. Use clear scoops or spoons for each kind and avoid returning unused flour to its source container if it’s touched a work surface.
| Essential Item | Purpose | Best Storage Practice | Takeaway Action |
|---|---|---|---|
| Flour | Fermenting agent & main ingredient | Airtight, food-safe bins | Decant into bins weekly & label dates |
| Starter Jar | Wild fermentation cultivation | Glass (easy to sanitize), loosely covered | Sterilize between feedings |
| Dough Scraper | Shaping & cleaning | On a magnetic strip/caddy | Rinse after every use |
| Kneading Surface | Mixing & working dough | Wood or stainless, sanitized | Spray & wipe pre/post use |
| Proofing Basket | Shaping rise | Well-dried, cloth-lined basket | Brush flour off after rising |
Apply Daily Sourdough Space Routines for Maximum Safety
Establishing wild fermentation-friendly habits is simpler when you follow actionable routines tailored for recurring sourdough bakes. Each habit makes wild fermentation smoother and safer over time.
Consistency with daily cleaning actions stops contamination before it starts. Every batch of wild fermentation sourdough depends on these foundational routines.
Wipe High-Touch Surfaces Continuously
Not all surfaces require deep scrubbing after every bake, but keep key touch zones spotless. Take ten seconds to wipe the counter, fridge handles, and faucet levers with a food-safe disinfectant.
- Clean your scale before weighing flour. Residual moisture or crumbs cause inaccurate measurements, which skews dough hydration during wild fermentation.
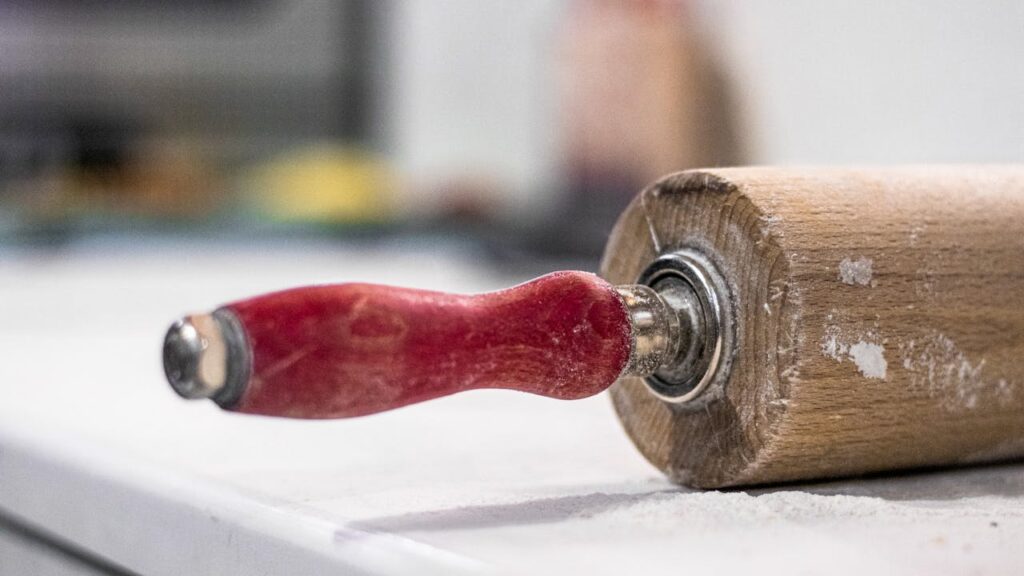
- Polish your dough scraper immediately after use. It prevents sticky residue and curbs yeast build-up.
- Empty and rinse the proofing basket using a stiff brush to remove stuck dough, warding off mold.
- Change dish towels daily. Lingering dampness breeds bacteria right where you handle dough.
- Spray and wipe your worktable after every sourdough session. It ensures no stray flour interferes with your wild fermentation process.
Mimic a restaurant’s open kitchen mentality: assume guests could drop by and see your baking zone—would you feel confident about your wild fermentation setup?
Maintain Tool Hygiene All Day
Between sourdough sessions, let utensils air-dry on a rack instead of stacked in a sink. Stagnant water harbors wild fermentation spoilers like unwanted bacteria or lingering detergent residue.
- Sanitize your bread knife with boiling water after slicing, then air-dry for the next loaf.
- Wash bowls immediately after dough is removed rather than once dried scraps harden and attract pests.
- Never use wooden spoons interchangeably between savory and sourdough tasks—dedicate one to wild fermentation only.
- Brush flour off your banneton and store it uncovered to keep mold away between uses.
- Deep clean mixing bowls with a vinegar-water solution every week for truly neutral results during wild fermentation.
This approach ensures nothing is left to chance—critical for those prized wild fermentation flavors you’ve cultivated in your starter for weeks.
Minimize Cross-Contamination to Protect Sourdough Cultures
Prevent raw food, airborne yeast, and sweeping dust from mingling with your wild fermentation process. Eliminating cross-contamination threats helps preserve your unique sourdough cultures and result in reliable flavor every time.
Make every movement deliberate while handling the dough or prepping your workspace—tiny lapses can throw off wild fermentation stability.
Stagger Food Prep by Category
Always start your sourdough routine before preparing any raw ingredients, like meats or vegetables, in the kitchen. Working on a clean slate means wild fermentation cultures face no competition from stray microbes.
When possible, finish wild fermentation prep, bake, and initial cooling before returning to general cooking. That buffer time limits pollen, crumbs, and outside bacteria from interfering with your active dough.
Store all sourdough utensils, walk-off mats, and proofing containers separately from the regular kitchen lineup. This habit prevents them from mingling and confusing flavors or culture populations during wild fermentation.
Use Disposable Towels During Sourdough Handling
Choose single-use paper towels or compostable cloths for spill clean-up and starter drips. This stops cross-seeding unpopular bacteria on reusable towels—a common slip in wild fermentation setups.
Dispose of each towel after one wipe so you don’t accidentally transport wild fermentation residue to other kitchen surfaces. Remember to wash hands thoroughly between dough handling and other tasks as well.
Adopt this mantra: “One towel or one wipe, then toss.” This simple script curbs kitchen mess and stops starter mishaps before they complicate bread flavor.
Keep Air Quality Stable for Optimal Fermentation Growth
Control the air in your kitchen to encourage wild fermentation and discourage unwanted microbial growth. Good ventilation, stable temperature, and low airborne dust make every wild fermentation sourdough batch more reliable.
Monitor humidity and open windows for brief periods, but avoid strong drafts when dough is exposed. Even a simple portable fan, positioned away from the dough, keeps air movement gentle and consistent without over-drying surfaces essential for proper wild fermentation.
Install a Small HEPA Purifier Near the Baking Zone
Set a compact HEPA air filter a few feet from your work area. Run it during wild fermentation activity to capture airborne yeast, dust, and pet hair that can compromise the dough’s microbial balance.
If you notice extra flour or pollen buildup on surfaces, increase the cleaning frequency of your purifier’s filter. This practice is effective especially during allergy seasons or high-activity baking days with wild fermentation doughs actively proofing.
After several weeks, you’ll notice fewer unexplained changes in starter aroma or dough rise—your wild fermentation ecosystem stabilizes thanks to these small air quality tweaks.
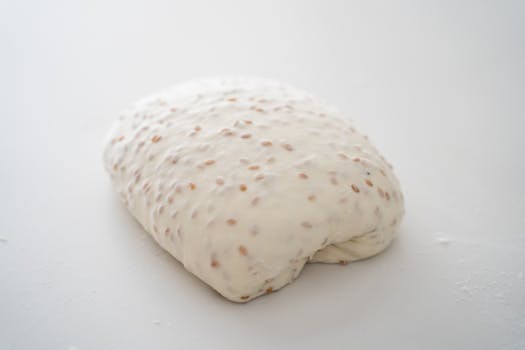
Use Covered Containers for All Dough Rest Periods
After mixing wild fermentation sourdough, transfer to a bowl with a fitted lid or plastic wrap. This simple cover deflects random dust, accidental sneezes, and hovering fruit flies out of your fermentation chain.
Select non-porous lids (never a sweaty tea towel) when humidity is low or drafting is strong. This approach keeps the dough’s hydration consistent without trapping too much moisture, which could tip the wild fermentation balance toward mold.
By practicing this at every stage—hydrating, proofing, and retarding—you’ll ensure your wild fermentation wild fermentation flavors shine above background kitchen odors or environmental contaminants.
Document and Track Your Cleaning Routines
Tracking helps you turn wild fermentation cleanliness into habit, not guesswork. Written logs show what’s working and flag recurring messes or weak points in your baking process over time.
A cleaning record doubles as a troubleshooting diary. If wild fermentation flavors turn sour or dough shapes slump, your cleaning log may reveal forgotten step—saving frustration and wasted flour.
Design a Quick-Check Cleaning Chart
Institute a daily or weekly checklist covering every major sourdough task, from “sanitize countertop” to “rinse proofing baskets.” Keep this chart laminated on your fridge or pinned by your wild fermentation station. Mark off tasks in real time.
Pair this with a wild fermentation log for each bake: list flour type, rise times, and notes about workspace condition. You’ll spot patterns—like sticky surfaces predicting dull rise—faster, so you can adapt before the next loaf.
This habit bridges the gap between intention and execution, helping bakeries and home bakers alike see where their wild fermentation systems are strong or need improvement.
Reinforce Consistent Results With a Proactive Clean-Up Script
After every wild fermentation bake, follow a step-by-step reset to ready your kitchen for next time. Preparedness ensures starter health, precise hydration, and an unspoiled flavor profile for all wild fermentation bakes going forward.
Include all sensory cues in your reset script. Smell for any vinegar or mustiness on towels; check for dried flour in corners. These details signal when a deeper clean is due.
- Remove unused dough and discard scraps right away—don’t delay cleaning until after you’ve enjoyed a fresh slice of sourdough.
- Wash all mixing bowls, utensils, and bannetons immediately. Don’t let sticky dough grow crusts or attract pests.
- Wipe the entire countertop and nearby shelves with food-safe cleaner, making sure to reach under canisters and the back of the workspace.
- Check flour containers for spills or pests. If needed, vacuum up stray grains or replace storage bins to protect your wild fermentation flour supply.
- Air-dry everything on a rack, keeping tools out until fully dry before storing. This avoids musty odors that could sabotage starters.
End each wild fermentation bake with a “pro-level” inspection: would you serve a loaf from this space to a guest? If not, reset one more key area before calling it done.
Embrace Maintenance and Flexibility for Evolving Wild Fermentation Needs
Wild fermentation keeps bakers engaged with its ever-shifting demands. Every new flour bag, starter update, or baking season calls for slight changes in cleaning, storage, and organizing routines.
Your sourdough kitchen should adapt—purge unused tools, swap in larger proofing containers, or update storage as your wild fermentation skills expand. Don’t let routines get stuck; refreshing workflows keeps the wild fermentation process joyful and safe.
Time-Tested Cleanliness Habits Make Wild Fermentation Succeed
Dedicated wild fermentation requires more than just flour, water, and patience—it demands regular, intentional cleaning and space management. By following these detailed routines, your sourdough starter, workspace, and bakes will remain healthy and flavorful.
Wild fermentation sourdough thrives best in kitchens where every surface and tool is treated with care and respect. Take pride in your clean-up process—it’s the foundation for every joyful, tangy loaf you share with friends or family.
Committing to these habits ensures your sourdough journey continues for years. Next time you feed your starter, look around, reset your station, and feel the satisfaction of a job well done. Each clean bake paves the way for tomorrow’s success.
Frequently Asked Questions
How do I prevent mold in my wild fermentation starter container?
Use sanitized glass containers, rinse thoroughly between feedings, and never let starter dry onto the rim or lid. Store covered but not airtight, letting excess gases escape. Clean spills promptly to keep wild fermentation conditions optimal.
What’s the safest way to clean sourdough proofing baskets?
Shake flour out immediately after use, air-dry fully, and brush away dried dough. Avoid water unless absolutely necessary, as excess moisture promotes mold. Store baskets in a well-ventilated area, away from heat or direct sunlight.
Can I use natural cleaners for my wild fermentation workspace?
A mix of vinegar and water works well for most surfaces, but rinse with plain water afterward to avoid scent residue. For deep cleaning, food-safe sanitizers are best for regularly handled tools to reduce wild fermentation cross-contamination risk.
Should I clean my sourdough utensils separately from other dishes?
Yes. Dedicated wild fermentation utensils ensure flavors stay pure and prevent the transfer of unwanted oils or bacteria. Immediately clean utensils after every bake and let them air-dry before storing, ideally away from strong-smelling foods or cleaners.
How often should I deep-clean my sourdough space?
Perform a full deep clean every 7 to 10 days if you bake regularly. Disinfect counters, empty and sanitize storage bins, and check for crumbs or spills under appliances. Track these sessions in your wild fermentation cleaning log for best results over time.