Baking a classic country loaf means making a tangible connection between simple ingredients and the wonders of wild fermentation you build right in your own kitchen. That hands-on process brings out layers of flavor you won’t ever find in commercial bread. Seeing the dough bubble and rise is a small miracle fueled by the wild fermentation method.
People crave authentic, time-tested foods because they offer depth, nutrition, and an experience that feels grounded and real. Wild fermentation sourdough delivers all three: rustic flavor, a softly chewy crumb, and the gentle tang that comes from natural leavening. That makes each bake personal and ever-changing.
Whether you’re new to baking or wanting to up your bread game, this guide makes wild fermentation approachable. You’ll learn every key step, what to watch for, and how to use your senses to get better results. Let’s delve deeper into crafting your own country loaf using wild fermentation techniques.
Setting Up for Wild Fermentation Success
Start with preparation that gives you control over the wild fermentation journey. Knowing your flour, water, and ambient conditions makes initial steps more predictable.
Reliable fermentation starts with high-quality bread flour, filtered water, and a clean jar for your sourdough starter. Mixing these sets the foundation for a healthy ecosystem.
Observing the Starter’s Livelihood Each Day
After mixing flour and water, loosely cover the jar. Each morning, observe: has it bubbled? Does it smell sweet, grassy, or acidic? Wild fermentation reveals itself with a slight aroma shift and visible air pockets.
Consistent signs of life—gentle bubbling, light aroma—mean beneficial microbes are at work. If it’s sluggish or smells unpleasant, discard half and feed fresh flour and water.
Try this script: “If my starter smells like ripe fruit or yogurt and looks fizzy, I’ll feed it and check again later.” Consistency brings your starter to peak activity.
Adapting to Your Kitchen’s Microclimate
Track daily temperature and humidity to see how they impact your wild fermentation. Warm rooms speed up fermentation, while cooler kitchens extend proofing times.
Pros write notes: “Overnight, the starter rose by half at 68°F—tomorrow, I’ll move it to a warmer spot.” Adjusting by observation helps keep the wild fermentation process on track.
A brighter, warmer window ledge usually boosts activity, while a drafty shelf might slow it. Mark your best spots for future reference and consistent starter care.
| Element | Variable | Fermentation Impact | Takeaway |
|---|---|---|---|
| Flour Type | Bread, Whole Wheat, Rye | More nutrients affect fermentation speed | Try varying ratios to tweak results |
| Water Temperature | Cold, Room, Warm | Warm boosts speed, cold slows | Start with room temp for balance |
| Starter Age | New, Mature | Mature brings stronger rise, better flavor | Allow 7 days for robust starter |
| Ambient Temp | Cool, Average, Warm | Warmer rooms ferment faster | Track room changes on your phone |
| Hydration Level | Low, Medium, High | Higher hydration = wider crumb | Practice at 75% before going higher |
Building and Feeding Your Wild Fermentation Sourdough Starter
A strong sourdough starter drives reliable wild fermentation and gives your classic country loaf structure, tang, and aroma. Creating a vigorous, balanced starter is your first step.
Combine equal weights of flour and water and stir briskly. Let the initial mix rest in a loosely lidded jar at room temperature for a full day, then start daily feedings.
Day 1–3: Observing and Adjusting Activity
During the first three days, bubbles may come and go, smells fluctuate from floury to sour. Don’t panic: wild fermentation requires patience and consistency.
If little change is visible after 48 hours, increase feeding frequency or switch to rye flour for richer nutrients. Mark progress and adjust future schedules accordingly.
By day three, you should expect some rise and a beery aroma. Stick with twice-daily feedings—consistency is the most important lesson for a robust wild fermentation starter.
- Mix by hand for improved microbial activity, ensuring flour and water fully integrate, creating an ideal environment for wild fermentation to thrive.
- Cover with a breathable cloth to encourage air exchange and reduce risk of undesirable bacteria during crucial starter growth periods.
- Place the starter in a spot where it maintains consistent warmth, around 70°F, as temperature swings stall wild fermentation or lead to erratic bubbles.
- Check starter peak by marking jar heights with a rubber band; bake when it’s doubled within 6–8 hours for optimal yeast-leavening strength.
- Sniff for changes: pleasant, slightly fruity or yogurt-like sourness signals wild fermentation has produced balanced lactic acid and acetic acid flavors.
After a week, a mature starter should double in volume and have a slightly tangy scent. This robust wild fermentation foundation will raise country loaves beautifully.
Refreshing and Storing for Future Bakes
If you’re baking regularly, feed the wild fermentation starter every morning, discarding half and adding fresh flour and water. For breaks, refrigerate and refresh weekly.
After long storage, revive by leaving it on the counter, resuming daily feedings until reliably doubled. Try this phrase: “My starter has been refrigerated, so I’ll warm it up and observe rise every 8 hours.”
Consistent feeding, even after a break, maintains microbial strength. Plan your baking routine around starter health for predictable sourdough results every time.
Mixing and Developing Your Classic Country Loaf Dough
The mixing stage creates structure and locks in robust flavor from wild fermentation. Begin with an autolyse: mix flour and water, rest uncovered for 30–60 minutes, then add starter and salt.
Knead by hand, pinch and fold, or use a dough hook. Conduct stretch-and-folds every 30 minutes during bulk fermentation, which helps gluten organize and traps wild fermentation gases effectively.
Bulk Fermentation with Hands-On Cues
Watch for signs: dough should smooth out, grow by roughly 60%, and show lively bubbles on top and at the edges of the bowl.
Try this checklist: dough starts sticky then becomes strong; it relaxes after each fold and stays pillowy when you press gently. Wild fermentation has reached prime action.
If it’s cool or dough seems slow, extend bulk by 30 minutes. Surface bubbles and a “jiggly” feel show fermentation is peaking—get ready for the next shaping step.
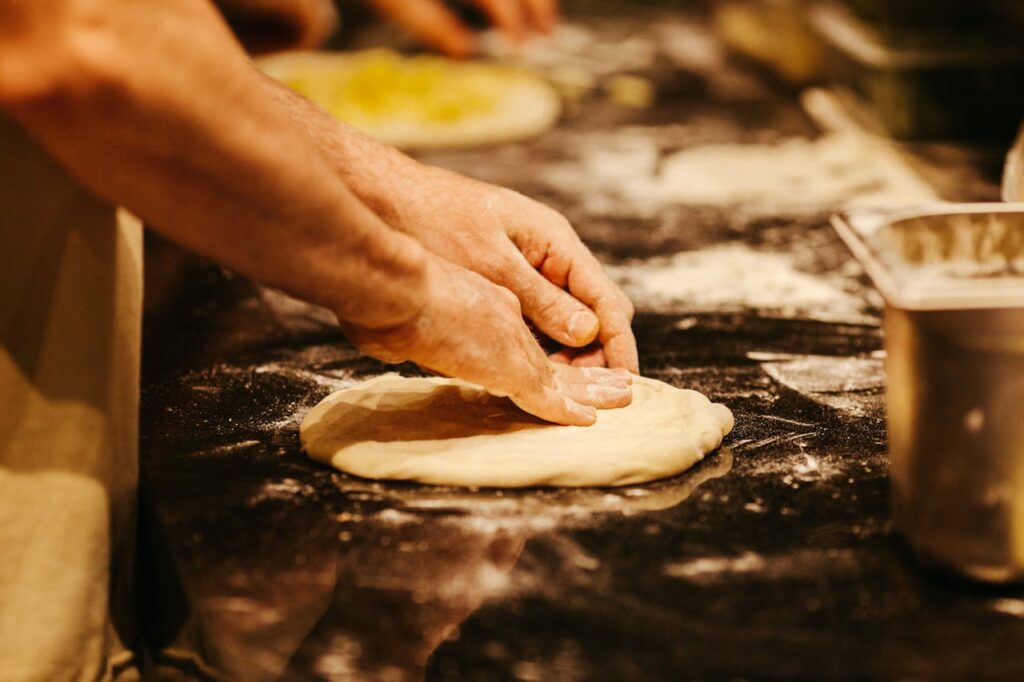
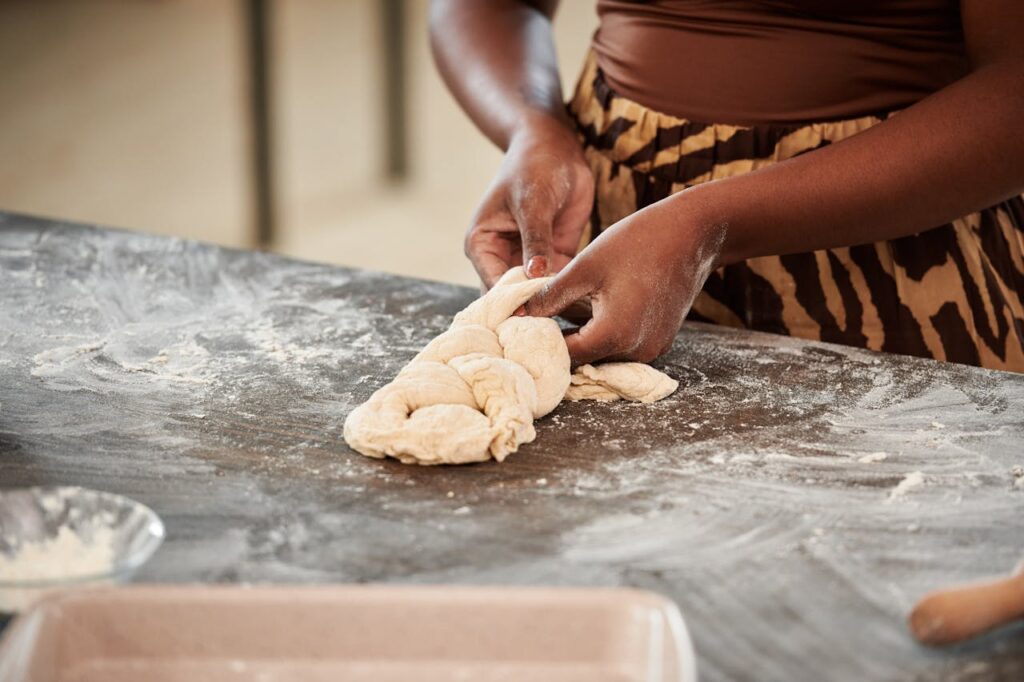
Shaping Tricks for Perfect Loaf Rise
Dust the counter lightly, then gently ease the dough out. Stretch it into a rectangle, fold both ends in, roll it up, and let it rest seam-side down.
Watch the dough’s “skin” for signs: if it tears, add a bench rest—10 minutes more. Tight, round surfaces allow wild fermentation gases to produce airy crumb and a crisp crust.
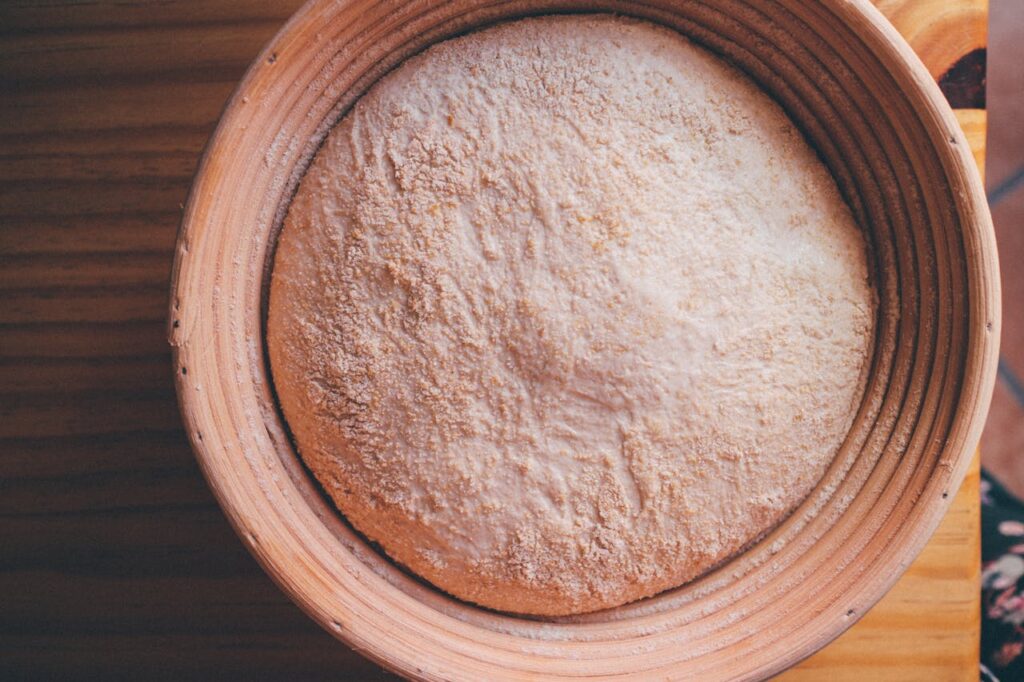
Transfer shaped dough to a floured basket or bowl, cover, and rest at room temperature for the final proof; you’ll see more rise, a soft surface, and the beginning of rustic flour patterns.
Final Proofing, Scoring, and Baking Tactics for Maximum Oven Spring
Proofing and baking methods bring out the magic of wild fermentation sourdough, giving the classic country loaf its open crumb and crisp crust.
After shaping, proof at room temperature for 1–2 hours, or refrigerate overnight. The dough should look slightly domed, spring back slowly to a gentle press, and hold light gas pockets.
Oven Readiness: Scoring and Steam Management
Preheat your oven to 500°F with a Dutch oven or baking stone inside. This high heat aids in rapid oven spring—the final surge of wild fermentation gases.
Turn the loaf onto parchment, score with a sharp lame or knife—deep enough for controlled burst, but not so deep it collapses.
Immediately transfer to your preheated vessel. Add ice cubes or a spritz of water for productive steam, which supports dramatic rise and a delicate golden crust.
- Score decisively: use one swift slash, about 0.5 inch deep, to direct loaf expansion and achieve artisan patterns that rival bakery results.
- Bake with the lid on for the first 20 minutes to trap steam, supporting maximum oven spring during wild fermentation loaf expansion.
- Remove the lid for final 15–20 minutes, allowing the crust to deepen in color and gain a crackly finish that invites people to break the bread.
- Monitor the dough with a quick thermometer: an internal temperature of 209°F signals complete baking without a gummy crumb—wild fermentation is at its best then.
- Cool the loaf fully on a wire rack before slicing, as resting completes residual fermentation and sets the airy crumb for easy cutting.
Savor the transformation: wild fermentation and skillful baking deliver texture, tang, and a burst of flavor unique to every loaf you share.
Flavor Development and Aroma: Secrets from Wild Fermentation Science
Understanding the timeline and chemistry of wild fermentation sharpens both aroma and flavor in your bread. Eat a rustic loaf, and you’ll taste days of microbial teamwork in every bite.
Acids from wild fermentation mellow wheat starch, creating that signature tang and complexity. Savvy bakers tweak timing, hydration, and temperature to lean the flavor toward fruitiness or bold sourness.
Balancing Lactic vs. Acetic Acid for Depth
Favor lactic acid (mild, yogurty flavor) with warmer, shorter ferments and higher hydration. Pursue acetic acid (sharp, vinegary tang) using cooler, longer ferments and drier dough.
Home bakers say, “I went with a cooler overnight proof for that extra tang,” or, “I increased the water to get a mellow crumb.” Both methods give wild fermentation bread a distinct stamp.
Switching this up builds a flavor library—log your tweaks and you’ll soon match aroma to your family’s favorite sourdough experience.
Visual and Sensory Cues for Perfect Fermentation
Look for pearly bubbles trapped beneath the loaf’s surface, a deepening cream or golden tone, and a crisp, fragrant aroma wafting from every slice.
Handle dough gently at each stage. When you nudge it with flour-dusted fingers, a fermented dough should spring back slowly, signifying strong yeast and lactic acid bacteria balance.
Pair each visual with a note: “It smells like honeyed grain and yogurt today, and the crumb is light and airy.” Repeat what works next time for reliable wild fermentation pleasure.
Adapting and Troubleshooting: Real-Life Problems, Practical Solutions
Wild fermentation can seem unpredictable, but specific fixes and habits make the process feel less random and more like a craft you control.
Sourdough bakers learn to judge dough by touch, track starter cycles, and read environmental cues. That intuition comes from facing challenges and knowing how to respond.
Problem Solving: Underproofed, Overproofed, and Weak Rise
If your loaf turns out dense or lacks big bubbles, lengthen your next bulk ferment by 30 minutes and feed your starter more regularly a few days before baking.
For flattened loaves, try reducing final proof time or baking a little earlier. If overproofed, expect a weaker oven spring—next time, chill your dough sooner or keep room temps steadier.
Learn from script: “This dough was slow at 66°F—I’ll adjust to 72°F and watch for doubling instead of timing alone.” Responsive bakers improve results bake by bake.
Building Your Wild Fermentation Habits for Flavor and Community
Baking wild fermentation sourdough is as much about the routine as it is about ingredients. Consistent practice carves delicious habits and inspires new loaves with friends or family.
Every bake is a chance to notice small shifts: how the dough feels, smells, or stretches differently each week, depending on the wild fermentation strength or weather outside.
Sharing and Savoring Your Classic Country Loaf
Many home bakers leave fresh loaves on neighbors’ steps or swap starters with notes: “Fed daily, doubles in six hours, let me know how yours turns out!” That simple sharing spreads wild fermentation culture in every sense.
Bread brings people together. Breaking a rustic crust involves more than flavor; it offers group laughter, crumbs on the table, and stories about that time the dough exploded with wild fermentation energy.
Keep a simple tradition: every Saturday, mix, shape, bake, and taste with people you love. Watch wild fermentation create new memories around your table week after week.
Frequently Asked Questions
What is wild fermentation in sourdough bread?
Wild fermentation refers to using natural yeast and bacteria from flour and the environment, instead of commercial yeast. It creates complex flavors and dependable rise, unique to each kitchen and batch.
My starter smells bad. Is it safe?
If your starter smells sharp, putrid, or like rotten eggs, discard half and feed fresh flour and water. A healthy starter smells tangy, fruity, or yogurty thanks to well-balanced wild fermentation.
How do I know when my dough is ready to bake?
The dough should look slightly domed, spring back slowly when lightly pressed, and feel airy. Surface bubbles and a gentle wiggle signal the wild fermentation is at its peak for baking.
How can I get bigger holes in my country loaf?
Use higher hydration dough, gentle stretch-and-folds, and avoid over-handling before shaping. Wild fermentation activity and stronger gluten allow gas pockets to expand, producing the rustic, open crumb.
Why did my sourdough loaf turn out dense?
Denseness comes from underfermentation, a weak starter, or overproofing. Let your wild fermentation go longer, feed your starter more frequently, and adjust rise times based on dough and room temperature readings.