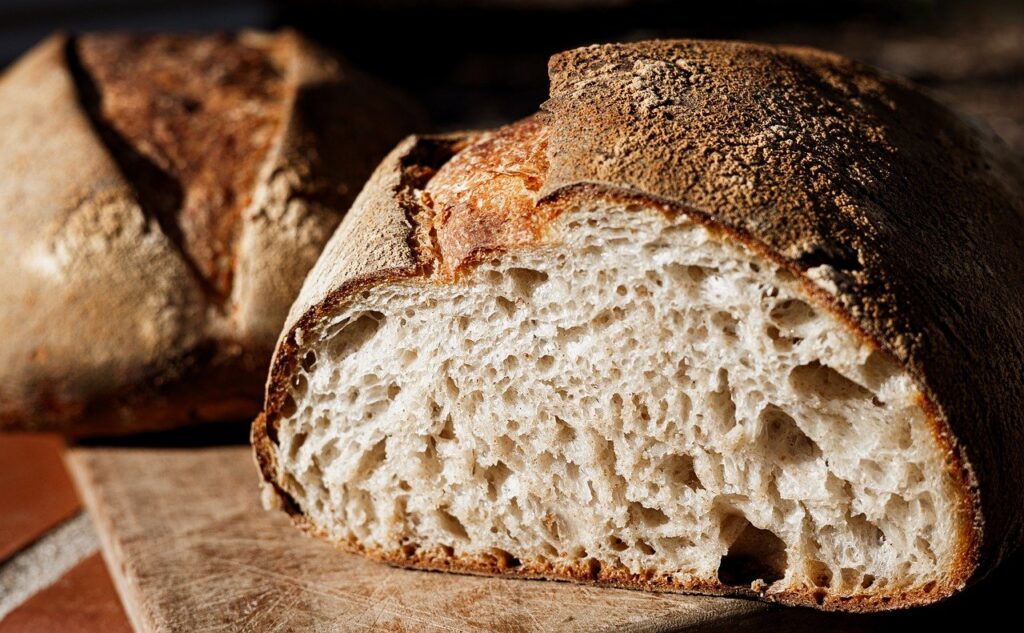
Picture shaping a loaf that holds together like a dream—no tearing, just silky stretch. That magic comes from many factors, but understanding ph levels in wild fermentation sourdough unlocks reliable structure you can count on.
Bakers who experiment with sourdough quickly discover the visible and textural clues linked to ph levels. From airy, open crumbs to tight, dense loaves, pH can make or break the dough’s strength during wild fermentation.
When you dig into how acidity guides fermentation, you gain clear steps for steering your loaves toward flavor and texture goals. This article will help you use pH to your advantage in wild fermentation sourdough.
Using pH Ranges to Get Predictable Results Every Bake
Controlling pH levels gives you a repeatable framework for shaping dough strength and structure. It’s a game-changer for anyone committed to wild fermentation sourdough.
Instead of flying blind, you’ll start to connect the dots: from starter maturity and flour choice to temperature and fermentation timelines, all mapped by real pH numbers.
Why Start Testing pH Levels
Measuring pH adds precision to sourdough routines. You’ll see what is happening inside, beyond what your hands or eyes detect. Many bakery pros use pH as their go-to diagnostic tool.
If a dough doesn’t spring as expected, checking the pH can show if it’s under- or over-fermented. Tracking this metric helps troubleshoot difficult starters as well.
Adding pH data to your baking notes can guide improvements. You can compare, for example, how two flours or two temperatures affect the pace of acidification in your wild fermentation.
Setting Yourself Up for Measurable Consistency
A starter’s pH often starts near neutral and gradually drops as lactobacillus and wild yeasts acidify the mix. Most mature sourdough starters settle around pH 3.8–4.5.
If a dough starts high and stays high, gluten won’t strengthen or relax properly. If acids build up too fast, structure collapses. You’ll want strategies for both edges, using pH as your guide.
Some bakers keep a color-coded pH strip chart nearby, while others log digital measurements at set hours. Both routines boost consistency across batches of wild fermentation dough.
| pH Range | Dough Behavior | Expected Structure | Baker’s Action |
|---|---|---|---|
| 6.0–5.5 | Early fermentation, low acidity | Sticky, weak gluten forms | Allow more time for acids to develop |
| 5.5–4.5 | Active fermentation, optimal zone | Elastic, extensible, strong structure | Shape and ferment for ideal crumb |
| 4.5–4.0 | Late fermentation, higher acidity | Crumbling, gluten weakening | Reduce proof time, chill if needed |
| <4.0 | Very acidic, overfermented | Collapsed, gummy or dry | Reduce fermentation or refresh the starter |
| Varies with flour | Flour minerals buffer acidity | Structure tightens or softens | Adjust hydration or blend flours |
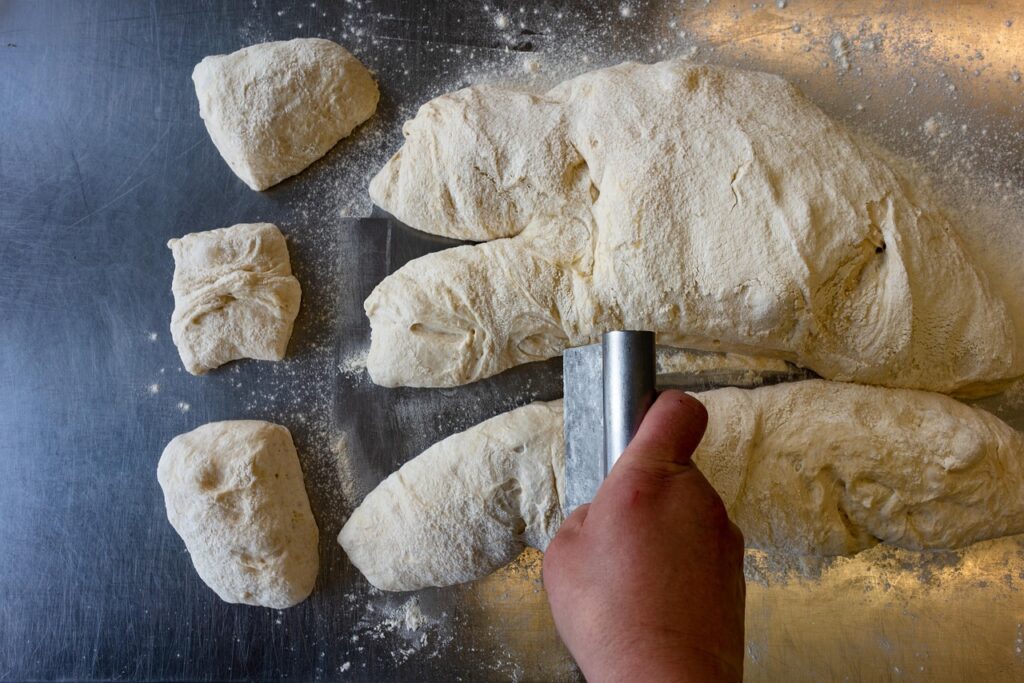
Matching Dough Texture with Step-by-Step pH Adjustment
Dialing in pH levels during wild fermentation lets you target specific crumb, crust, and strength characteristics—critical for bakers seeking custom results for different loaves.
Flavor, chew, and rise are all on the table when you make pH a guiding metric. Your dough will be easier to troubleshoot as well as to replicate for future bakes.
Fine-Tuning with Acidic Boosts
Sometimes, flours with fewer minerals or newer sourdough starters don’t acidify quickly. In those cases, you can gently bump acidity with apple cider vinegar or yogurt.
- Measure pH after adding acid to avoid overshooting.
- Add acid in small increments to stay in the ideal window.
- Monitor gluten tension during bulk fermentation to see if it matches the expected pH.
- If structure gets tight quickly, reduce acid in future bakes.
- Use flavor as a secondary marker—acidity boosts tang, so match to your taste preference.
Matching pH with gluten strength helps prevent tight, dry crumbs or dense, under-proofed loaves, especially when baking repeat recipes.
Checklist: Steps for Targeting pH for Specific Breads
Take a measurement of pH at mixing, after bulk fermentation, and before baking. You’ll notice shifts that align with structure and flavor. Adjust next time for your favorite result.
- Test starter pH before mixing to confirm it’s ready.
- Log each pH measurement and note the dough texture.
- For stiffer dough, try lowering pH sooner with warmer temperatures.
- For airier open crumbs, encourage slower acid development at cooler temps.
- If dough slackens early, test for sharp drops in pH, then adjust next proof accordingly.
Collecting this data lets you create your unique baking ‘playbook’ for each flour and environment.
Connecting Acidity, Fermentation Time, and Gluten for Reliable Crumb Structure
You can harness the relationship between pH levels, wild fermentation speed, and gluten development to plan bakes that fit your available schedule and desired structure.
Dough with balanced acidity ferments at a steady pace, letting gluten bonds form strong links that trap gas bubbles and create a tender, open crumb.
Scenario: Planning a Weekend Bake
Imagine setting up a Saturday schedule for sourdough: Mix before bed, let the dough ferment overnight, and bake in the morning. You’d want a slow pH drop, hitting 4.6–4.2 at mix’s end.
To nudge the dough towards this target window, slightly decrease starter percentage or use cooler water. This maintains gluten structure until morning, avoiding the risk of collapse.
If the dough is already near pH 4.0 at midnight, shape right away and chill, then bake straight from the fridge. This adapts sourdough timing precisely using pH awareness.
Rule: Don’t Let pH Drop Below 4.0 Unchecked
Structure suffers in wild fermentation dough when acids accumulate unchecked. Safeguard your gluten by monitoring pH at regular checkpoints—mix, bulk, and proof. A reliable sweet spot ranges from 4.2–4.5 at shaping time.
Set a reminder or visual cue so you’re not caught guessing as you near the end of proof. Even a simple sticky note helps.
If you notice a dramatic drop below pH 4.0, take action: shape immediately or refrigerate, rather than waiting and risking gummy or collapsed bread. Protective steps matter as much as measurements.
Analyzing Common pH Problems in Sourdough Baking
Recognizing what pH levels reveal helps you spot brewing issues before they sabotage a wild fermentation bake. You’ll learn to act fast when weakness or collapse looms.
Common sourdough complaints—weak loaf, flat shape, crumbly texture, or gummy interiors—each link directly to the pH trajectory from starter to finished dough.
Troubleshooting Tight or Weak Loaves
If a crumb shreds easily or loaves feel tight, pH may have dropped too rapidly. Over-acidification breaks gluten bonds prematurely, resulting in a lack of oven spring.
To remedy, reduce ferment time or starter amount next batch. Another strategy is increasing the dough’s temperature during initial fermentation for a gentler acid curve.
This lets you catch early warning signs—sticky dough, minimal rise, or a pronounced tang—and adapt before shaping next time.
Restoring Structure When Dough Overferments
When bread collapses or comes out sticky, check if pH is below 4.0 after bulk or proof. That’s a classic sign of wild fermentation pushing too far.
Hold back on subsequent fermentations by reducing time, starter, or temperature. Immediately chill over-acidified doughs: cold slows acid activity, saving structure and flavor.
By tracking pH, your response becomes quicker and more effective, preventing wasted ingredients and frustration across future bakes.
Building Flavor and Shelf Life Through pH Management
Manipulating pH levels during wild fermentation lets you design bread not just for structure, but also for flavor depth and long-lasting freshness at room temperature.
Loaves finished in the right acidic range taste bright, keep longer, and fend off spoilage. Managing this balance transforms home and professional sourdough routines.
Mini-Process: Scaling Shelf Life Up or Down
For a chewy crust and crumb that stays soft after days, aim to finish the final proof near pH 4.3. More acidic bread resists mold but can taste sharper, so adjust to your preference.
Breads for quick consumption can end at higher pH, like 4.6, for delicate flavor and thinner crust. Always pair pH targets with storage plans to preserve ideal freshness.
This method lets you create signature bread profiles that stand out at markets, potlucks, or family tables, matched to handling and eating timelines.
Analogies for Remembering the Ideal pH Range
Think of the perfect sourdough crumb like a ripe peach: too firm and it lacks juiciness; too soft and it gets mushy. Hitting the sweet spot—pH 4.2–4.5—yields bread that’s flavorful and timeless.
For lasting storage, aim closer to the “firm but juicy” zone. If you want maximum tang, drop the pH a tad further, but plan for quicker consumption to avoid staling.
Tying taste memory to pH readings helps you hit your goals batch after batch.
Balancing Acidification and Dough Strength for Every Flour
Bakers experimenting with heritage, ancient, or blended flours use pH tracking to discover which combinations yield the best dough strength in wild fermentation sourdough.
Flours rich in minerals or natural enzymes change acidification speed and tolerance. Knowing this, you can adapt every step for improved results by keeping an eye on pH levels.
Checklist: Matching Hydration and Fermentation to Flour Type
Choose stiffer dough with high-protein flours, but test pH hourly as acidification moves quickly. For weaker grains, stretch bulk time and nudge temperature upwards for a slower, steadier drop into the ideal pH window.
With dark whole grains, expect a buffered acid curve. Following the pH level rather than just the clock helps get reliable oven spring and chewy texture, regardless of flour.
Always adjust hydration or add supporting white flour if a single-origin batch falls below pH 4.0 early. The flour’s unique chemistry will guide your tweaks by way of pH measurement.
Summarizing Key pH-Level Lessons for Sourdough Bakers
Tracking pH levels changes the home and professional baker’s experience, transforming wild fermentation from unpredictable to reliably delicious through clear numbers and actionable steps.
Flour, time, temperature, and starter activity all connect through the pace of acidification, made measurable by simple pH tests. Each step, from mix to final proof, becomes easier to troubleshoot and repeat.
If you match your baking habits and adjustments to each sourdough’s pH, you’ll unlock the textures, flavors, and crusts you dream about every bake. Make those notes and test strips part of your toolkit today.
Frequently Asked Questions
What is the best pH range for wild fermentation sourdough dough strength?
The optimal pH range for balancing structure and extensibility in wild fermentation sourdough sits between 4.2 and 4.5. This fosters stable gluten bonds and a moist, open crumb.
How do I measure pH during fermentation?
Use digital pH meters or color-coded test strips designed for food. Test at mix, end of bulk, and pre-bake to track acidification and make informed adjustments to your next bake.
Why does dough collapse when pH drops too low?
Acid breaks down gluten as pH falls below 4.0, causing dough to weaken and collapse. Act early by monitoring pH and refrigerating dough before it becomes over-acidified for best results.
Can adjusting starter feeding affect dough pH?
Absolutely. Using a more mature, acidic starter or feeding at higher ratios slows acidification, making it easier to stay within the ideal pH window and achieve consistent wild fermentation results.
Why do different flours require different fermentation strategies with pH?
Each flour’s mineral and enzyme content buffers acids differently, shifting their reaction to wild fermentation. Monitor pH often, and adjust hydration, temperature, and mix-ins to suit the specific flour for best structure.