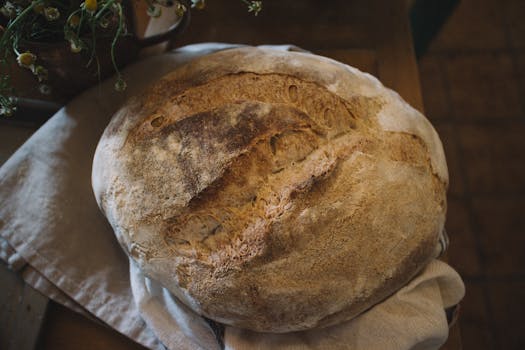
Biting into a wild fermentation sourdough with a glossy, airy open crumb just feels special. For many bakers, high hydration dough unlocks a new world of possibility — transforming humble ingredients into crusty rustic loaves with an irresistible, moist interior.
Wild fermentation offers both flavor depth and challenges, which means every baker faces the unpredictable power of live cultures and variable hydration. The pursuit of a chewy, airy sourdough crumb has become a rewarding quest for anyone excited by bread’s natural magic.
If you’ve ever gazed at bakery loaves and wondered how to capture that wild, lace-like crumb at home, this guide will help. Let’s look at proven steps and smart adjustments to reliably achieve high hydration dough open-crumb results — without mystery or guesswork.
Shaping Wet Dough for More Lift and Structure
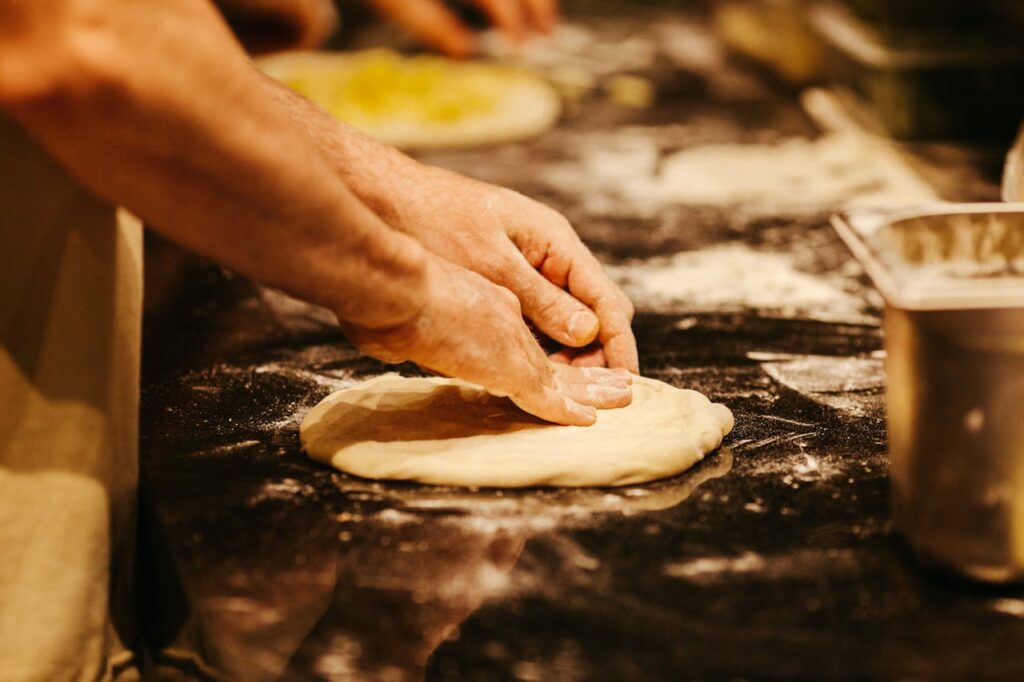
The first step for better open crumb wild fermentation sourdough is to adapt your handling. Wet doughs behave differently and require a gentle, assured technique during shaping.
Light, swift movements help retain the dough’s internal bubbles. Instead of rough kneading, think careful tucking and folding to maintain the open structure you want.
Gentle Shaping: The Envelope Fold Method
Start by flouring your work surface lightly. Turn out the dough and gently stretch one edge up and fold it to the center, repeating for each side to create a loose rectangle.
The envelope fold traps gas inside while tightening the dough’s structure. This minimizes sticking and prevents tearing, even when the dough feels almost pourable at higher hydration.
Imagine gently smoothing a bedsheet—your aim is to stretch and gather, not compress. This method is easy to repeat and helps create those coveted, irregular crumb holes.
Bench Rest for Relaxed Gluten
After the initial fold, let your dough sit uncovered for 20–30 minutes. This “bench rest” period allows gluten strands to relax, making the next shaping step much more manageable.
A relaxed dough lets you avoid over-handling, preserving more gas for the oven spring. Watch for a noticeable flattening and increased elasticity in the dough during this rest.
If you poke gently and the dough holds its shape, you’re ready for the final shaping. Add a very light dusting of flour to prevent sticking before the final moves.
| Shaping Style | Hydration % | Results | When to Use |
|---|---|---|---|
| Boule (Round) | 70–80 | Lofty crumb, rustic look | Soft, high hydration dough needing extra tension |
| Bâtard (Oval) | 75–85 | Elongated holes, more open crumb | Intermediate bakers optimizing oven spring |
| Letter Fold | 80–85 | Maximum gas retention, airy crumb | Advanced wild fermentation and high hydration |
| Preshape Only | 75–78 | Subtle holes, less structure | Lighter handling, delicate or sprouted flour blends |
| Tight Roll | 65–72 | Tighter crumb, small holes | Breads needing more shape retention in baking |
Hydration Percent and Flour Types: Getting the Ratios Right
Dialing in water and flour ratios is a clear path to achieving that sought-after open crumb. Start by accurately weighing ingredients and understanding each flour’s absorption.
High hydration dough can range from 75% to over 85% water by baker’s percentage. Each flour type absorbs water differently and can make the dough feel sticky or slack.
Whole Wheat vs. Bread Flour in High Hydration Mixing
Whole wheat flour soaks up water rapidly, adding earthy flavor but limiting open crumb size. Strong bread flours, with their higher gluten, help dough trap bigger pockets of gas.
- Use high-protein bread flour for maximized open crumb because it supports gas retention and dough strength in high hydration mixes.
- Blend up to 20% whole wheat for color, mild bran flavor, and still a relatively open crumb if you stretch your fermentation slightly.
- Upgrade to artisan flours (e.g., stone-ground or freshly milled) for wild flavors, but adjust hydration downward 2–5% as these absorb water unpredictably.
- If dough pools out or won’t hold form, lower hydration by 2–3% on your next bake for easier shaping and better oven spring.
- Rye flour can be included at 5–10% for sour depth, but keeps your crumb finer; offset with extra stretch-and-folds for structure.
Goal: find a flour blend that supports both elasticity and open structure. Observe each batch to dial in adjustments, noting changes in elasticity, spread, and final crumb.
Using Springs and Room Temperatures Wisely
Higher hydration ferments faster, especially with wild starters. Seasonally, warmer rooms quicken activity, while cooler spaces slow it down. Note ambient effects on dough feel.
- Ferment in a slightly cooler space to allow additional stretch-and-folds for wild fermentation sourdough to develop full open crumb potential and deeper flavor development.
- Use a dough thermometer. Target 75–78°F for bulk fermentation. Cooler temps mean longer time, but more flavor and open holes.
- Aim for a uniform dough temperature to prevent uneven gas bubbles in the final loaf—gently rotate your dough tub if needed during bulk rest periods.
- Relax the dough’s gluten with a 30-minute autolyse—mix water and flour before adding starter. This primes high hydration dough for wild structure and easier stretching.
- Observe the dough’s spread: too slack could mean over-fermentation or too much water. Adjust times or water down for your next bake based on your hands-on feel.
Smart hydration and flour management build wild fermentation doughs that rise tall and slice open with that signature lace-like crumb.
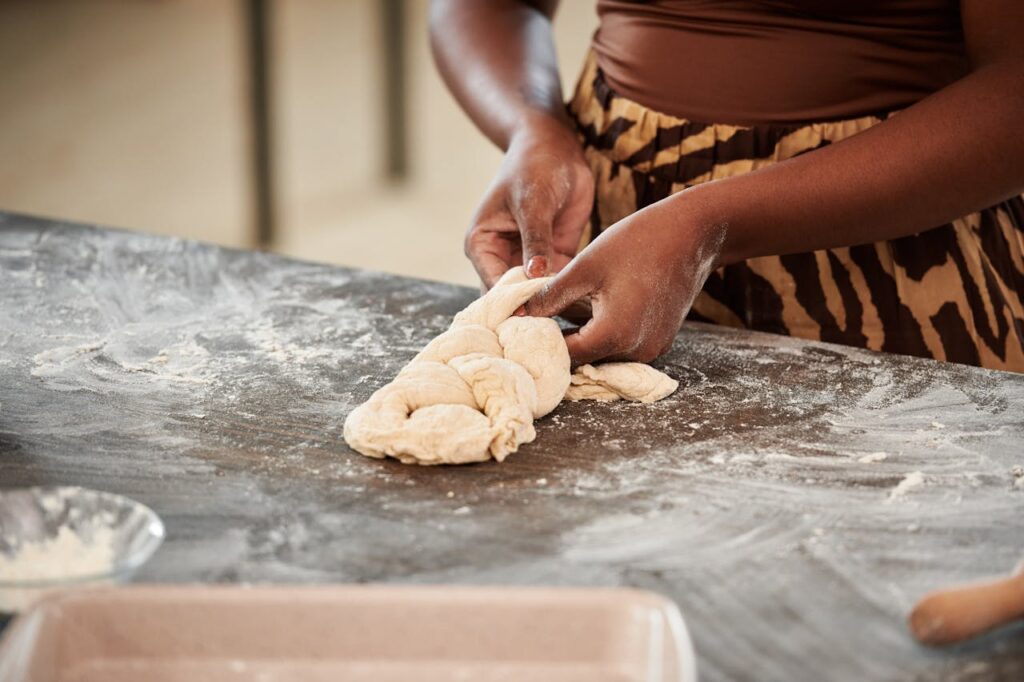
Stretch-and-Fold for Open Wild Fermentation Structure
Frequent, gentle stretch-and-folds are essential for wild fermentation doughs above 75% hydration. Each round develops elasticity and traps bigger air pockets, critical for open crumb.
Think of it as gradually assembling a trampoline—the gluten network tightens and lifts the dough with every pass, supporting the wild structure needed for airy loaves.
Quick Guide: Stretch-and-Fold Sequence
During bulk fermentation, perform four rounds of stretch-and-folds, spaced 30–45 minutes apart. Wet hands before each step for less sticking and cleaner folds.
Gently pull one side of the dough up and drape it over itself, rotating the bowl a quarter turn between folds until all sides are stretched and folded. Keep movements deliberate but soft.
After each round, notice the dough tightening and holding its shape a little more. Minimize deflation by working swiftly, keeping high hydration dough airy and wild fermentation bubbles intact.
Recognizing Proper Fermentation Windows
Wild fermentation is visible; look for a 50–70% rise in dough volume, jiggly movement, and bubbles along the surface. Poke gently—if it springs back slowly, it’s ready.
Wild sourdough fermentation can take anywhere from 4 to 7 hours at 75°F. Err on the side of patience, letting the structure build naturally for optimal open crumb.
Moving too soon or stretching excessively risks degassing, so observe cues closely. This patience results in open, web-like wild fermentation structure throughout the finished crumb.
Scoring and Baking: Setting the Final Structure for Open Crumb
Precise scoring determines how high hydration dough expands during baking and gives wild fermentation sourdough that dramatic open structure and beautiful ear. Your cuts set the loaf’s expansion path.
Score deep enough—about half an inch—and slightly diagonally. This directs oven spring upward, promoting more open pockets within the finished crumb.
Light Steaming for Superior Oven Spring
Introduce steam in the first 15 minutes to keep the crust soft. This lets the loaf expand and set before crisping, so the open crumb sets in place without tearing.
Place a pan of boiling water at the oven’s base, or bake in a preheated Dutch oven. Open the oven at the 15-minute mark to release steam and brown the crust.
Steam is essential for wild fermentation structure; a dry oven hardens the crust too soon, stifling high hydration dough rise and resulting in a denser, less open interior.
Flavor and Fermentation Nuances in Wet Dough Sourdough
Wild fermentation sourdough develops bold, tangy flavors with high hydration. Longer, colder fermentation deepens complexity and enhances moisture retention for an even glossier, more open crumb.
Slightly over-fermented doughs gain a stronger tang, but risk over-collapsing during baking. Find a balance by using a cold retard in the refrigerator after shaping to rein in wild activity.
Boosting Acidity and Aroma
If you crave sharp sour notes, extend bulk fermentation by 30–60 minutes. Balance with a gentle touch during shaping to avoid deflating airy, high hydration dough.
For more complex aroma, swap a portion of bread flour for whole grain or spelt. The wild microbes in these flours amplify natural fermentation and flavor, building a layered, rustic character.
Finish by letting shaped loaves cold-proof overnight. The slow, wild fermentation enhances aroma and moisture, resulting in a sliceable crust and an open, lace-like crumb in every piece.
Wild Fermentation Missteps and Recovery
If you notice weak oven spring or large holes around the crust but not inside, the dough was over-proofed or under-shaped. Plan shorter bulk time next batch or add an extra fold early on.
Dense or gummy centers in high hydration loaves hint at underbaking or too-wet dough. Extend baking by 5–10 minutes and lower hydration by 2% for more control in future bakes.
Always cool the loaf completely before slicing. Warm wild fermentation loaves are tempting but still finishing their structure—cutting too soon compresses the open crumb. Exercise patience for best results.
Frequently Asked Questions
What is considered high hydration for wild fermentation sourdough?
High hydration means a dough with 75% to 85% water relative to flour weight by baker’s percentage. This creates better open crumb and moist texture, but requires gentle handling and strong gluten development.
How can I reduce stickiness in high hydration dough?
Use wet hands and minimal flour dusting when handling. Shape dough on a well-floured surface if needed. Cold proofing after shaping also helps make sticky dough easier to work with and score.
Why are there dense patches in my open crumb wild fermentation sourdough?
Dense patches usually result from underfermented dough, insufficient stretching, or shaping too firmly. Focus on longer bulk fermentation, gentle shaping, and letting the dough rest fully before baking for a more open crumb.
Can I achieve open crumb using only whole wheat flour?
100% whole wheat will produce a tighter crumb due to bran interference, but blending 20–30% whole wheat with bread flour keeps texture airy while boosting nutrition and wild sour flavors.
How long does wild fermentation sourdough take at high hydration?
Fermentation time depends on room temperature and starter strength. At 75°F, bulk fermentation usually takes 4–7 hours, with an additional 8–14 hours cold retardation for the best wild flavor and open crumb.