The rise of slow-crafted bread has captured both home bakers and professionals. When you extend the process with multi day fermentation, wild sourdough transforms from good to truly outstanding. This patient approach builds flavor and reveals subtleties found in the very best artisan loaves.
Bread flavor and texture often hinge on time—specifically, scheduling and tending multiple fermentation phases. Long, slow ferments using wild yeasts yield deeper complexity, extended shelf life, and crumb structures you can’t replicate with shortcuts. Bakers who invest that time see and taste the difference in every slice.
If you’ve wondered why some sourdough seems impossibly aromatic, crackling, and delicious, stick around. You’ll find clear steps, checklists, and comparisons to apply the art of multi day fermentation for wild sourdough, whether you’re curious or looking for your next bread-baking breakthrough.
Building Big Flavor with Simple Timing Shifts
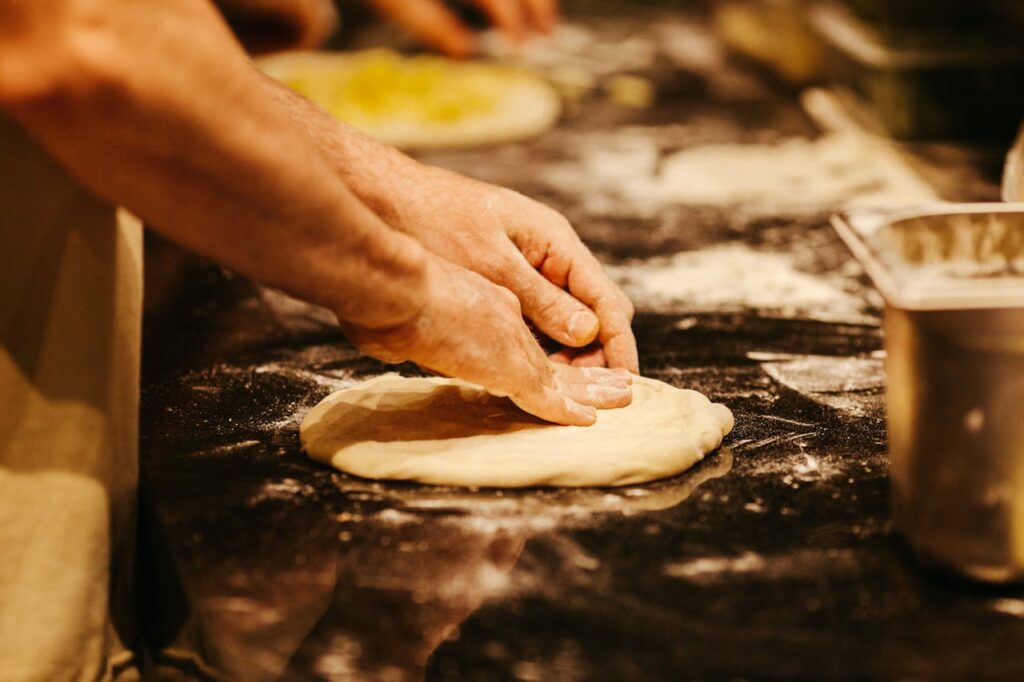
Set your bake up for success by planning stages that stretch over two or three days. Each added hour contributes distinct acids, flavors, and dough strength. This translates into artisan bread that stands out.
For wild sourdough, choosing multi day fermentation allows the natural wild yeast community in your starter to develop slowly, feeding gradually and building a foundation for nuanced, mature flavors in your finished loaf.
Stagger Mixing, Bulk Ferment, and Proofing Stages
To practice, prepare your dough and let it bulk ferment at room temperature until it shows visible air pockets and doubles in height. Afterward, chill the dough overnight, which slows activity and unlocks sweet, lactic, and tangy notes.
Letting dough rest in the fridge after an initial rise gives you flexibility with busy schedules and ensures each phase reaches optimal flavor. Try this once, and you’ll notice the subtle difference when slicing into the loaf.
Repeatable results come from tracking timing and temperature—write down when you mix and move your dough. Adjust under- or over-proofed loaves by tweaking the length of each phase next time for a more open or dense crumb.
Harness Flavor Development Through Rest
Picture resting your dough like marinating a steak—more time means deeper infusion. In wild sourdough, slow fermentation gives wild microbes room to develop acids and aromas naturally present in grains.
This gradual buildup amplifies flavor and reduces harshness. Instead of quick sours, you’ll find soft, gently tangy undertones and increased digestibility, all from the patience invested during multi day fermentation.
When the dough looks relaxed, with a puffy surface and gentle resistance, it’s usually ready for shaping or a further retard in the fridge. If rushed, crust and flavor lack character, so let your schedule stretch a little longer.
| Stage | Duration | Temp | Key Flavor Impact |
|---|---|---|---|
| Initial Mix | 15-30 min | 72-78 F | Gluten kink, seed mild acids |
| Bulk Ferment (room) | 4-6 hr | 72-76 F | Early yeast, open up structure |
| Fridge Retard | 12-48 hr | 35-45 F | Deep acids, aroma blossom |
| Final Proof | 2-5 hr | 72-78 F | Rise, texture sets |
| Bake | 30-50 min | 450-500 F | Crust flavor, Maillard browning |
Planning Your Bake: What to Do and When, Step by Step
You’ll streamline your sourdough project if you break down the entire schedule beforehand. Mapping out when mixing, bulk fermentation, and fridge time will help you hit those peak flavor notes in multi day fermentation.
Visualizing each hand-on and resting window means you’ll never feel rushed or confused about timing. You can fit wild sourdough process into workdays or weekends—just adjust fridge hours or proof temps accordingly.
Building a Detailed Timeline
Create a list with exact times for each phase. Write them on a sticky note: “Mix at 8 PM, fridge at 11 PM, shape at 5 PM tomorrow.” You’re less likely to miss a step and get consistent every bake.
- Start with a 1:2:2 (starter:water:flour) formula for the levain; mix in the evening for overnight flavor development and fresher morning dough.
- Feed your starter every 8–12 hours during multi day fermentation. This keeps the wild yeast colony vigorous, so dough always rises predictably and achieves a full, open crumb.
- Choose fridge-proofing when you need flexibility. Place shaped dough into the fridge after a short bench rest to hold until baking fits your schedule.
- Let dough come to slight room temperature before scoring and baking. This removes chill that slows oven spring and evens out finished crumb flavor.
- Slice and test after a minimum 45-minute rest. This ensures crust sets and internal moisture distributes, allowing you to observe how schedule tweaks change aroma, crust, and chew.
If sticking to a written plan, you’ll find yourself with tastier bread and more free time. Templates, calendars, or phone alerts work just as well—pick the system that fits your habits.
Building in Flexibility for Weekdays or Weekends
Multi day fermentation isn’t rigid—you have room to adjust. For weekday bakes, mix at night, bulk ferment a few hours, and refrigerate before work. On weekends, stretch proofing for leisurely, hands-on learning.
- Refrigerate at any proof stage: overnight bulk, shaped loaf, or even after the first rise, depending on your personal schedule.
- Adapt autolyse time to your flour’s absorption; 30 to 90 minutes provides gluten strength without rushing the process.
- Accommodate interruptions by pausing in the fridge; for example, if errands arise mid-process, rest dough cold to keep the fermentation on track.
- Rotate the dough during bulk ferment by folding every 30-60 minutes—this improves structure even on a stretched schedule.
- Double your batch and freeze half after shaping—bake the second loaf later for fresh bread all week.
Giving yourself scheduling options through multi day fermentation keeps the experience rewarding rather than stressful, so baking fits your lifestyle and not the other way around.
Building a Better Loaf: Gluten Strength and Crumb Texture
By stretching out fermentation, every structure in wild sourdough dough can reach its full potential. The gluten matrix develops strong yet extensible bonds for rise and open crumb, while leftover sugars caramelize in the oven for golden crusts.
This process contrasts with single-day bakes, where flavor and texture may seem muted. Slow, wild fermentation ensures the dough’s strength and resilience are built for an exceptional, shattering crust and moist interior.
Tuning Hydration and Dough Handling
Adjust your water percentage (hydration) gradually in each bake. A higher hydration needs more rest and gentle folds, while lower hydration yields a firmer structure. Working with wet hands helps prevent sticking without adding extra flour.
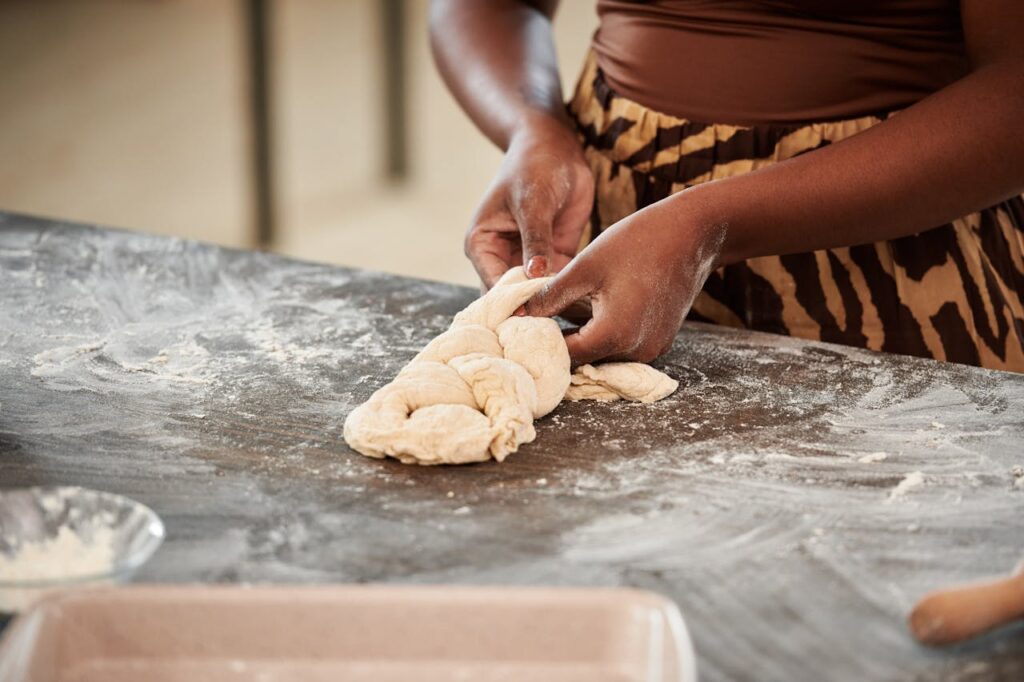
When stretching and folding, lift the dough, stretch toward yourself, then fold over. Repeat from each side every 30–45 minutes during bulk ferment. This maintains air pockets vital for artisan crumb, especially in multi day fermentation bakes.
After several sets, expect a smooth and puffy dough. If it tightens or tears, pause and wait longer between folds to avoid breaking gluten. By watching how dough reacts, you’ll gain intuition, making each bake smoother.
Recognizing When the Dough is Ready
Look for signs like jiggling, expansion, and a domed appearance. When poked with a finger, it should gently spring back. These signals show fermentation progress—especially after a night in the fridge or a long room-temp proof.
Don’t hesitate to let dough ferment longer on cool days or when using a young sourdough starter. Cooler ambient temps slow wild yeast activity in multi day fermentation, requiring a little extra patience for best flavor and structure.
Resist shaping too soon; under-fermented dough tears when shaped and results in a dense or gummy crumb. By going slow, you maximize oven spring, open crumb, and that elusive, vibrant flavor every wild sourdough baker wants.
Flavor, Acidity, and Aroma: Creating Bread with Character
Multi day fermentation lets wild sourdough’s delicate acids and natural aromas deepen, producing bread that’s subtly tangy, layered, and full of complexity. You’ll notice fruit and nut notes that single-day loaves miss entirely.
This approach also improves the aroma when toasting or slicing: the warm, sweet, and almost buttery smell signals a successful fermentation handled with intention and care.
Tweaking Variables for Personalized Bakes
Highlight maltiness or tang by changing rest temperatures. For a brighter, more acidic profile, maintain fermentations near 78 F; for mellower loaves, try colder multi day fermentation in the low 40s F.
Longer fridge times allow acetic acid to build—ideal for those craving a rustic, sharp flavor in wild sourdough. Taste each batch and adjust based on the result, tracking notes for future improvement.
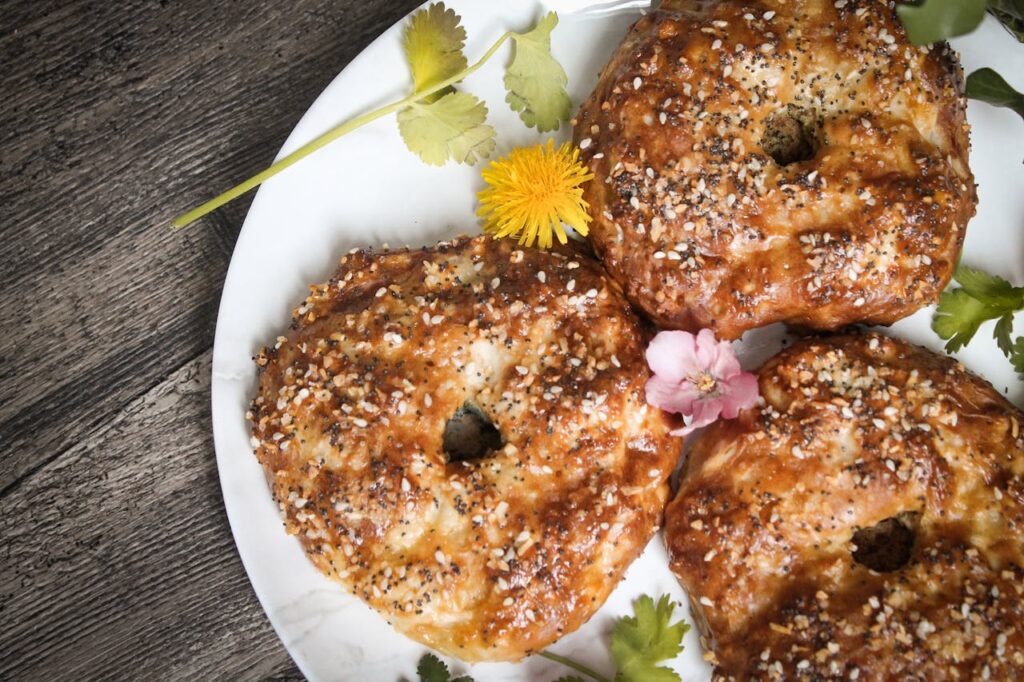
Don’t forget whole grains and seeds. Adding them boosts aroma, flavor, and color with every rise. Toast seeds lightly before mixing to deepen the nutty notes and balance out sourness during fermentation.
Real-World Example: A Family’s Multi Day Ritual
Picture this script: “We mix dough together on Friday, let it rest in the fridge, and shape loaves Saturday morning.” This flexible timeline works for gatherings or regular routines, always yielding flavor-packed bread.
Each family member gets a small task—feeding the starter, folding the dough, or washing bakeware. This makes wild sourdough less intimidating and helps everyone recognize stages like bubbly rise and golden crust development.
After the first few loaves, they record which schedule made for the crispiest crust and best crumb structure. It turns baking into a creative project that deepens both flavor and tradition in every multi day fermentation cycle.
Wrap-Up: The Bread Baker’s Journey with Multi Day Fermentation
Baking wild sourdough with multi day fermentation builds unforgettable flavor, texture, and aroma into every loaf. Taking things slow lets every part of the dough develop its best character—and offers a rhythm you can adapt to any schedule.
Extended fermentation is approachable for both new and experienced bakers. Rather than racing the clock, you’ll enjoy tactile feedback, clear improvements, and a deeper connection to your food and process.
Small changes in timing mean big upgrades in taste, so embrace experimentation! Jot down your unique schedule tweaks, and celebrate each successful loaf as proof that patience and planning pay off for wild sourdough every time.
Frequently Asked Questions
- Does multi day fermentation make sourdough more sour?
Generally, a longer cold ferment promotes both lactic and acetic acid production. If you want extra tang, extend the fridge time to 48 hours, but check the dough’s surface regularly for drying or excess softness. - Can I fit wild sourdough baking into a work week?
Yes. Mix your dough and start bulk fermenting in the evening, then proof in the fridge overnight or through the next workday. Bake when you return—it’s a process designed for busy schedules. - Why is my loaf too dense after multi day fermentation?
This usually means under-proofing or a weak starter. Add an extra fold during bulk ferment, or try letting your dough bulk rise at a slightly higher temperature before retarding in the fridge next bake. - How do I avoid a gummy or underbaked interior?
After baking, let the loaf cool for at least 45 minutes before slicing. If gumminess persists, bake slightly longer or lower your hydration by 2–3% next round. Ensure your oven is fully preheated for a crisp crust. - Is it OK to refrigerate dough at any stage?
Yes, but late-stage fridge proofing in a banneton is most common for wild sourdough. If emergencies pop up, you can pause the process cold at any stage—just resume once you’re able, and allow dough to warm before shaping or baking.