Baking bread at home can sometimes feel intimidating, but a relaxed, no knead sourdough approach helps many beginners find joy and confidence. Instead of tackling tough, sticky dough, you let time and natural fermentation do the work, unlocking artisan results.
This method stands out because wild fermentation allows the dough’s flavor to deepen while reducing the need to handle the dough constantly. It appeals to those who want real sourdough character without learning complex techniques straight away.
If you’re curious about wild fermentation or ready to bake bread from scratch, you’ll discover clear steps and practical examples here. Simple routines and a focus on no knead sourdough empower any newcomer to get baking today.
Your Setup: Assembling Tools and Ingredients for No-Knead Success
With the right setup, anyone prepares for no knead sourdough. Gather a simple toolkit and quality ingredients so your first loaf can be stress-free, organized, and reliably delicious.
Essential tools include a mixing bowl, digital scale, bench scraper, Dutch oven, and proofing basket or kitchen towel. For ingredients, focus on unbleached bread flour, clean filtered water, sea salt, and a lively wild sourdough starter.
Tool Shortlist for Everyday Bakers
A large mixing bowl offers enough space for bulk fermentation and gentle stretching. A bench scraper lets beginners cleanly portion and move dough with minimal sticking—a trick even pros use.
A digital scale truly matters: always measure by weight, not cups, for greater accuracy. Home bakers who prioritize grams gain consistent dough texture and hydration on every bake, avoiding surprise results.
Pick a Dutch oven that’s oven-safe to 450°F, so loaves develop steam-injected crust and proper oven spring. It’s the closest home analogy to a bakery hearth, producing that signature crackle.
Sourcing Wild Sourdough Starter and Choosing Flour
Invite wild fermentation by cultivating or obtaining a healthy sourdough starter. You’ll feed flour and water daily and watch for bubbles, a fruity aroma, and doubling volume—visible cues your starter’s alive.
Unbleached bread flour delivers dependable structure and a pleasing, slightly chewy crumb for no knead sourdough. Whole-grain flours can be added for more flavor complexity as you grow in confidence.
Use filtered or dechlorinated water to encourage the right yeast and bacteria balance. Chlorine in tap water can harm the wild cultures you rely on for authentic sourdough taste and rising power.
| Tool/Ingredient | Purpose | Recommended Choice | Next Step |
|---|---|---|---|
| Mixing Bowl | Combining and fermenting dough | 4-quart glass or steel | Lightly oil before mixing |
| Digital Scale | Accurate measurements | Grams-based, 0.1g precision | Weigh flour and starter separately |
| Dutch Oven | Baking with steam | Heavy, oven-safe to 450°F | Preheat fully before use |
| Unbleached Bread Flour | Structure and flavor | Protein content 11.5%+ | Mix with whole wheat for variety |
| Sourdough Starter | Natural leavening | Active, bubbly, will double | Feed 4-6 hours before mixing |
Shaping a Reliable Routine: Timing and Schedules for Beginners
When you know what each step looks like and how long it takes, no knead sourdough quickly fits into daily routines. Timing transforms uncertainty into steady baking progress—your first wild loaves prove it.
Let’s break down a schedule: Prepare your starter in the morning, mix and ferment the dough at midday, shape in the evening, and bake the next morning for consistent, fresh results.
Wild Fermentation: Timeline Checklist
Feed your starter at 8:00 am: Stir in equal parts flour and water, watching it bubble by lunchtime. By noon, your starter should be peaking and ready to use for mixing.
- Prepare the starter in the morning to ensure it’s bubbly and well-fed by midday. This guarantees the natural yeast and bacteria are at their most active.
- Mix flour, water, salt, and starter between noon and 1:00 pm for maximum freshness and predictable bulk fermentation timing.
- Let the dough rest, covered, at room temperature from 1:00 pm to 8:00 pm. In that window, perform a gentle stretch and fold after the first hour to build gluten naturally.
- Shape the dough after dinner, then cover and refrigerate. Overnight cold proofing gives a tangier flavor and makes morning baking stress-free.
- Bake the loaf first thing the next morning in a preheated Dutch oven. This approach turns no knead sourdough into a sustainable, weekly ritual for any lifestyle.
These steps allow hands-off fermentation while guiding you to recognize cues like dough volume, bubbles, and lightness that signal readiness.
Adapting to Busy Schedules with Strategic Pauses
If life interrupts, wild fermentation is forgiving: Pop the dough in the fridge for up to 24 hours anytime after mixing. Cool fermentation slows time and gives more flexibility.
- Chill your dough after mixing if you need a longer pause. This keeps wild yeast active while preventing over-fermentation and fits around unexpected meetings or errands.
- Let dough warm up for an hour before final shaping and baking—cold dough scores better, shaping’s easier, and bakes with better “ear.”
- Don’t worry if your timing isn’t perfect; taste and crumb improve with practice and mild variation using no knead sourdough methods like this.
- Plan baking mornings around your schedule; fresh sourdough becomes a weekend ritual or a weekday highlight, thanks to routine wild fermentation.
- Track timing in a journal. Noting start times, fold intervals, and rise duration helps refine each bake and builds confidence for adjusting future loaves.
Every step nudges you closer to personalized baking proficiency. Detailed records or simple awareness turn wild fermentation from guesswork into a hobby worth savoring.
Mixing, Stretching, and Folding: Let Time and Fermentation Lead
Every phase of the no knead sourdough process has a purpose. Mixing brings ingredients together, while brief stretching and folding supply structure without hard labor, assisted by wild fermentation’s natural gluten-building magic.
Instead of aggressive kneading, you let the dough rest. This relaxation time supports fermentation and creates extensible gluten—think of it like stretching pizza dough slowly rather than forcing it quickly. Each rest cycle encourages a well-aerated loaf.
The First Mix: Consistency and Hydration
Start by combining flour, water, salt, and starter. Mix until just incorporated and shaggy—don’t overwork. Leave the mixture covered for 30 minutes. This so-called “autolyse” period helps flour hydrate and gluten begin to form spontaneously.
If the dough feels too sticky, wet your hands before the next touch. Use a bench scraper for easy bowl cleaning—the stickiness tells you wild fermentation is underway, and it’ll become smoother with each rest.
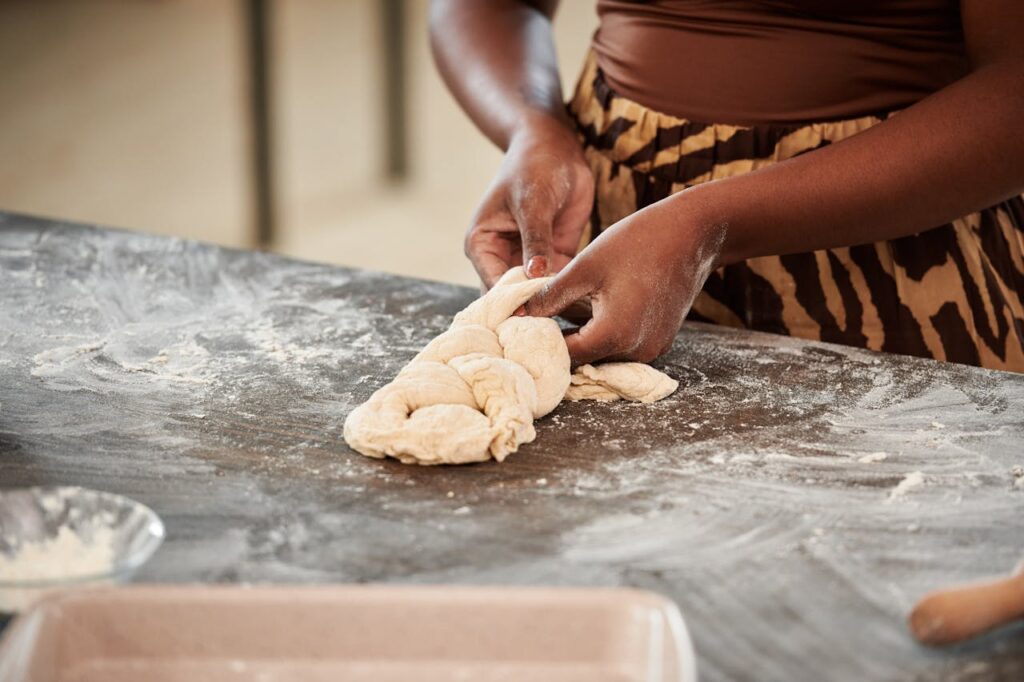
After the autolyse, perform a single set of gentle stretch and folds. Grab one dough edge, stretch upward, and fold it over; repeat around the bowl. You’ve now gently built gluten for a high-rise crumb.
Stretch and Fold with Intent for Wild Fermentation
Return to your dough every 45 minutes for two or three more stretch/fold sets. Each time, you’ll notice the dough growing airier and easier to lift. Don’t rush—slow movement protects its delicate, wild structure.
This hands-off approach lets wild yeast and bacteria bolster gluten while developing distinctive flavor, characteristic of no knead sourdough methods. It’s a good analogy for slow-cooked stews—long, low energy builds richness you’d never get from speed.
Finish with a final rest until bulk fermentation doubles the dough in size. Check for visible bubbles and a soft, pillowy texture. This is your sign the dough’s ready for cold proofing or shaping.
From Shaggy to Shapely: Final Shaping and Overnight Proofing Unpacked
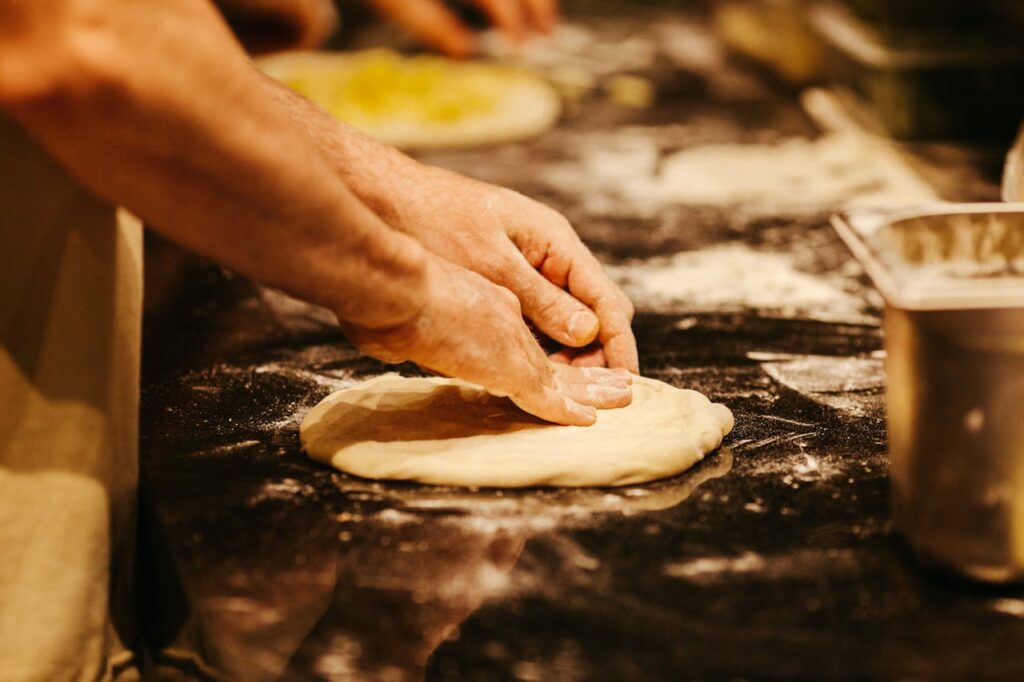
The final shaping step turns sticky dough into a well-formed loaf, setting up wild fermentation for an artisan crust and open crumb. By working with intention, you give structure and support to your rising bread.
Lightly flour your work surface, then tip out the dough. With wet or floured hands, pull edges toward the center, rotating as you go. The dough tightens, gaining a smooth surface that encourages a great rise.
Transferring to Baskets and Building Tension
Set the shaped dough seam side up in a floured banneton basket or a bowl lined with a floured towel. Use rice flour here—it resists sticking during overnight proofing better than wheat flour.
Cover the loaf tightly and place in the refrigerator for a minimum of 8 hours, up to 18 hours. This cold proofing adds signature sour flavor, with fermentation continuing slowly to deepen tanginess and complexity.
After cold proofing, dough should jiggle slightly and show tiny bubbles at the surface. These cues give beginners confidence—they reveal wild fermentation’s work has primed your no knead sourdough for oven baking.
Scoring for Aesthetic and Function
Preheat your Dutch oven to 450°F before removing dough from the fridge. Invert it onto parchment, dust off excess flour, and use a sharp blade to score the top. A swift, decisive slash is safer than hesitating.
Scoring allows steam to escape and encourages oven spring, resulting in a lofty ear and rustic texture. Even simple straight lines or a cross pattern show off wild fermentation’s energy, making each loaf unique.
Lower the dough (on its parchment) into the Dutch oven, cover, and bake for 20 minutes under the lid. Then remove the lid and continue until a deep golden crust forms and the bottom sounds hollow when tapped.
Reading Cues: Texture, Aroma, and Flavor in Wild Sourdough
Every loaf speaks through its texture and scent. Learning these cues helps you improve each batch, linking positive aroma and crumb to the underlying success of wild fermentation in no knead sourdough baking.
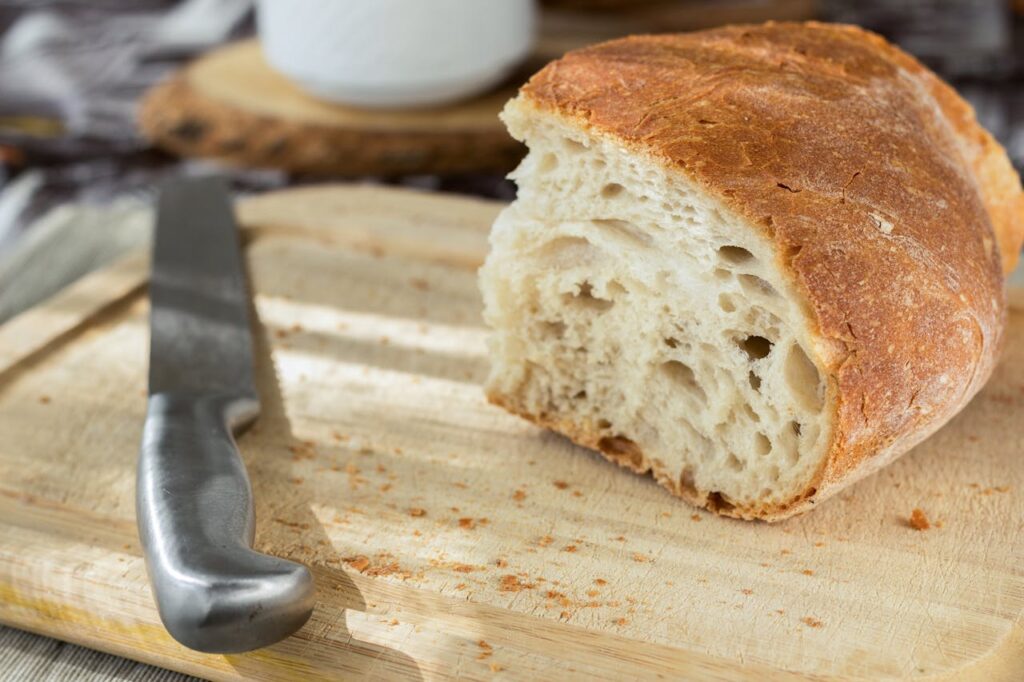
After cooling, a good loaf feels light, with a crisp crust and moist crumb. Its sour tang, nutty undertones, and tiny blisters signal healthy, wild fermentation. Cut in and listen: a soft crackle matches bakery bread.
Texture and Crumb as Guides
Look for irregular holes in the crumb, neither gummy nor dry. A slightly chewy bite—never tough—proves your fermentation and hydration are in balance. These are clear, observable signs that your approach is working.
Wild fermentation loaves sometimes show more open crumb toward the top than bottom. Over time, you’ll adjust shaping or hydration for evenness. Crumb journals or phone photos make progress visible bake by bake.
If a loaf feels dense or flat, check that your starter was active enough and dough bulk fermented fully. Tweaking timing gives you more spring and open crumb next time.
Flavor and Aroma: Trusting Your Senses
Fresh no knead sourdough offers a tang that’s balanced, never overpowering. The aroma—warm, slightly sweet, with lactic acid notes—provides instant feedback about fermentation depth and flour character.
If bread seems bland, extend bulk fermentation or let the cold proof run longer next time. Extra time draws richer flavors from your starter, amplifying complexity and depth unique to wild fermentation.
Tasting crust and crumb side by side helps identify subtle changes. Each bake, jot a few flavor notes: tart, nutty, grassy, or buttery? This awareness refines your future attempts at no knead sourdough.
Enjoying, Sharing, and Storing Your Fresh No-Knead Sourdough
Once your loaf cools, it’s time to slice, share, and store. These small rituals turn baking into community—a wild fermentation tradition passed down and shared, no matter your skill level.
Cut using a serrated knife, supporting the loaf with your free hand. Serve with soft butter, olive oil, or alongside meals. Within the first 24 hours, sourdough’s texture is at its best: moist crumb and shatteringly crisp crust.
- For best storing, let the loaf cool completely, then wrap in cotton or paper to protect crust. Avoid plastic, which steams the crust soft and dampens texture.
- Revive slightly stale sourdough in a hot oven for 8 minutes; the crust crisps back and the interior steams beautifully, reclaiming its original freshness.
- Sourdough freezes extremely well. Slice before freezing, so you can thaw individual pieces in the toaster anytime for quick, wild fermentation flavor boosts.
- Share recipes or starters with friends and family, fostering connections. This spirit of generosity echoes historic wild fermentation traditions across generations.
- Track your results: Take photos, give samples, or organize a monthly bread swap. These gestures help bake wild fermentation into your daily life, no matter how busy.
Returning to your process after sharing a slice invites new discoveries—wild fermentation turns each attempt at no knead sourdough into a chance to refine and rejoice.
Conclusion: Embracing Wild Fermentation with No-Knead Freedom
No knead sourdough baking with wild fermentation brings artisan bread within easy reach for anyone. Each step, from mixing to slicing, unfolds with clear, repeatable cues, guided by time and natural fermentation.
Wild fermentation not only deepens flavor but makes bread baking approachable, repeatable, and deeply rewarding. A humble starter, basic tools, and steady observations create loaves with character and story baked in.
Trust the process, enjoy every experiment, and remember that every no knead sourdough is both delicious and unique—your signature on a tradition as old as bread itself.
Frequently Asked Questions
- How do I know if my wild sourdough starter is ready to use?
Check that your starter doubles in size within 4 to 6 hours of feeding, has a mildly fruity aroma, and is visibly bubbly. When you drop a spoonful in water and it floats, it’s ready for no knead sourdough. - What’s the ideal room temperature for wild fermentation?
A range between 70°F and 75°F (21°C–24°C) is ideal for most wild fermentation. If your kitchen is cooler, bulk fermentation may take longer. Warmer spaces will accelerate the process, so check dough progress rather than the clock. - Can no knead sourdough be made with whole-grain or gluten-free flour?
Absolutely. Substitute up to half the bread flour with whole wheat or rye for more flavor, but monitor hydration and fermentation time. For gluten-free options, follow a dedicated wild fermentation gluten-free recipe for best results and structure. - How do I prevent my dough from sticking to the proofing basket?
Dust the basket generously with rice flour before placing your shaped dough. Rice flour resists sticking far better than wheat flour, ensuring smooth release and professional scoring when you’re ready for a bake. - Why did my loaf turn out dense or flat?
Common reasons are under-proofed dough, inactive starter, or cold dough that hasn’t fully risen. Review bulk fermentation cues: the dough should double in size, feel pillowy, and show visible bubbles before shaping or baking your no knead sourdough.