Watching loaves multiply on your kitchen counter can feel magical, but the real secret behind those bubbling breads lies in scaling up starters at just the right moment. The process transforms familiar routines into a baker’s dance that requires careful attention and timing.
Wild fermentation sourdough isn’t about simply feeding and forgetting. When batches grow in size, scaling up starters has a direct impact on flavor, structure, and the rhythm of your baking. Every jar and bowl tells its own lively story.
This guide lays out every step for scaling up starters alongside practical examples, troubleshooting scripts, and tips for a stress-free wild sourdough journey—so whether you’re baking two loaves or twelve, you’re prepared for any kitchen crescendo.
Creating a Reliable Routine for Large-Batch Wild Sourdough
Establishing a predictable routine anchors your scaling up starters process. Regular feedings and timing adjustments ensure robust growth for wild fermentation sourdough, making it possible to scale with confidence each week.
One routine might involve feeding your starter twice daily for three days before baking, adjusting water and flour ratios to maintain consistent bubbling activity. These habits prevent sluggish fermentations and help cultivate a resilient, versatile starter.
Scheduling Bakes That Rely on Consistency
Choosing the right feeding schedule can make or break large batch bakes. Mark calendar reminders 12 hours apart to encourage activity and spot trends, especially when multiplying wild starter thresholds quickly.
Organizing the kitchen before a bake saves precious minutes. Activities like pre-weighing flour and water or preparing extra containers for scaling up starters cut down wait times and reduce stress as batch sizes grow.
Just as athletes track workouts for results, bakers record ratio adjustments in scaling up starters journals to replicate their best loaves, fine-tuning the process for upcoming events or busy weekends.
Visual Cues Every Baker Should Notice When Scaling
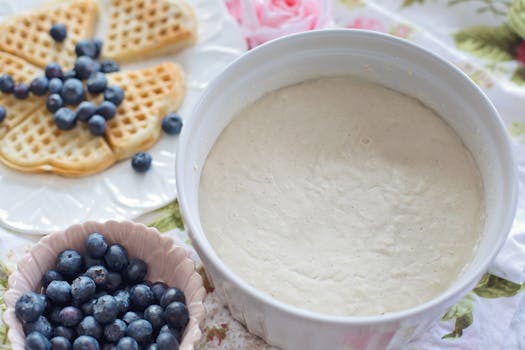
Active starters double within four to six hours after feeding. Watch for domed tops, clusters of bubbles, and a subtle tangy aroma. These signals confirm your wild starter’s readiness to scale and handle a bulk bake.
If a starter appears flat or smells overly pungent or yeasty, it may need extra feedings or a temperature adjustment. Rely on appearance and aroma rather than relying solely on a formula, as wild fermentation always brings new surprises.
Imagine a scenario where you’re prepping for a party. Seeing your starter peak in size with that glossy rise means you’re set for successful scaling; use this as a go-signal before mixing up your dough.
| Starter Amount | Flour (g) | Water (g) | Takeaway |
|---|---|---|---|
| 50g | 50g | 50g | For 1 loaf, single feeding routine |
| 125g | 125g | 125g | For 2–3 loaves, double feeding before bake |
| 200g | 200g | 200g | Ideal for 4–6 loaves, gradual scaling up |
| 350g | 350g | 350g | Large batch, feed in two stages |
| 500g | 500g | 500g | Commercial size, increase monitoring |
Adjusting Flour and Water Ratios for Different Batch Volumes Effectively
Correct ratio adjustments are crucial for scaling up starters without compromising wild fermentation. Matching hydration to your preferred sourdough style, whether you require open crumb or chewy texture, pushes your starter to deliver optimal dough structure every time.
When increasing starter size, measure all ingredients with a digital scale for best results. If your usual recipe calls for a 1:1:1 ratio by weight, keep proportions consistent but multiply each component to match your bake volume precisely.
Using Percentage-Based Calculations for Reliable Results
A baker aiming for 300g of starter (100% hydration) multiplies existing feeding weights accordingly: 100g starter + 100g water + 100g flour. After 4–6 hours at 75°F, check the rise visually and note peak activity before baking.
- Increase all feedings equally to prevent dilution of microbes, ensuring robust fermentation for large batches. Doubling a starter without balancing water and flour can result in sour or sluggish dough.
- Monitor temperature closely; cooler rooms slow wild fermentation. For high-volume scaling up starters, maintain kitchen warmth above 70°F using a proofing box or gentle light if needed.
- Feed two or three times before your baking day to build enough starter slowly, allowing natural yeast and bacteria to thrive. This results in more consistent rise across multiple loaves.
- Use large, food-safe containers with markers for volume. Observing doubling or tripling in size helps catch peak activity at scale, so you don’t risk overproofing or missing the window.
- Stagger baking times when working with several batches. This prevents starter fatigue and makes the process manageable for one person. Always leave 30–60 minutes between mixing dough rounds.
Sticking with ratio scaling and regular monitoring transforms stress into reliable bread results, regardless of how many loaves fill your oven on any given day.
Building Strength Without Over-Feeding Starters
Feed higher flour portions in colder climates. More food means wild yeast remain active and your starter doesn’t collapse mid-scaling. Change the schedule if fermentation seems sluggish or doesn’t produce visible bubbles.
- Limit overfeeding. Use only what you need plus enough for a next feeding to keep microbial balance intact at every scale-up step, especially with wild fermentation sourdoughs.
- Check consistency after every feeding. If dough feels slack or sticky, adjust flour amounts or shorten intervals to firm up the mixture before the final bake.
- Separate discard from your main culture each scaling up starters session to avoid overwhelming the wild microbial ecosystem. Discard goes to pancakes or compost rather than clouding the main jar.
- Test by floating a spoonful in water after feeding at peak rise. If it floats, that reflects optimal yeast activity for scaling up. If not, feed again and repeat the check.
- Label jars with time and temperature. This helps track each fermentation and prevents the confusion of mixing up large and small batch starters on busy days.
Use these checkpoints to ensure vibrant starters no matter how much you increase your wild sourdough production; every loaf deserves a champion rise.
Anticipating Sourdough Challenges When Baking at Scale
Planning for bumps in the road feels rewarding as your scaling up starters workflow grows. A few actionable techniques catch common issues before they spoil an entire bake-day’s effort.
Stay nimble by reserving some starter for emergencies. If a batch fails to rise, immediately refresh your reserve with a 1:1:1 feeding to recover quickly and avoid wasting flour or time.
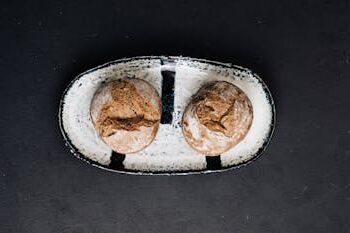
Spotting the Exact Moment Your Large Starter Peaks
Wild starter peaks are dramatic and short-lived. You’ll spot domed surfaces, honeycomb bubbles beneath the top, and a faintly fruity aroma wafting from the jar around the four-hour mark after feeding at 75°F.
Watch for small creases in the starter’s edge where it climbs the container. That’s a sign it’s holding strength. If the dome flattens or bubbles burst rapidly, activity’s peaked and it’s time to proceed.
Tap the container lightly: if the top wobbles and recedes slowly, the gluten network has matured, supporting larger loaf volumes. That means your starter’s ready for scaling up and mixing into dough.
Avoiding Common Mistakes as Bread Volume Grows
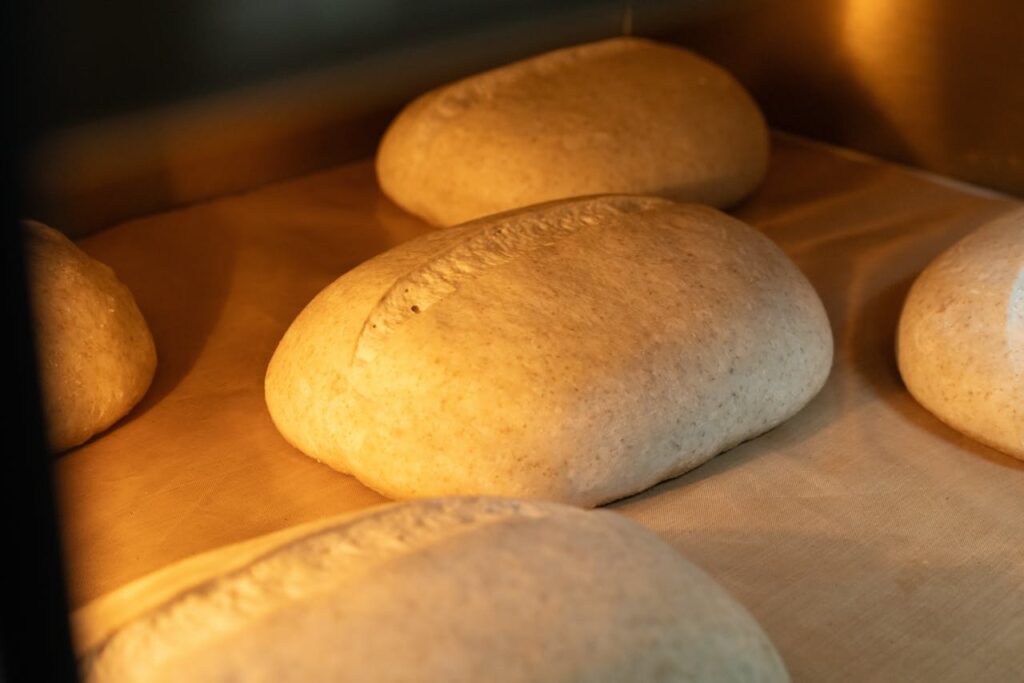
Mixing all dough at once saves minutes but risks underdeveloped crumb or flavor loss in wild sourdough. Instead, split dough into manageable 500–1000g amounts to allow uniform fermentation in each bowl.
If dough sags or smells overly sour, check if feeding intervals are too far apart for your kitchen’s temperature. Close the gaps, use smaller portions, or move your jars to a warmer corner for quicker activity.
Store each batch separately and keep jars covered loosely for airflow. If scaling up starters leaves excess discard, redirect it into waffles or flatbreads before the next session for a zero-waste approach.
Elevating Wild Sourdough Bakes with Confident Scaling Up Starters
Scaling up starters powers every great wild fermentation sourdough bake, giving each loaf lift, flavor, and a sense of timing you can rely on. Adjusting feedings, monitoring activity, and spacing out bakes all contribute to this well-orchestrated process.
Your attention to routine and the small signals from your starter can mean the difference between lackluster results and wildly satisfying bread bakes. Every scaling up starters session strengthens your connection to the dough, passing on knowledge each time.
Embrace each lesson from scaling up, and treat every loaf as an opportunity for improvement. Wild fermentation is always shifting—so track, adjust, and savor the unique character of your homemade bread at any scale you choose.
Frequently Asked Questions
How far in advance should I scale up my starter for a big bake?
Begin scaling up 24-48 hours before baking. Double the size in two or three feedings at regular intervals, monitoring activity and peak rise closely during the process.
Can I feed my starter with whole wheat or rye to add strength when scaling?
Yes, mixing in whole wheat or rye flour adds nutrients and supports robust fermentation. Substitute 10–20% of your flour with wholegrain for the final scale-up feeding.
Does temperature affect the scaling up starters process?
Absolutely. Warmer kitchens (above 70°F) speed fermentation, while cooler spaces slow it down. Adjust schedules and amounts based on observable changes in rise and aroma to match your bake time.
What if my scaled-up starter is too runny or too stiff?
If it’s runny, add a touch more flour and decrease water slightly next feeding. If stiff or dry, add a bit more water. Adjust until consistency is scoopable, light, and bubbly at peak.
How do I store leftover scaled-up starter between big bakes?
Remove a portion, feed it, and refrigerate the rest with a loose lid. Use or refresh within one week. Label containers with dates and amounts to avoid confusion or spoilage.