The thrill of baking wild fermentation sourdough comes from transforming flour, water, and starter into an artisan loaf crowned with bold score patterns and a dramatic ear. Every baker remembers their first crackly crust—those lines are a signature, not just decoration.
Score patterns and the coveted ear don’t just please the eye. They signal a well-fermented dough, control how the loaf expands in the oven, and let you experiment with both function and artistry in each bake.
This guide explores what goes into achieving eye-catching score patterns and a perfect ear using wild fermentation. Whether you’re new or working to refine your method, you’ll find actionable steps and concrete examples to enhance every loaf.
Getting Wild Fermentation Ready for Stunning Loaves
A great ear and crisp score patterns begin long before you grab the blade. You’ll get real control by dialing in wild fermentation conditions, keeping dough strong but flexible for shaping and scoring.
Focus on maintaining a mature sourdough starter and a consistent fermentation curve. This means careful feeding schedules and keen observation, not just following a clock or recipe blindly.
Starter Strength Sets the Stage
Choose a feeding routine that fits your environment. If your kitchen is warm, daily feedings (1:5:5) by weight will keep your starter lively, making score patterns respond sharply once baked.
The starter should double in size within four to six hours when ripe. A starter that lags usually creates sluggish dough, leading to dull or torn score patterns rather than bold lines and ears.
If you’re unsure of your starter’s readiness, drop a spoonful in a cup of water. It should float. A dense starter rarely powers a vibrant oven spring, so repeat this test every few weeks.
Fermentation Timeline: The Telltale Signs to Watch
Look for bubbles through the dough and a smooth surface before shaping. These cues mean wild fermentation created a resilient structure, able to hold intricate score patterns without collapsing.
If you press a damp finger into the dough and the indent springs back slowly, it’s proofed just right. Dough that sticks to your finger or collapses needs a gentler hand or shorter final rise.
End bulk fermentation as soon as the dough feels lighter, not sweaty or slack. Each minute too long sacrifices structure and makes achieving a clean ear more difficult in the oven.
| Sourdough Step | What to Check | Why It Matters | Action Step |
|---|---|---|---|
| Starter Feeding | Doubles in 4-6 hours | Powers oven spring and scoring | Feed at least 1:5:5 ratio |
| Bulk Ferment | Bubbles form, smooth skin | Ensures airy crumb, clean score patterns | Stop when dough feels lighter |
| Shaping | Dough holds shape, slight tension | Supports design and ear formation | Use gentle, quick shaping moves |
| Scoring | Blade cuts clean, no drag | Defines ear and artistic slashes | Chill dough for 30 mins before scoring |
| Baking | Max oven heat, quick steam | Enables robust ear and bloom | Preheat oven and bake with lid or steam |
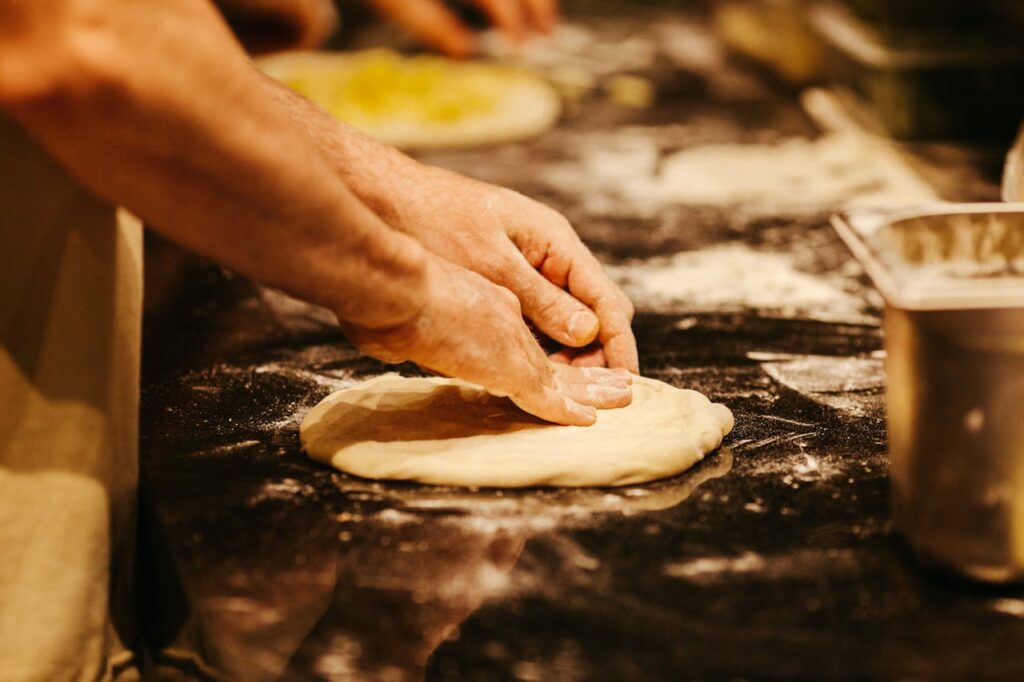
Shaping Tactics to Create Reliable Ears and Score Patterns
Forming a taut surface sets up attractive score patterns and ears. Use decisive movements—pressing, folding, and rolling—to trap gas. This approach lets the dough expand upward, not outward, as it bakes.
If shaping feels awkward, practice with a scrap of dough. Notice how tension forms across the top, like stretching a fitted sheet tightly over a mattress. When the dough holds its shape, you’re ready to score.
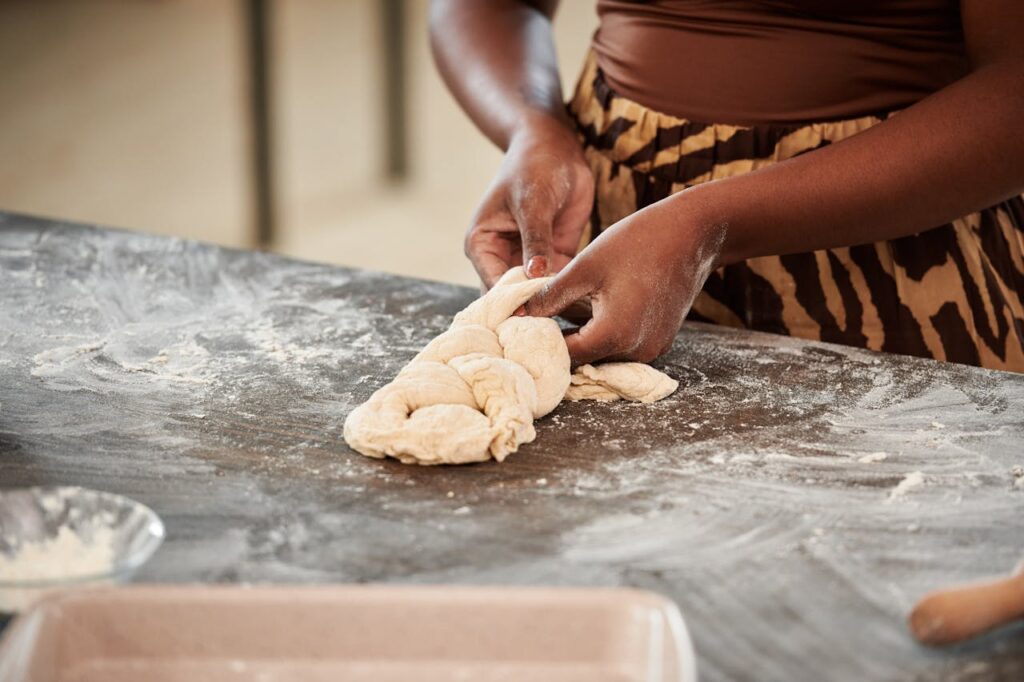
Surface Tension Rules for Score Success
Pull the dough’s surface tight each time you shape. Place hands at the dough edge, then gently scoop underneath while spinning. You’ll watch the surface smooth while the seam seals underneath.
If seams pop open during the final rise, flour your hands less and press the dough more confidently. A taut top supports intricate score patterns—otherwise, the blade drags and the designs tear.
Let shaped loaves rest, uncovered, for 5–10 minutes before final proofing. Resting lets the surface dry slightly. This step makes the blade glide cleanly, improving ear and pattern clarity.
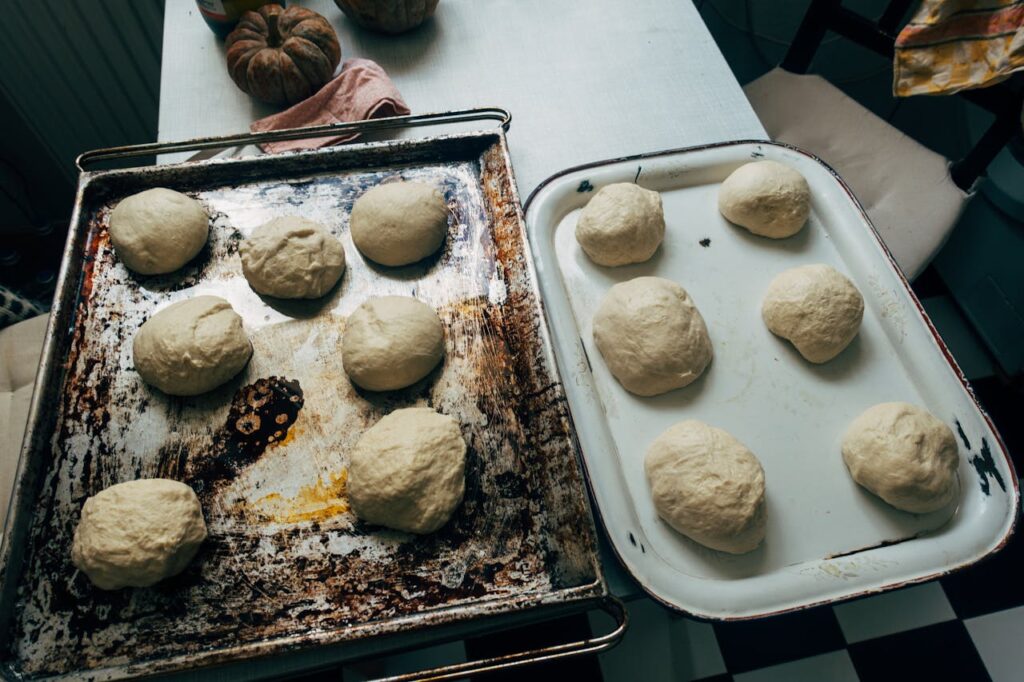
Putting Seam Side Up for Country Loaves
For rustic country-style sourdough, shaping with the seam side up can reveal natural cracks as score patterns. After proofing seam-side up, flip the dough before scoring for a more controlled expansion.
Bakers who prefer organic, rustic looks can use these natural seams as scoring guides—a “nature’s score pattern,” with less need for artistic designs. They can still add one bold slash to encourage an ear.
Try alternating between seam-up and seam-down methods to see which helps your score patterns stand tall in your specific baking environment. A single cut can produce a large ear, or gentle cracks will shine alone.
- Shape dough with firm yet gentle hands: preserves wild fermentation bubbles and creates the tension needed for pronounced score patterns in the oven.
- Start final shaping only after a full bulk ferment: lets the dough develop flavor and structure, helping scores open up and forming a dramatic ear when baked.
- Roll dough from the edges inward during shaping: this traps air in the loaf, setting the stage for bold score patterns and a robust oven spring.
- Seal the seam tightly every time: prevents deformed loaves and keeps the gas where it supports score pattern expansion.
- Practice shaping with small dough pieces: develops muscle memory, so you’ll confidently handle wild fermentation sourdough for artful scores and ears.
Blade Choice, Angle, and Pressure: Simple Rules for Clear Patterns
Switching up your scoring blade and angle has a dramatic effect on score patterns and ear height. Always use a fresh, ultra-sharp razor for crisp, clean cuts in wild fermentation dough.
Hold the blade at about a 30-degree angle to the loaf surface and move swiftly to avoid dragging. With practice, this technique creates a raised edge—the classic ear that bakers cherish.
Test for the Best Cut Each Bake
Practice each bake by scoring one loaf with a straight blade, the next with a curved one. Notice which one gives you sharper lines through the expanded score patterns and taller ears.
Bakers notice immediately when the blade hesitates or dulls: the cuts look ragged, and the ears sag. Swap blades before each bake, even if your current one looks sharp. It’s the single easiest fix for poor patterns.
For loaves proofed in the fridge, cut right after removing from cold. The chilled dough resists drag, letting your blade skate cleanly for defined score patterns and a crisp, bold ear.
- Replace blades after every two bakes: ensures a swift, clean cut for consistently beautiful score patterns and a strong ear in wild fermentation sourdough.
- Use a curved lame for classic ears: this blade scoops under the skin, guiding a dramatic lift as score patterns open and brown in the oven.
- Score only cold dough for fine detail: chilling the shaped loaf firms the surface, supporting crisp score lines and helping tall ears stand up.
- Cut deep for the main score: one decisive pass encourages a full ear and prevents blowouts or ragged score patterns elsewhere on the loaf.
- Try shallow slashes for artistry: keep decorative score patterns light so the dough doesn’t collapse, especially with wild fermentation’s open crumb.
Scoring Approaches That Deliver Identifiable Ears for Wild Fermentation
The best score patterns for wild fermentation sourdough are intentional and repeatable. Practice with a bold single slash before experimenting with intricate designs or crosshatch patterns.
Score your loaf right before baking. If the dough comes from the fridge or is well-chilled, you’ll notice the blade glides, leaving defined lines and enabling the signature ear to form.
Achieve the Classic Ear with One Swift Cut
Begin by scoring a single deep line along the dough’s top, about one-quarter inch deep and at a 30-degree angle. This main score controls the loaf’s expansion and creates an impressive, proud ear.
The ear forms as the top layer of dough lifts and peels back during the intense oven spring. If your score is too shallow or too vertical, you’ll get wide cracks instead of this distinctive edge.
With each try, repeat the single bold cut, using visual cues from previous bakes to adjust your angle and depth for the next batch. Consistency yields better score patterns and ears over time.
Adding Artistic Personality: Leaves, Wheat, or Radiating Arcs
Once you’ve mastered the classic ear, layer in lighter, artistic score patterns such as leaves, wheat stalks, or radiating arcs. These slashes should be shallow—just enough to open slightly in the oven.
Think of each decorative cut as a sketch in firm clay: your blade should barely graze the surface. A confident but gentle wrist gives fluidity to score patterns without interfering with the ear’s rise.
With time, you’ll combine a single bold cut and several decorative lines. Each loaf then tells its story, and every baker has their preferred sequence, reflecting their personality and evolving skill.
| Pattern Type | Blade Angle | Score Depth | Tip for Success |
|---|---|---|---|
| Ear | 30º | 1/4 inch | One long swift slash aids oven spring |
| Leaf | 15º–20º | Shallow | Keep the slashes light for clarity |
| Crosshatch | 30º | Medium | Space even for controlled expansion |
| Wheat Stalk | 20º–30º | Shallow and thin | Use gentle, overlapping cuts |
| Starburst | 15º | Very Shallow | Score from center outward, gently |
Proofing and Baking Variables That Impact Your Final Score
Targeting consistent score patterns and an ear means tracking small-but-mighty variables: dough proofing, fridge time, and oven habits. These factors nudge the dough’s elasticity, changing the way it responds to your scoring.
Proofing too long softens the dough and blurs score patterns. Err on the side of a slightly under-proofed dough for wilder oven spring and more vivid patterning from each cut.
Refrigerated vs Room-Temperature Proofs
Refrigerated proofing tightens the dough’s skin, resulting in sharper and clearer score patterns. Room temperature proofs can be trickier—scores will open dramatically, but details may spread wider or fuse together.
If your climate is humid, try longer fridge proofs (up to 18 hours) and score the dough right from cold. Bakers with drier conditions may benefit from shorter fridge rests, to avoid excessive drying on the loaf.
Ovens with strong bottom heat encourage a bolder ear. If your bottom crust browns too fast, use a double baking sheet underneath to temper heat without compromising your beautiful score patterns.
Steam Strategy for Maximizing Ear Height
Pour a cup of boiling water into a preheated tray as your loaf goes in, or bake in a lidded cast iron pot. Steam suspends the crust formation, allowing score patterns to bloom and an ear to rise proudly.
After 20–25 minutes, remove the lid or steam source to let the loaf color up. An ear caramelizes and crisps, standing tall on well-etched score patterns as steam dissipates and crust hardens.
Let loaves cool completely—resist slicing!—so the cuts stay firm, the crumb sets properly, and your score patterns show off. Cutting hot bread will collapse your achievement in mere seconds.
- Keep fridge below 41 F: cold dough scores clean and yields well-defined ear and crisp score patterns after wild fermentation bulk fermentation.
- Use an oven thermometer: home ovens mislead easily, causing poor oven spring and uneven pattern expansion. Adjust bake to 480 F for best results.
- Add steam at bake start: this delays crust setting, letting score patterns open and the ear develop standing tall on wild fermentation sourdough loaves.
- Uncover halfway through bake: finish with dry, direct heat to caramelize the ear and deepen score pattern contrast on the crust’s surface.
- Cool on wire rack: airflow around the loaf stops crusts from going soggy, preserving the artistic edges of every score pattern you created.
The Role of Flour Types and Hydration in Scoring Outcomes
Alter flour types and hydration to see how wild fermentation doughs react to scoring. Each change brings new texture and behavior—whole grains, high hydration, or blends all influence score patterns and ear prominence.
Bakers who want to experiment can make small-batch tests. Track pattern sharpness, ear height, and crumb structure for each combination and bake.
Whole Grain vs White Flour Loaves
Whole grain doughs absorb more water but ferment quickly, sometimes limiting oven spring. You’ll get earthy, bold flavor but should keep score patterns simple and deep, since the dough may not hold thin, decorative lines as well.
White flour loaves stretch further in wild fermentation, giving extravagant rises and crisp, shell-like ears. These are best for detailed score patterns—try leaves or starbursts for dramatic effect on a pale, crackly surface.
Mixed flour blends let you dial in behavior. If the dough seems delicate, reduce hydration by 3–5 percent. This creates surface tension for better pattern definition and consistent ears.
Hydration’s Effect on Ear and Pattern
Hydration over 80 percent produces a delicate, webby crumb. High-hydration doughs—alive from wild fermentation—must be scored quickly and boldly or they’ll collapse prematurely. They favor a single bold slash for the ear, with less room for decorative patterns.
Lower hydration creates a firmer dough. Score patterns can be more intricate, because the shape holds, and slashes open slowly in the oven, revealing detail over time. Each shift reveals new strengths or trade-offs for the baker.
It helps to keep a scoring notebook with pattern ideas, flour mixes, and hydration notes, paired with photo results and observations about ear height and pattern sharpness.
- Include rye or spelt for bolder flavor and rustic score patterns, but expect a more subdued ear due to their lower gluten potential and denser crumb.
- Swap in bread flour for superior rise and oven spring, giving score patterns a razor’s edge and ears that stand out on any wild fermentation loaf.
- Mix all-purpose and whole wheat for balanced flavor and artistic patterns; use decorative scoring to accentuate unique marbling and crumb structure.
- Adjust hydration for pattern complexity, lowering water content by 5 percent for ornate scores or boosting for a bold single slash and tall ear.
- Record all scoring experiments, flour blends, and observations in a baking journal. This habit narrows in on your personal wild fermentation signature for score patterns and ear styles.
Celebrating Your Signature Sourdough Patterns
From starter care through proofing, shaping, and scoring, the art of wild fermentation sourdough is a journey. Each loaf you score—each ear you achieve—reflects choices in timing, technique, and your evolving intuition.
Scoring rewards mindful practice over perfectionism. Even small tweaks—changing the blade angle, chilling dough, or tightening your shaping—lead to different score patterns and ear expressions. Patterns become your signature, marking progress and personality over time.
Bring curiosity and patience to every bake. Reviewing your patterns, baking notes, and experimenting with new designs will let you grow as a wild fermentation sourdough baker—and help your loaves earn real pride of place on any table.
Frequently Asked Questions
What causes an ear to form on sourdough?
The ear forms when you score at a shallow angle and the dough’s surface lifts and peels back during oven spring. A hot oven and strong, fermented dough unlock the best results. Use one swift, deep slash for a classic ear.
Why don’t my score patterns open up?
If your patterns stay closed, dough may have over-proofed, become too wet, or lacked surface tension. Try shaping with more vigor, scoring chilled dough, and using a new blade to get bolder openings and pronounced score patterns.
Which scoring blade should I use?
Most bakers use a curved lame for ears and a straight blade for decorative work. Swap blades every few bakes to keep cuts clean. Chilled dough makes scoring easier and keeps patterns sharp.
Can I use whole wheat dough for decorative score patterns?
Whole wheat supports simple, deep patterns but might lose intricacy due to heavier crumb structure. Start with one bold cut for a good ear and add shallow decorative lines. Test and track results for each flour blend over time.
What helps prevent my sourdough loaf from collapsing after scoring?
Focus on wild fermentation timing—stop bulk ferment when dough feels lighter, shape with strong tension, and score the loaf cold. This preserves internal gas and ensures that score patterns and ears hold as the loaf expands in the oven.