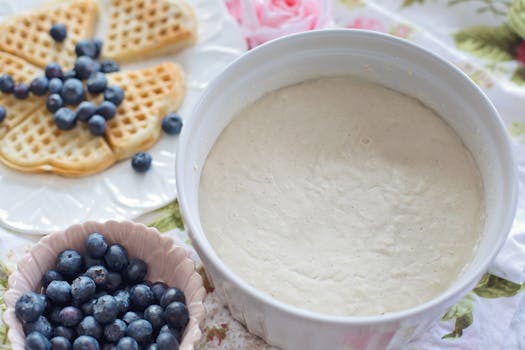
Starting your own wild sourdough starter can seem like a science experiment, but it’s surprisingly simple once you see fermentation in action. With a little patience and a few ingredients, anyone can raise lively wild cultures at home and bake bread with unique flavors.
Baking bread with a wild sourdough starter connects you to traditional methods and deepens your understanding of natural fermentation. Every loaf made with your own starter carries the hallmark of your kitchen’s unique environment and the art of slow transformation.
If you’re ready to bring wild fermentation sourdough into your kitchen, this guide provides step-by-step support, real-world scenarios, and actionable tips. Discover what makes a starter thrive, troubleshoot setbacks, and celebrate the milestones of living bread-making culture.
Choosing Ingredients That Spark Wild Fermentation
Get your wild sourdough starter off to a thriving start by picking flour and water that invite wild microbes to settle in. The right base sets up robust fermentation and sustained growth in your starter.
Organic, whole grain flours—like rye or whole wheat—contain more bran and natural yeast, making them the best choice when you aim to capture wild yeast from your environment. Use filtered or dechlorinated water to keep these microbes from being inhibited.
Recognizing the Best Flours for Quick Activity
Rye flour rapidly inoculates a wild sourdough starter thanks to extra minerals and nutrients, which is why it’s the top pick for day one. Whole wheat flour works well too and gives distinctly nutty aromas early on.
If you start with all-purpose flour, feeding with whole grains within the first week boosts microbial diversity. Unbleached, organic, and stone-ground flours generally promote stronger initial activity than white processed ones.
For a practical schedule: “Mix rye and whole wheat on the first two days, then feed with bread flour.” This jump-starts robust fermentation and gives flexibility as your process continues.
Using Water That Encourages Flourishing Microbes
Chlorinated tap water slows or halts wild sourdough starter fermentation, making bottled or filtered options safer choices. Letting tap water sit overnight can let chlorine dissipate; it gives your wild yeast a better shot at thriving.
Hard water can boost fermentation if it doesn’t taste metallic or soapy. High mineral content sometimes adds subtle notes to sourdough, so it’s worth experimenting with your local water after initial establishment.
If uncertain, start with spring water—many bakers report fewer starter stalls and a cleaner fermentation smell. When your starter is stable, try a batch with your regular tap or well water, observing any flavor change.
| Ingredient Type | Starter Impact | Best for Beginners? | Takeaway |
|---|---|---|---|
| Rye Flour | Rapid fermentation, strong yeast growth | Yes | Use rye for fast results in early days |
| Whole Wheat Flour | Nutty flavor, rich in nutrients | Yes | Blend with rye for deep flavor and robust microbes |
| All-Purpose Flour | Milder aroma, slower start | Somewhat | Add whole grains soon to boost wild activity |
| Filtered Water | Consistent fermentation | Yes | Removes chlorine for healthy yeast and bacteria |
| Tap Water (untreated) | Varied results | No | Let stand overnight before use, or filter |
Building Daily Habits That Encourage Consistent Growth
Following a regular feeding schedule helps your wild sourdough starter develop stability, rise reliably, and resist undesirable organisms. This section includes a checklist and actionable practices you can use today to support your starter.
Consistency signals wild microbes to multiply, crowding out spoilage organisms and leading to bubbles and a tangy aroma. Simple routines—same jar, time, and tools—anchor your process and help troubleshoot if growth lags.
Observing Behavior and Adjusting Routine
Track your starter’s bubbles, height increase, and aroma daily. A bubbly, pleasantly sour starter signals thriving yeast and bacteria, while off colors or odd smells suggest adjustments are needed. Discard half before each feed.
- Feed at the same time daily—promotes rhythm for microbes, helps you remember the process.
- Keep starter at room temperature—warmer rooms (68-75°F) speed up fermentation.
- Stir after feeding—ensures even hydration and aeration, encouraging activity.
- Use clean utensils and jars—reduces contamination risk, letting only wild sourdough starter microbes grow.
- Label with start date—helps you keep track of progress and spot patterns.
Daily documentation helps you tweak variables if your starter’s progress slows. If you miss a feeding, feed as soon as possible and return to your cycle. Healthy starters are forgiving, but consistency builds strength.
Temperature Strategies That Speed Fermentation
Maintaining your wild sourdough starter at an even temperature (ideally 70°F to 75°F) results in better rises and flavor. Colder rooms lead to sluggish growth, so choosing a warm spot is key.
- Store starter above the fridge—gentle ambient warmth promotes growth.
- Use a proofing box in winter—keeps temperature steady and fermentation predictable.
- Wrap jars in towels—slows heat loss in drafty kitchens, creating a microclimate for the wild starter.
- Move starter out of direct sunlight—protects microbes from wild temperature swings.
- Monitor with a thermometer—precise tracking lets you correlate activity with environment.
Even with temperature variation, a wild sourdough starter bounces back after a few feeds if it lags. Set a phone timer so you never miss a feeding during the first crucial days.
Interpreting Early Signs of Fermentation With Confidence
Your wild sourdough starter should start showing bubbles, a rise in height, and a sharp aroma in several days. This section guides you to read these changes so you can respond appropriately to encourage robust development.
Understanding these early signals prevents confusion between natural stages and potential problems, giving you the confidence to continue or tweak your process when results aren’t perfect yet.
Recognize Normal vs. Worrying Changes
Visible bubbles indicate wild microbial life is at work. If your starter doubles in size after a feeding, that’s a positive sign. Creamy, slightly tangy aromas are expected in the early days.
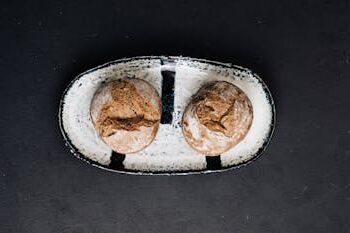
Discoloration, mold (fuzzy patches), or unpleasant rotten odors suggest the need to discard and restart using fresh flour and water. Gray liquid (hooch) on top is harmless—pour it off and continue your process.
While eager activity is good, sudden slowdowns after a burst are normal. Starters sometimes go dormant before stabilizing, so continue regular feeds and monitor for consistent bubbling and pleasant smells.
Example Troubleshooting Scenarios for New Bakers
If your wild sourdough starter smells like cheese or dirty socks, wait for one more feed. If it persists, switch to a fresh jar and resume feedings with only whole grain flour for two days.
For sluggish bubbling: ensure your water isn’t chlorinated and your kitchen is warm enough. If your starter hasn’t risen after four days, mix in a teaspoon of rye and check location temperature.
If your starter has pink or orange tints, that’s a sign it’s been contaminated—discard and start over with freshly sanitized tools and filtered water for optimal results.
Feeding Practices That Shape Starter Flavor and Strength
A well-planned feeding strategy gives you control over the rhythm, flavor, and vigor of your wild sourdough starter. Your feeding ratio, schedule, and flour choices tailor both taste and rising power.
The most active and flavorful starters result from adjusting feed ratios and experimenting based on sensory observations each day. Adapting habits quickly sharpens your starter’s performance.
Effect of Feeding Ratios on Fermentation
Feeding with more water creates a thinner, more sour starter. More flour makes it thicker and milder, supporting longer fermentation before each feeding.
Standard home bakers start with a 1:1:1 ratio—equal parts starter, water, and flour by weight. Others use 1:2:2 or 1:3:3 ratios for stronger, sweeter flavors as the starter matures.
Try this accessible phrase: “Double the flour and water if your starter sours too fast, or increase feeds to add tanginess.” Adjusting day-by-day yields reliable, custom results.
Tracking Feeding Rhythm and Sensory Changes
Observing how quickly your wild sourdough starter bubbles, rises, and deflates shows its feeding schedule needs. If it rises and falls within 4–6 hours, increase flour to slow down the process slightly and deepen flavor.
If your starter seems sluggish or develops hooch regularly, it may be underfed. Add a feeding or slightly increase the flour and water. Keeping a basic log—recording time, volume, smell—can clarify what tweaks are needed.
Bakers who note when their starter peaks (when it domes and before collapse) can schedule feeds for just before or after this moment, leading to more predictable bread outcomes.
Troubleshooting Sluggish or Stalled Starters With Actionable Steps
When your wild sourdough starter seems stuck, you can revive its vigor with proven steps that target common obstacles. Here, learn how to diagnose and intervene for quick recoveries.
Timing, temperature, and ingredient quality influence every stage of the starter’s health. Intervening early prevents extended downtime and keeps you on track for baking day.
Quick Turnaround for Weak Fermentation
Warm the starter spot by 5–7 degrees, feed with whole rye flour, and briefly increase feeding to twice daily for two or three days. Pick a new, clean jar—sometimes a contaminated vessel stalls growth.
If there’s a persistent crust on top, scrape it off before feeding. Repeat with fresh flour and water to help wild yeast rebound quickly. This approach fixes issues from cold kitchens or depleted nutrition.
After five consistent days, if there’s still no bubble activity, seek out a new bag of flour or switch brands to ensure your ingredients are fresh and active for fermentation.
Scenario: Wild Sourdough Starter With Faint Smell but No Bubbles
Keep feeding and use a rubber band on your jar to track daily height. A faint aroma without visible bubble growth suggests wild yeast just needs more time or warmth.
Gently stir your starter after every feeding to encourage aeration, supporting more uniform microbial development. Watch for small surface bubbles even if the rise is modest—the process often starts slowly.
If you see even the slightest rise by day five, continue for two days before making further changes. Most wild sourdough starters reward patience and observation above all.
Celebrating Your Wild Sourdough Starter’s Milestones and Next Steps
By tracking your starter’s bubbles, aroma, and rise, you can congratulate yourself on building a lively wild sourdough starter ready for bread-making. Each batch becomes a chapter in your baking journey.
With your starter stable and active, baking test loaves lets you taste the results of your unique wild fermentation process. Record each loaf’s crust, crumb, and tang to showcase your wild sourdough starter’s evolution.
As you continue to develop your starter, explore feeding schedules, flour swaps, and temperature tweaks—all to fine-tune flavor and performance. Every adjustment is a chance to personalize your sourdough for your kitchen and tastes.
Consider sharing jar splits with friends or neighbors, spreading your wild sourdough starter’s lineage. Encourage others to record feeding notes and flavor impressions to build a collaborative baking community.
Your wild sourdough starter, once established, can last years with care—becoming a family heirloom and a reliable source of delicious, naturally leavened bread.
Frequently Asked Questions
How long does it take for a wild sourdough starter to become active?
Most starters show bubbles and rise within 5 to 7 days if fed regularly with whole grain flour and kept at room temperature. Variables like water quality and temperature can impact timing, so some may take a few extra days to stabilize fully.
What causes gray liquid (hooch) on my starter?
Hooch forms when a starter is hungry or underfed, leading to separation. It’s harmless, though you should pour it off and resume regular feedings. Better hydration and more frequent feeding often resolve this issue quickly.
Can I switch flours after my starter is healthy?
Yes. Once your wild sourdough starter is active and doubling routinely, feel free to feed it with all-purpose, bread, or other flours. Keep an eye on rise and aroma as the microbial balance adjusts, and switch back if activity drops.
Why does my starter smell bad after the first few days?
Early days of fermentation can create strong or cheesy odors as bacteria and yeast establish balance. These off smells often disappear after a few feeds with fresh flour and water. Persistent, unpleasant odors or visible mold means you should start over.
Is it okay to skip a day of feeding my new starter?
If you forget a feeding, resume as soon as possible—the wild sourdough starter is resilient in its early stages. Consistency builds strength, but a single missed feeding rarely ruins a starter. Multiple missed days can lead to spoilage, so set reminders when possible.