Leaving your wild sourdough starter behind as you set out for a long vacation can tug at your baker’s heartstrings. Balancing your travel dreams with proper starter maintenance presents a real challenge. Many bakers find themselves worrying: Will my sourdough starter survive my time away?
Wild fermentation isn’t just a hobby; caring for a thriving starter strengthens your baking routine and kitchen confidence. Starter maintenance is the backbone of healthy, flavorful bread. Neglect can undo weeks or months of patient cultivation and unique flavor development.
This article explores actionable steps and proven methods to simplify starter maintenance when you won’t be home. By reading on, you’ll find practical checklists, specific scenarios, and expert techniques to return to bubbles and tang instead of disappointment.
Planning a Reliable Maintenance System Before Departure
A customized pre-vacation routine guarantees your wild sourdough starter will bounce back when you return. Preparation now means peace of mind later. Investing in solid starter maintenance makes long absences less risky, so every homecoming is a fresh-baked success.
Figure out how much time you’ll be away, then match your starter’s care with storage and feeding methods that fit your timeline and fridge space. Starter maintenance strategies vary if your break lasts one week versus one month.
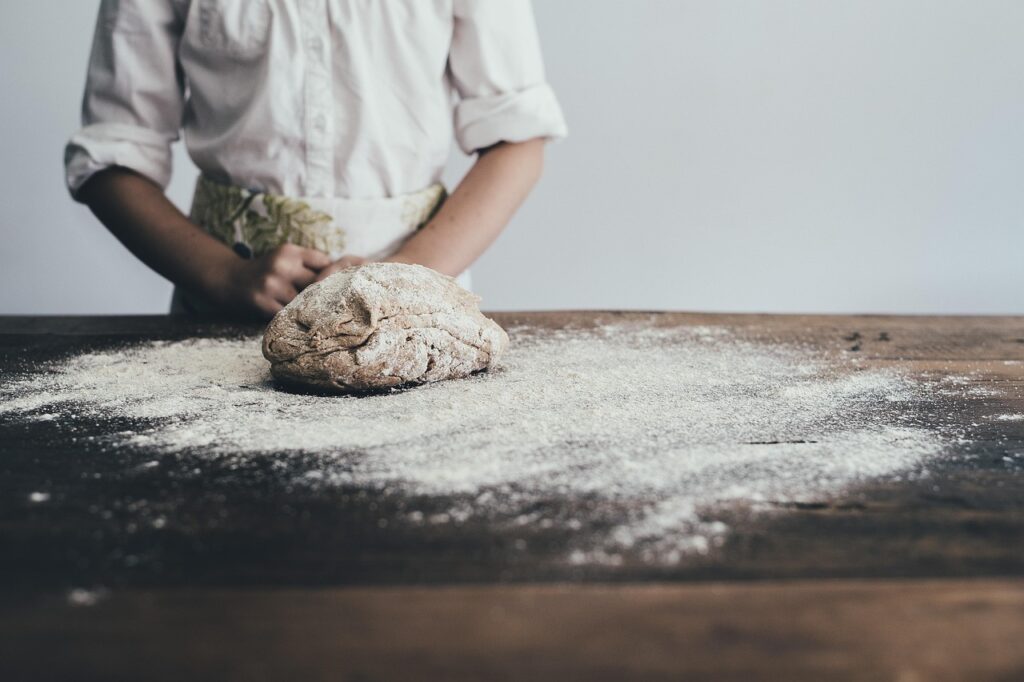
Setting the Stage: Assess Your Starter’s Health
Healthy wild sourdough starters rise within four to six hours of feeding and show a web of bubbles throughout. Sluggish or separated starters signal a need for extra feeding before storage.
If your starter emits sharp acetone or solvent scents, refresh it with two or three feedings on consecutive days. Active, strong starters withstand longer dormancy and adapt to post-vacation routines easily.
Document your starter’s feeding ratio and schedule so you can recreate or tweak the same maintenance steps upon your return. Consistency in wild fermentation leads to predictable quality loaves.
Choosing Long-Term Storage: Fridge, Freezer, or Dried?
For trips under ten days, a thick starter can rest in the fridge with a single, generous feeding beforehand. Starter maintenance here means feeding, waiting one hour, then sealing tightly before chilling.
For absences beyond two weeks, freezing is safest. Spread a tablespoon of starter thinly on parchment, freeze, then transfer shards to an airtight bag. This preserves wild microbes after months apart.
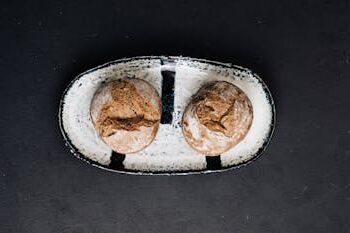
For indefinite storage, opt to dry your starter. Smear starter thin on parchment, let it completely air-dry, break into flakes and keep in a sealed jar. Reliable rehydration instructions ensure a quick recovery.
| Method | Duration | Ease of Revival | Best For |
|---|---|---|---|
| Fridge Storage | 7-14 days | Very Easy | Short Vacations |
| Freezing | 1-3 months | Easy | Extended Absence |
| Drying | Several months | Moderate | Unknown Return |
| Delegate Feeding | Any | Easy (if trained) | Trusted Person Available |
| Backup at Friend’s | Any | Easy | Extra Security |
Delegating Starter Maintenance to a Friend or Neighbor
Trusting another person with your wild sourdough starter requires both clarity and confidence. Detailed starter maintenance instructions prevent accidental neglect and encourage accurate, timely feedings in your absence.
List step-by-step care directions, feeding ratios, and visual cues of healthy starter activity. Use accessible language, and tailor schedules to your helper’s comfort level to maximize starter survival success.
Demystifying the Feeding Process for Novices
If your helper hasn’t seen a bubbly starter, leave a labeled sample and a written ‘normal’ description. Introduce them to classic cues—sour-fruity smell, domed surface, and webs of bubbles after feeding.
- Start with a simple ratio: Mix one part starter, one part flour, one part water to keep things uncomplicated and foolproof.
- Explain the importance of discarding excess starter before feeding; let your helper know exactly how much to remove.
- Plan for missed feedings: Clarify what to do if they forget a day—generous feeding next time, and reassurance that the starter is resilient.
- Give a troubleshooting tip: If the starter smells off or shows liquid on top, suggest scooping some away and giving it an extra feed.
- Offer ‘call or text me’ permission for real-time help or photos if your helper gets nervous about a weird smell or slow rise.
Creating a low-pressure environment for your helper frees you to travel without the shadow of worry. Printed, fridge-ready guidelines make all the difference.
Equipping Your Helper for Unexpected Scenarios
Proper starter maintenance means planning for issues: spilled jars, missed feedings, or dropped containers. Outline quick fixes and backup plans in your caretaking guide, so your sourdough isn’t doomed by a hiccup.
- Advise on jar cleaning: Always use clean spoons and clean jars to prevent accidental mold.
- State that small hiccups—like skipped feedings or thin layers of hooch—are fixable upon your return with extra feedings.
- Encourage patience: A slow-rising starter usually bounces back after one to two feedings once the baker is home.
- Give guidance for mold: Instruct your helper to stop using the starter if colored spots or fuzzy growth appear and freeze a sample instead.
- Reiterate wild sourdough starter resilience by sharing a specific story: “Once, my starter missed feedings for eight days, but two diligent refreshes brought it back.”
Thoughtful preparation and gentle reassurance empower your friend, ensuring both baker and starter survive the vacation with a smile.
Cultivating a Backup Plan for Starter Longevity
Having more than one safety net adds another layer of reliability to your starter maintenance system. These techniques ensure your wild sourdough starter endures misadventure or caretaking mishaps while you’re on the road.
Storing a dried or frozen backup gives you peace of mind even if your fridge starter spoils or your helper forgets a step. Give yourself multiple routes to revival—belt and suspenders, sourdough style.
Stashing Away and Reviving a Whisky Jar Sample
Long-term travelers favor storing a tablespoon of thick starter in a small, well-sealed jar (such as a clean jam jar) filled nearly to the top. Refrigerate tightly closed and labeled with the date.
Upon return, revive it by scraping a small portion into a fresh bowl, feeding with equal parts flour and water, and waiting for the first signs of bubbles. Repeat this refresh twice a day until normal rise and aroma return.
This backup offers the flavor tradition of your original culture with minimal risk of outside contamination or total loss if catastrophe strikes your main batch.
Sharing Dried Flakes with a Sourdough Buddy
Nurture your wild sourdough community by mailing a sample of dried starter flakes to a trusted fellow baker before leaving town. This way, you have a friendly insurance policy and spread the sourdough love at the same time.
When you’re home, ask your friend to rehydrate a few flakes with room temperature water for several hours. Then feed them with flour at your usual ratio, repeating daily until bubbly activity resumes.
If your main starter fails, this method reestablishes your unique wild culture and lets you reconnect with your baking circle for mutual encouragement.
Making the Most of Minimal Feeding Intervals
Spacing out feedings lets your wild sourdough starter withstand absences of up to three weeks with proper starter maintenance. Lower feeding frequency slow fermentation, keeping cultures stable even when your kitchen sits silent.
Feeding just once a week with a higher ratio of flour and less water, and chilling immediately, lets wild yeast and bacteria go semi-dormant while staying viable. This approach is popular with busy household bakers.
Adjusting Hydration for Extended Storage
Switch your starter to stiff consistency before you leave: instead of a pourable batter, aim for doughy and spoonable. The drier starter slows fermentation, prolonging viability without daily oversight.
For stiff starters, try a 1:3:3 ratio (starter:flour:water by weight), resulting in a thick paste that rises slowly but steadily. This is especially handy for vacations of ten days or more.
Label the jar with the feeding date, so you can easily verify the time elapsed upon your return. Clear labels make maintenance a breeze and boost kitchen organization confidence.
Resetting with Double Feedings After Returning
When you get home, give your starter double feedings for the first two days: morning and night. Discard half each time, then feed at your normal ratio to jump-start fermentation.
Watch closely for the return of lively bubbles, tangy aroma, and robust rise within six hours of each feeding. These sensory cues confirm your starter survived its rest period and is ready for action.
If progress stalls, extend double feedings until bubbles and aroma reappear, then transition back to your usual maintenance routine. Persistence is key—starters reward attention and patience.
Recognizing and Remedying Common Post-Vacation Problems
Even with robust starter maintenance practices, reentry after travel might reveal sluggish fermentation or unfamiliar smells. Knowing what recovery steps to take sets expert fermenters apart from frustrated home bakers.
A wild sourdough starter that appears separated or emits a sharp odor can usually recover with repeated feedings at room temperature and diligent discarding of off-smelling top layers.
Avoiding Hasty Judgments: When to Feed and When to Toss
Surface liquid, known as hooch, usually isn’t a sign of starter death—just dehydration from infrequent feedings. Pour it off before your first post-vacation feed to restore balance.
Only toss your starter if you see colored mold (red, green, black, or orange patches) or unmistakable spoilage odors like rot or ammonia. Faint vinegary or nail polish smells can be remedied with continuous refreshments.
Dramatic analogies help stick: Think of starter maintenance like plant care—brown leaves need pruning, not throwing out the pot. Feed first, judge later.
Getting Back to Baking: Timing Your First Loaf
A revived starter can return to bread readiness after two or three consecutive strong rises, provided it smells tangy and looks bubbly. Patience with wild fermentation pays off in complex, delicious flavors.
If your dough rises but tastes flat, try one more feeding cycle—yeast and bacteria populations need a little more time to rebound. Monitor rise times closely, and don’t rush into larger bakes until activity stabilizes.
Your unique starter maintenance routine becomes more resilient each season, translating to tastier and more reliable home-baked loaves, no matter your travel schedule.
Maintaining Optimal Flavor and Performance After Extended Absence
Careful starter maintenance ensures your starter not only survives time away but also returns with robust flavor and rising power. Know what steps to take to restore tang and leavening so your next loaf shines.
Returning from vacation, feed your wild sourdough starter with flour and water at your usual ratio and closely monitor its texture and aroma. Expectations must be flexible: wild fermentation rewards observation over rigidity.
Fine-Tuning Acidity and Texture With Starter Discard
Instead of keeping all your starter post-trip, discard all but a tablespoon to reduce acidity build-up. Too much acid slows wild yeast activity and steers your starter toward excessive sourness.
If your starter has become overly tangy or thin, refresh several times using unbleached all-purpose or bread flour for mildness and renewed elasticity. Wild fermentation always offers room for course-correction with careful attention to starter maintenance.
Notice whether your starter doubles in volume. Consistent rise after feeds signals the recovery of both yeast and lactic acid bacteria populations for reliable baking performance.
Experimenting Safely With Fresh Add-Ins
Once your starter’s back in full swing, consider introducing small amounts of whole grain or rye flour for extra nutrition and flavor complexity. Dip into your pantry and experiment with local grains that spark your curiosity.
Try splitting your revived starter into two jars—one fed exclusively with white flour and the other with 20% rye. Observe and note flavor shifts, rise patterns, and overall resilience to keep learning from your own sourdough journey.
With every vacation cycle, your wild sourdough starter grows more robust and distinct, reflecting both your care and the uniqueness of your process.
Frequently Asked Questions
What’s the safest way to store a wild sourdough starter for more than two weeks?
Drying a thick layer of starter on parchment creates shelf-stable flakes that can be rehydrated even after months. Fridge or freezer storage is easier for up to a month, but always keep a dried backup for peace of mind.
Can I skip feeding my starter entirely if I’ll only be gone three days?
For trips under five days, a generous pre-trip feeding and fridge storage are usually sufficient. Label the jar and feed as soon as you return to resume wild fermentation vitality.
How do I know if my starter died during vacation?
A truly dead starter emits rotten, putrid, or moldy odors and may develop colored spots or fuzz. If your starter simply smells sharp or alcoholic, try reviving it with two or three daily feeds before discarding.
Will my starter’s flavor change if I miss multiple feedings?
The balance of wild yeast and bacteria may shift, leading to extra-sour or sluggish behavior. Several consecutive refreshments upon return typically restore the original tangy flavor and strong rising power unique to your wild sourdough starter.
Should I ask a friend to feed or just dry the starter before leaving?
If you have a trustworthy friend, detailed instructions let you keep your routine going. If not, dried or frozen backups offer reliable starter maintenance without relying on outside help, especially for unpredictable or extended travels.